I have been testing out a ton of different ideas for how to articulate the glass facade for the Desert Trench House project. From those studies, I developed a spread that shows some of the iterations that were generated. As I was putting this illustration together, I thought it might be helpful to break down how I typically organize my diagram files. I use a lot of smart objects to control size, sharpness, and ability to edit as I move stuff around on the page and try to figure out the composition. As you will see below, there are two Photoshop files being used to manage the individual elements as well as the overall layout. I wrote a post about smart objects a few months back that goes into more depth about the advantages of using smart objects in Photoshop which can be seen HERE.
1. Setup Base Photoshop File: Individual Options
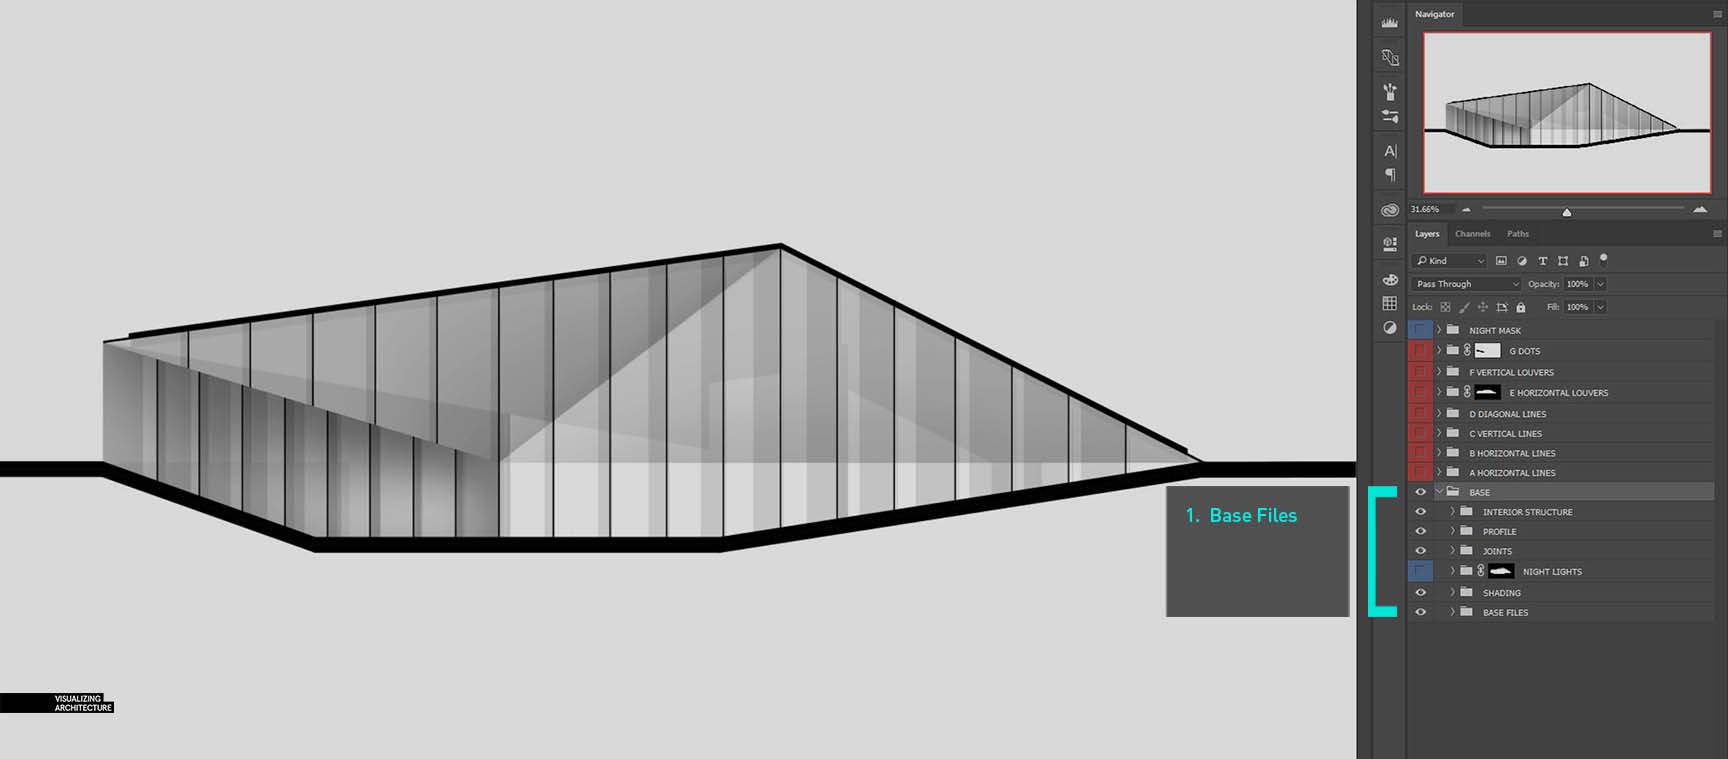
1.A – Getting started, I setup a Photoshop file that would house the different facade options. The “BASE” folder contained the base images that I would overlay the different facade options onto. For this illustration, I used an exported Sketchup image with some thickened ground lines and profile lines.
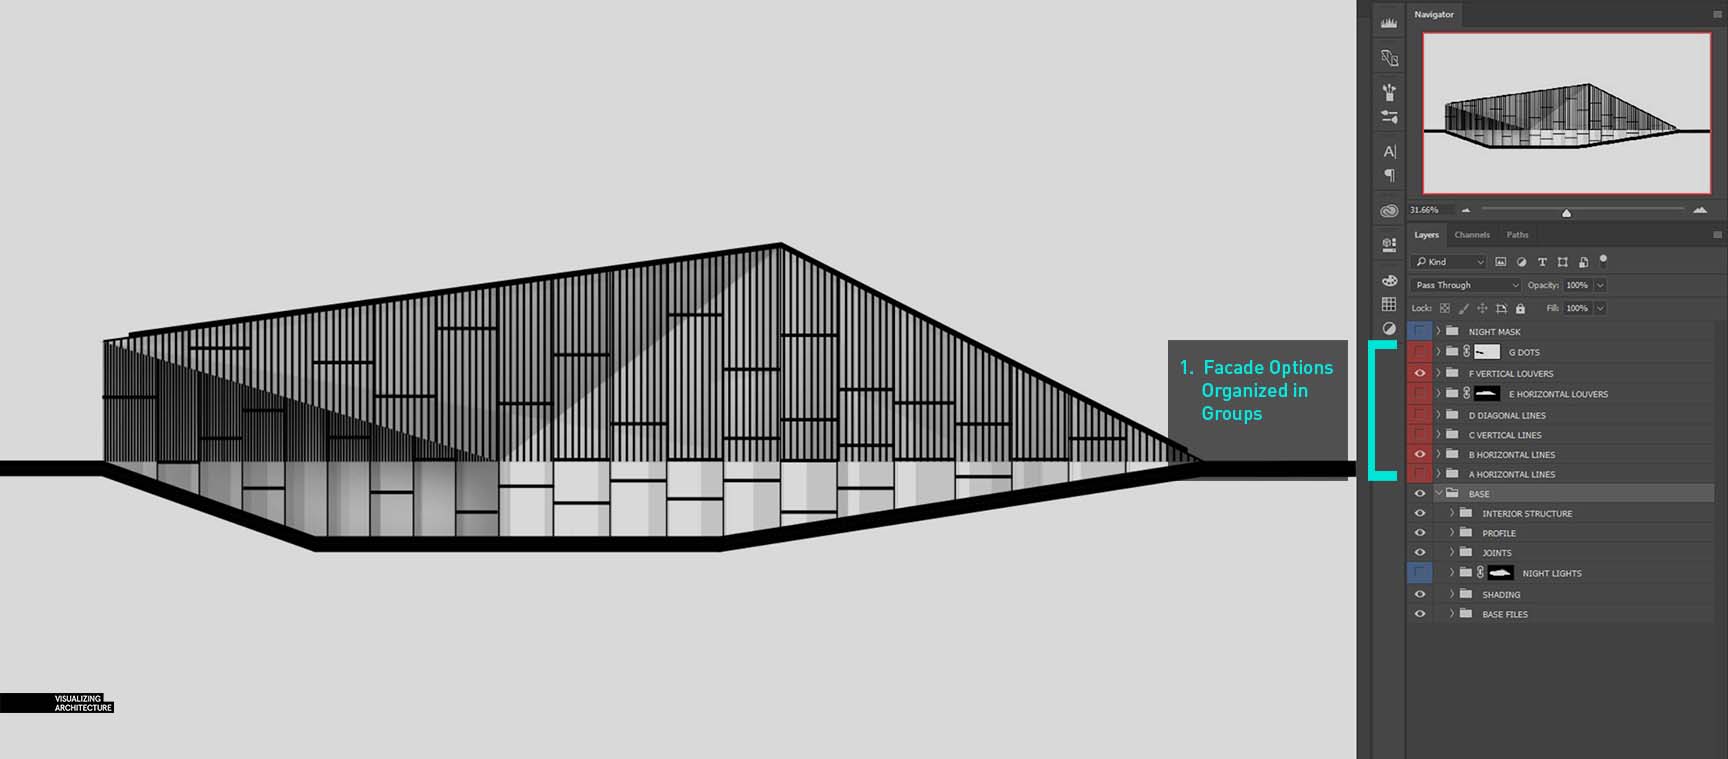
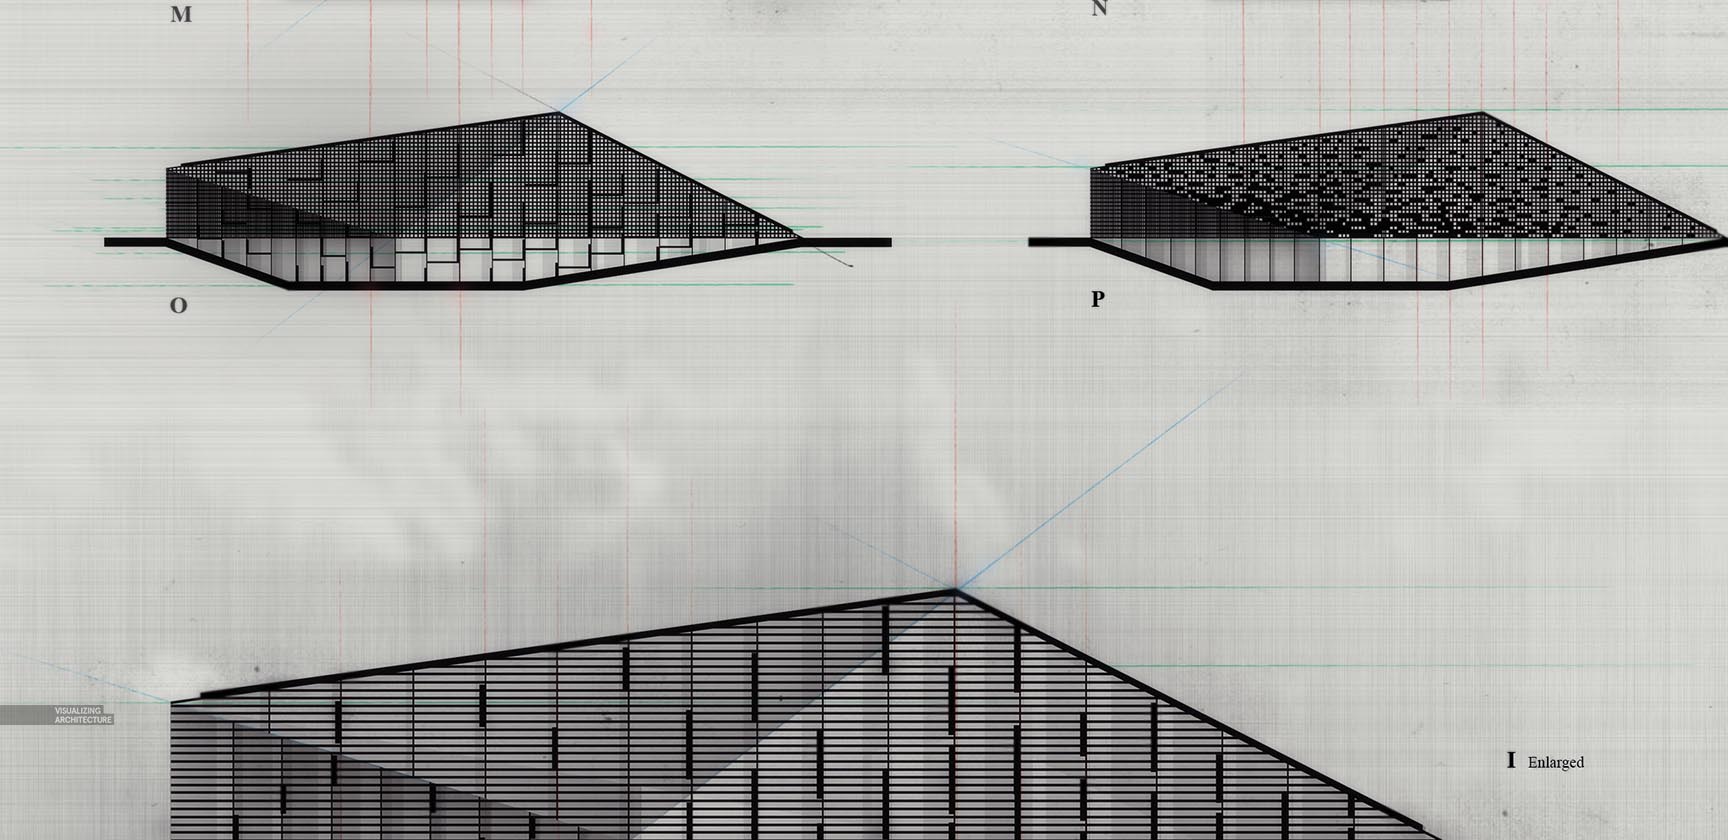
1.B – From there, I started testing out some different facade options. Each move was saved within a group so that I could easily toggle on and off different options quickly and start to play around with different combinations.
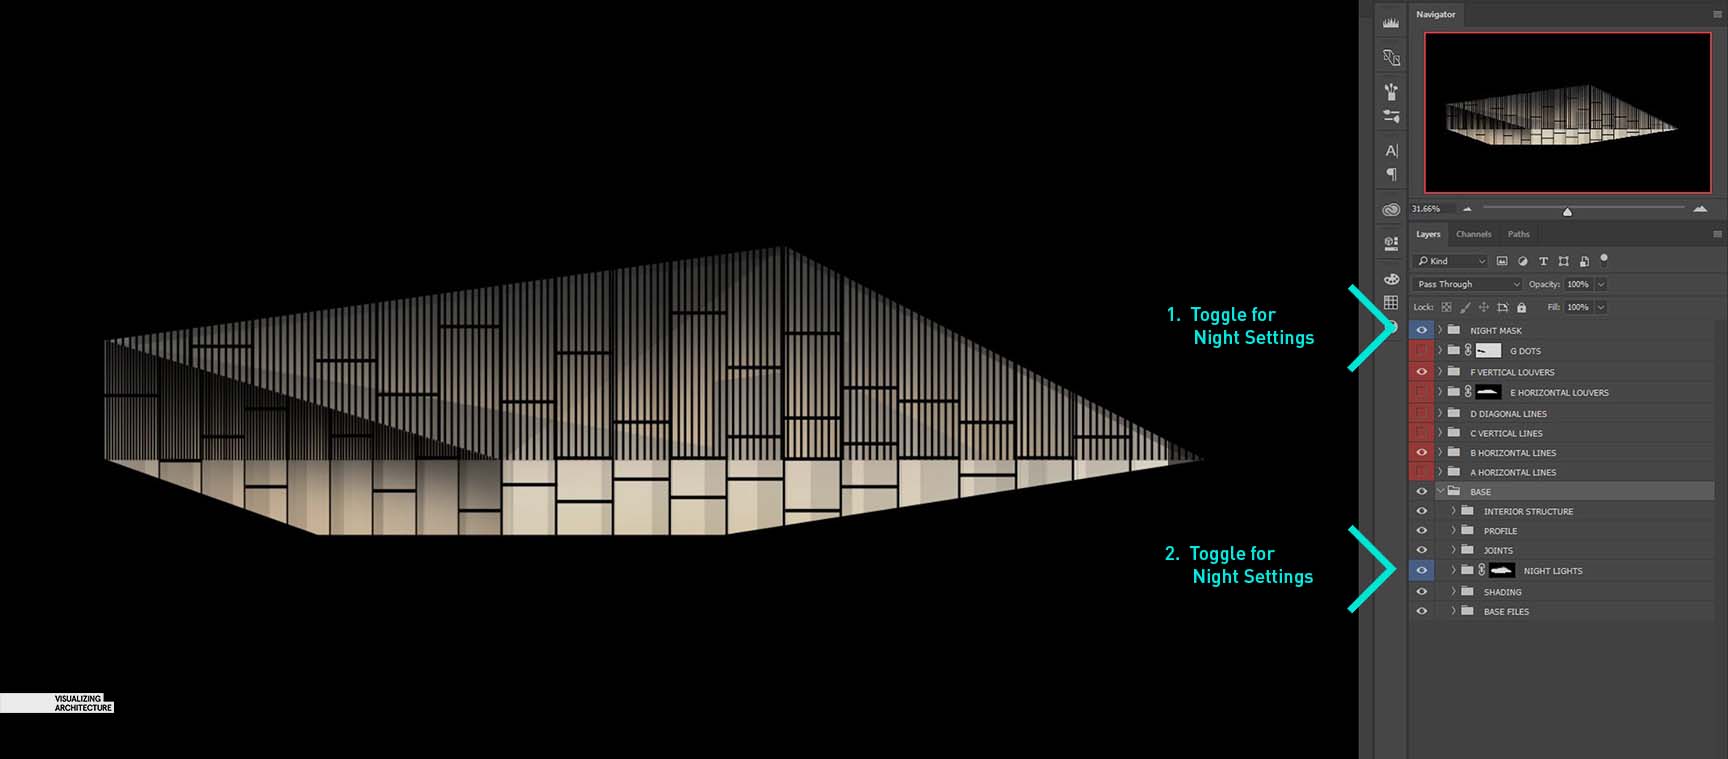
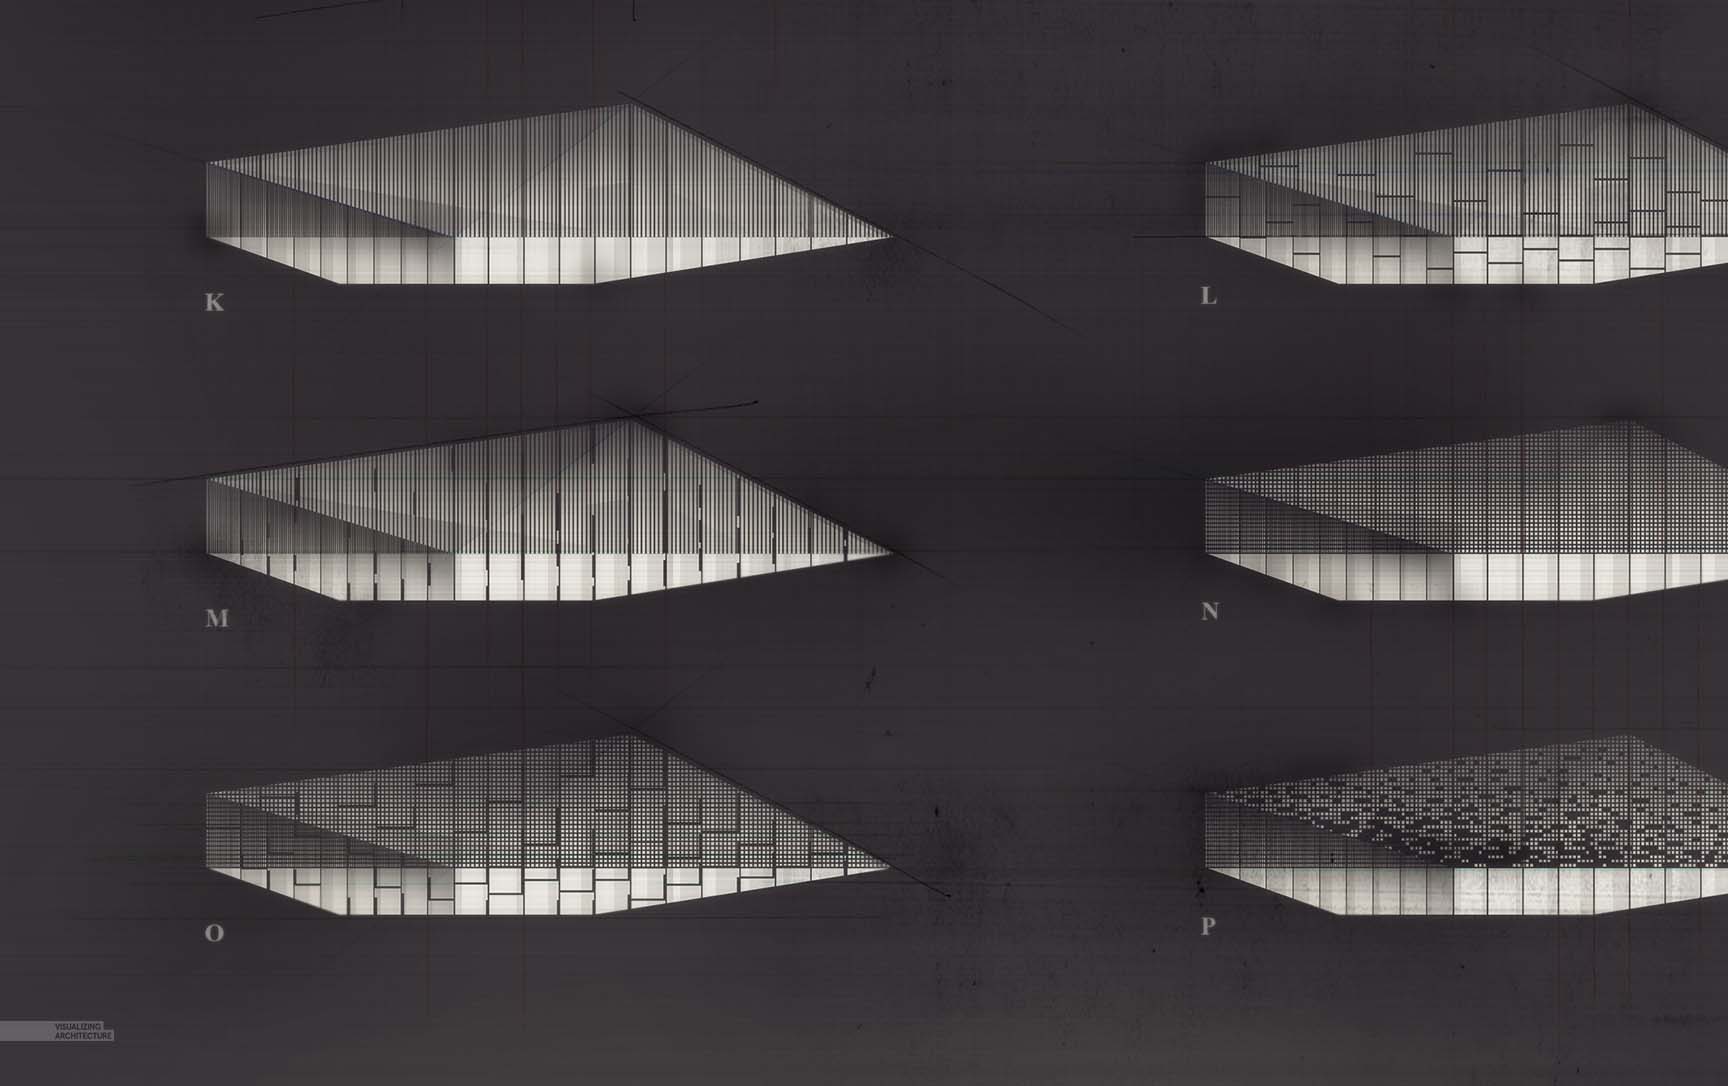
1.C – Two other groups were created that would turn the image into a night scene when toggled on. This would allow me to view each option in both a daytime and nighttime setting to study how the reading of the facade systems change.
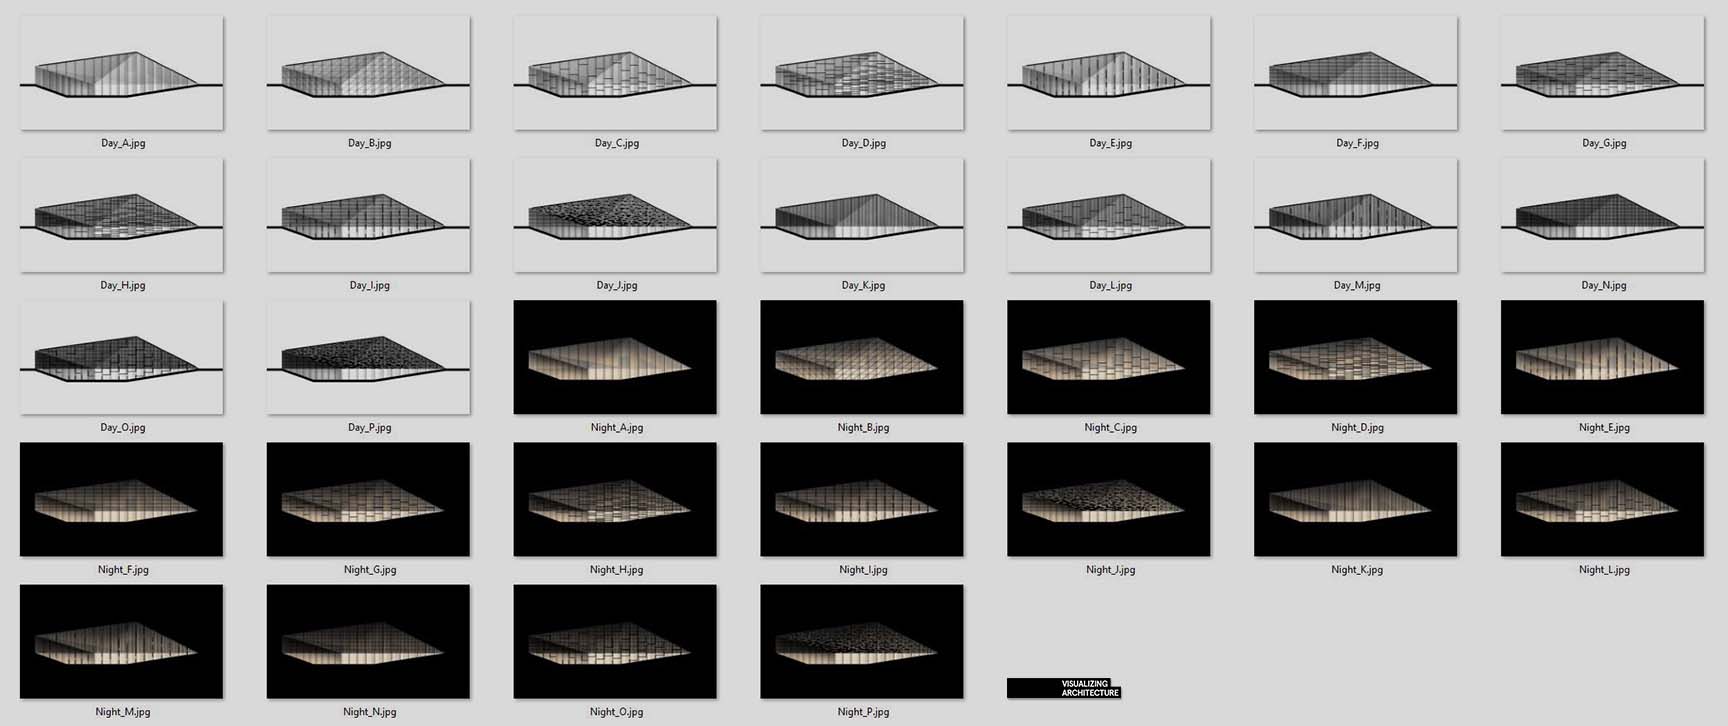
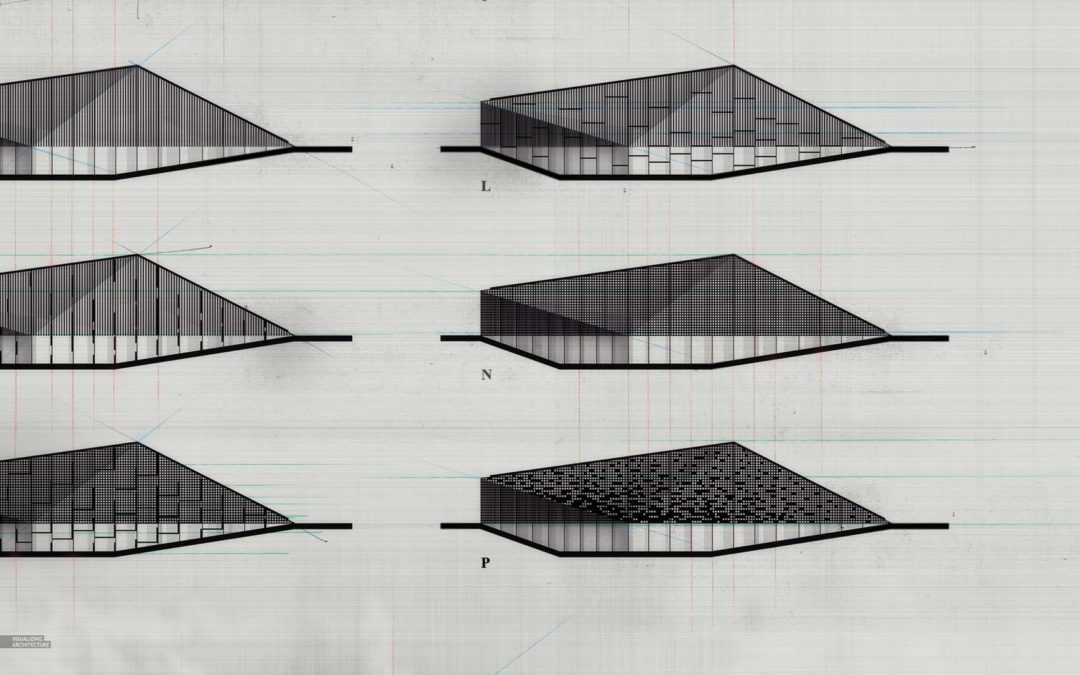
1.D – Finally, when I finished experimenting, each option and combination was exported as a jpeg in both day and night versions.
2. Setup Master Photoshop File: Layout and Textures
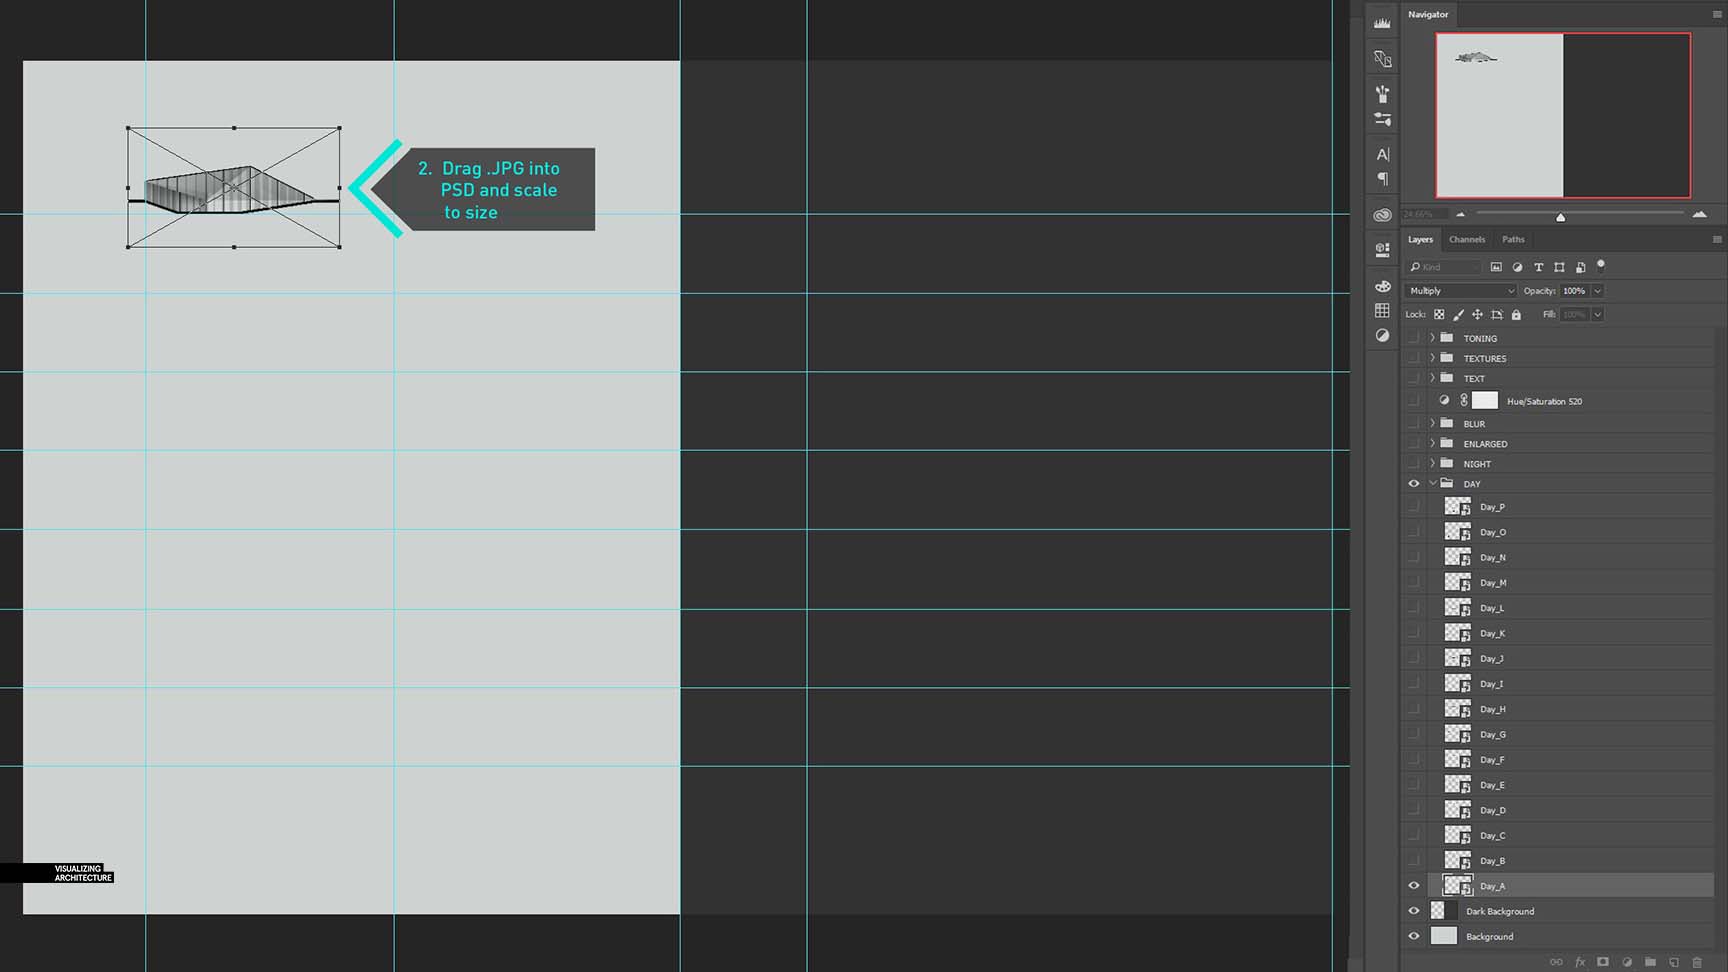
2.A – Next, a new Photoshop file was created that would serve as the “Master” Photoshop file and was setup based on the size and resolution I needed for printing. I began by dragging the first facade option jpeg into the new Photoshop file. When the jpeg is dragged in, you will see a bounding box around it letting you know that it came in as a smart object. From there, I scaled it to the size that I wanted and then hit the check mark at the top to finalize the move.

2.B – It is important to keep all of the options exactly the same size. Instead of dragging in each option and scaling the best I can to match the other options, I am going to use a different method. I right-clicked on the first option layer and chose “New Smart Object via Copy”. This creates a unique copy of the smart object.
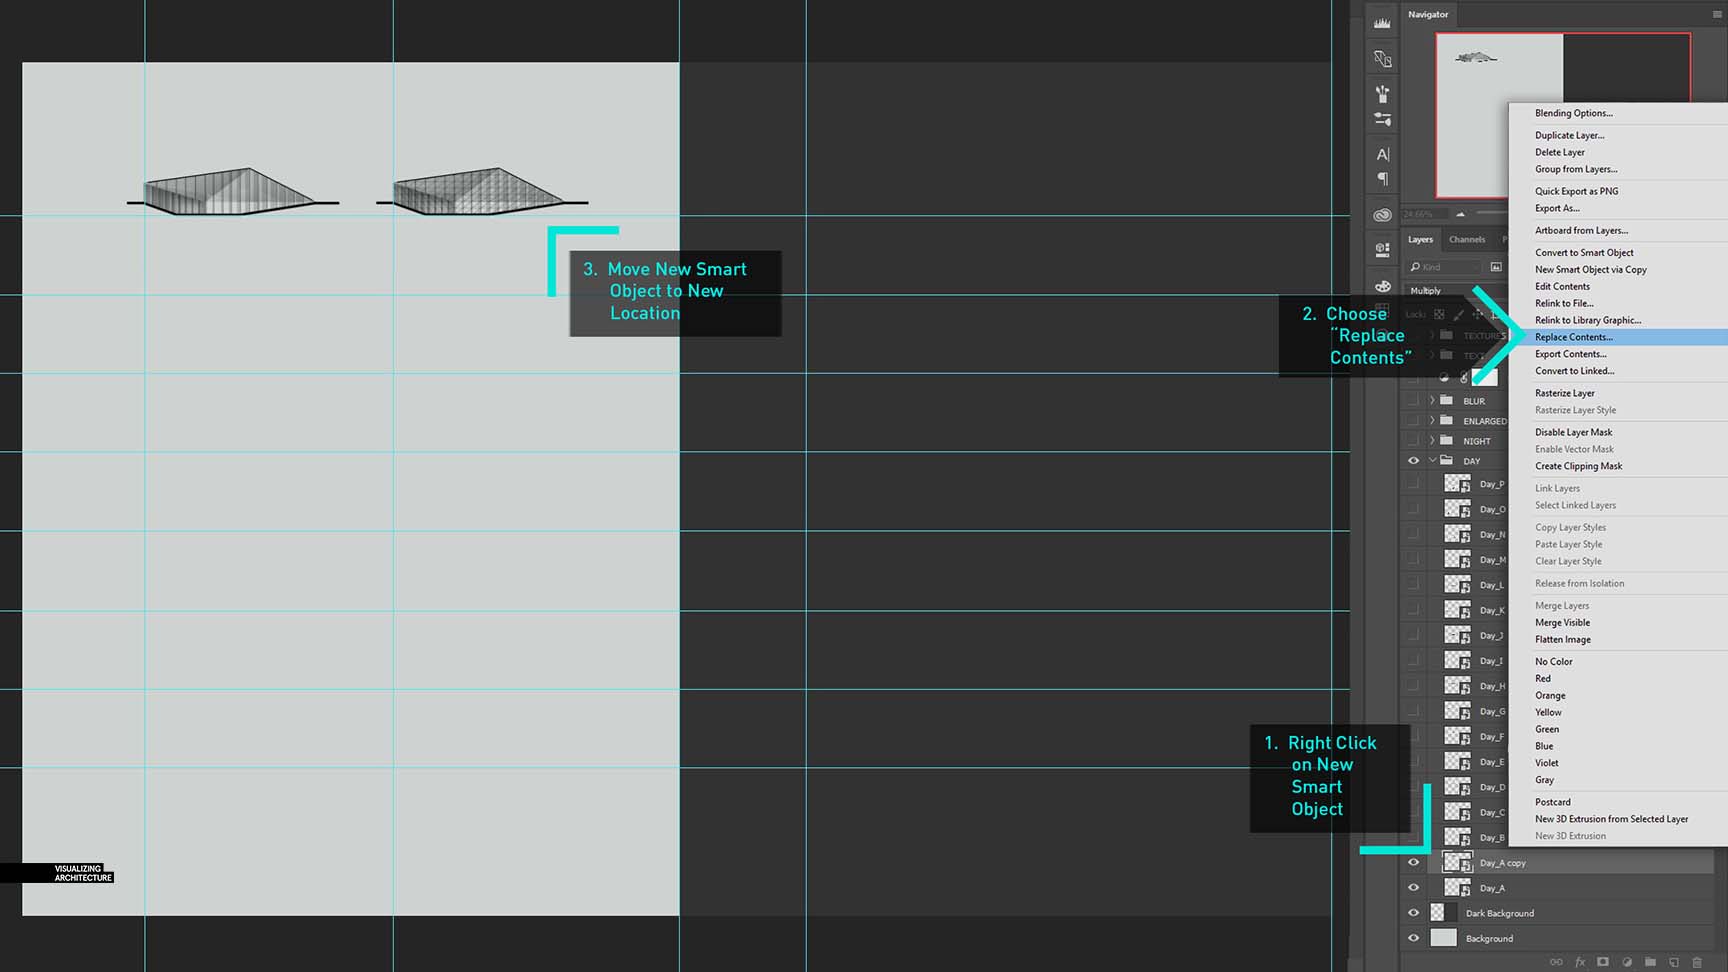
2.C – Next, I right-click on the new copied smart object layer and choose “Replace Content”. In the dialogue box that appears, browse to a new facade jpeg option and choose “Replace”. The old option was replaced with the new option while maintaining the exact same size. I repeat these steps until all of the options have been placed on the canvas.
3. Apply Textures
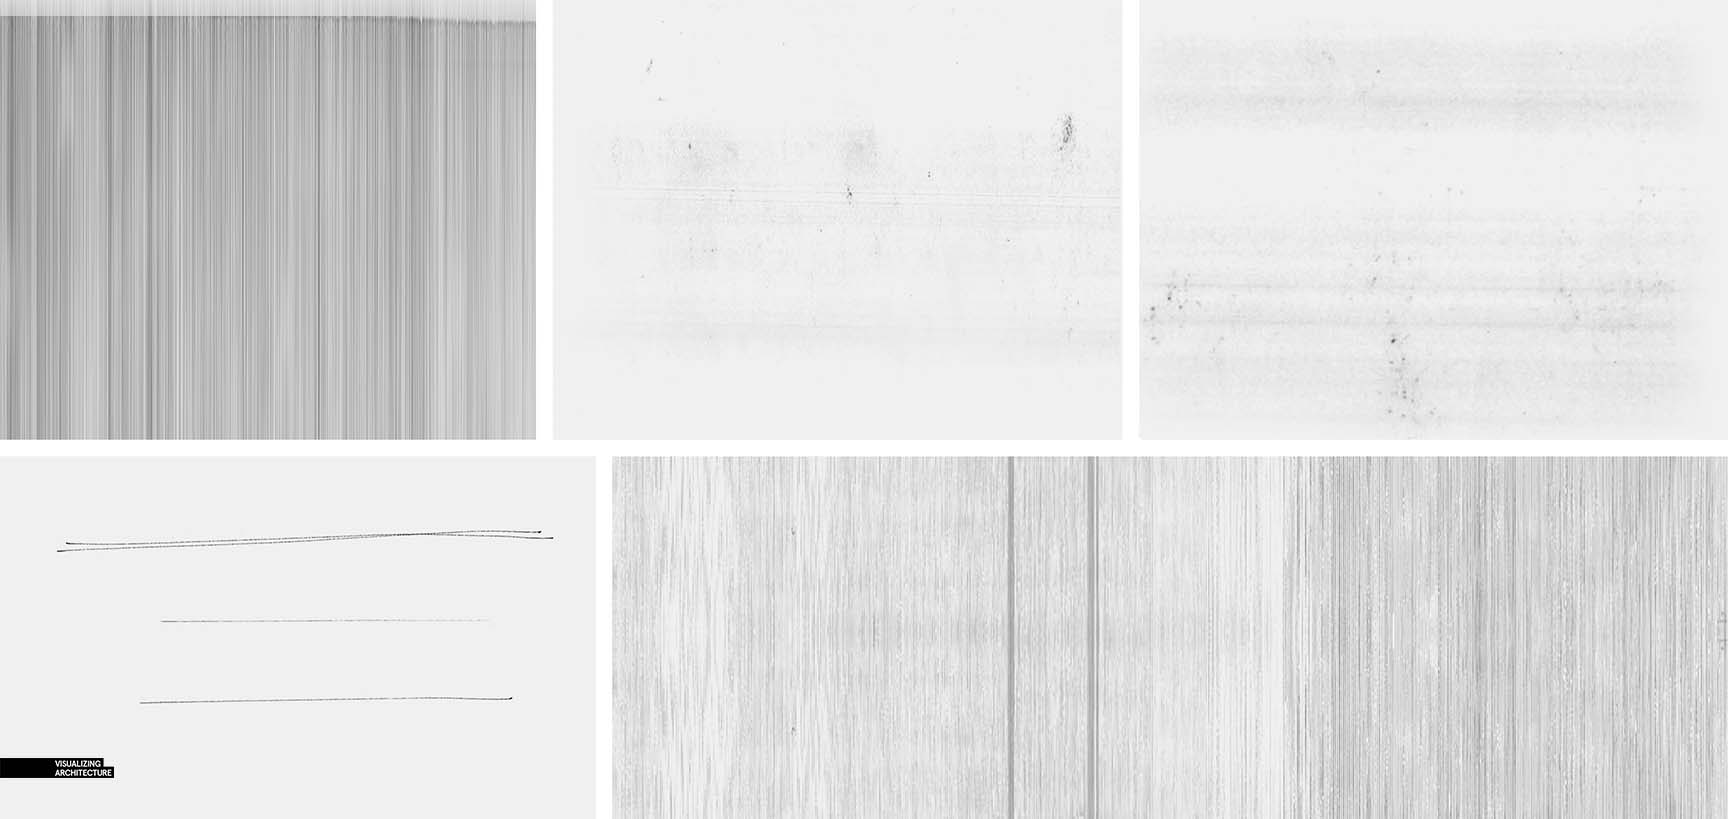
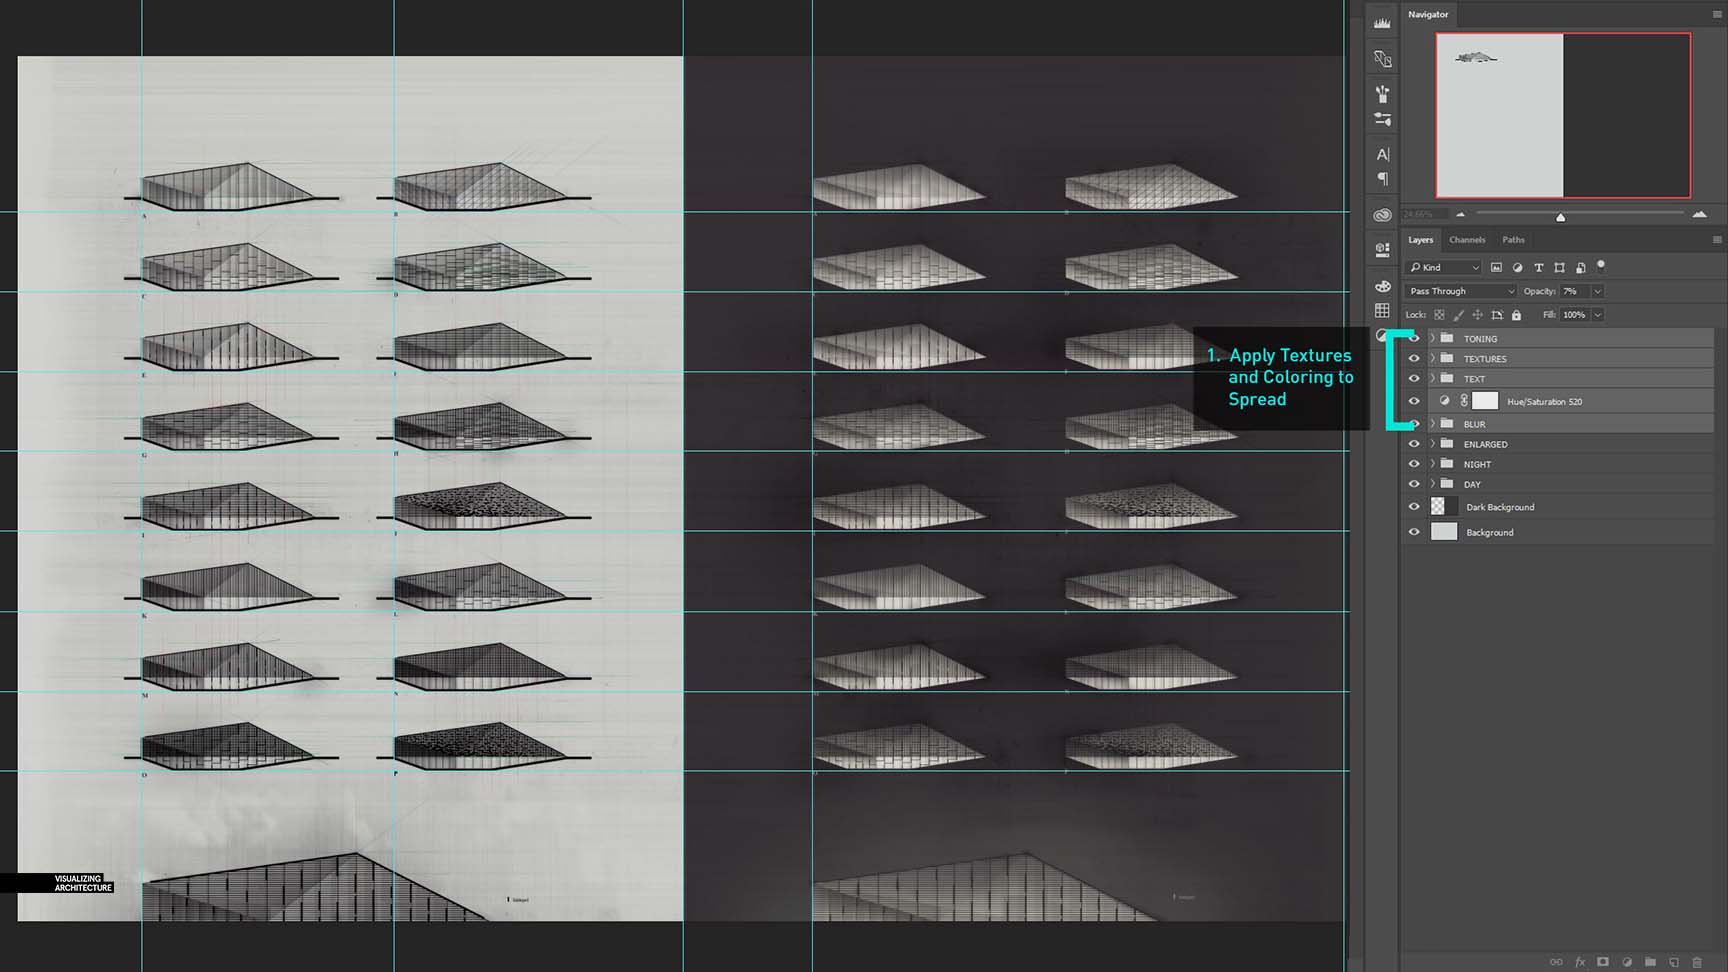
They reason why I didn’t use a program like InDesign to layout the different options is because I like to paint and add texture quite a bit over the entire spread at the end of the process. For this diagram, I compiled a few sketchy textures and began overlaying them on top. I also painted in smudges and roughed up some of the line work. I used some of the methods described in this really old post about creating the “Sketchy Look”.
Final Images
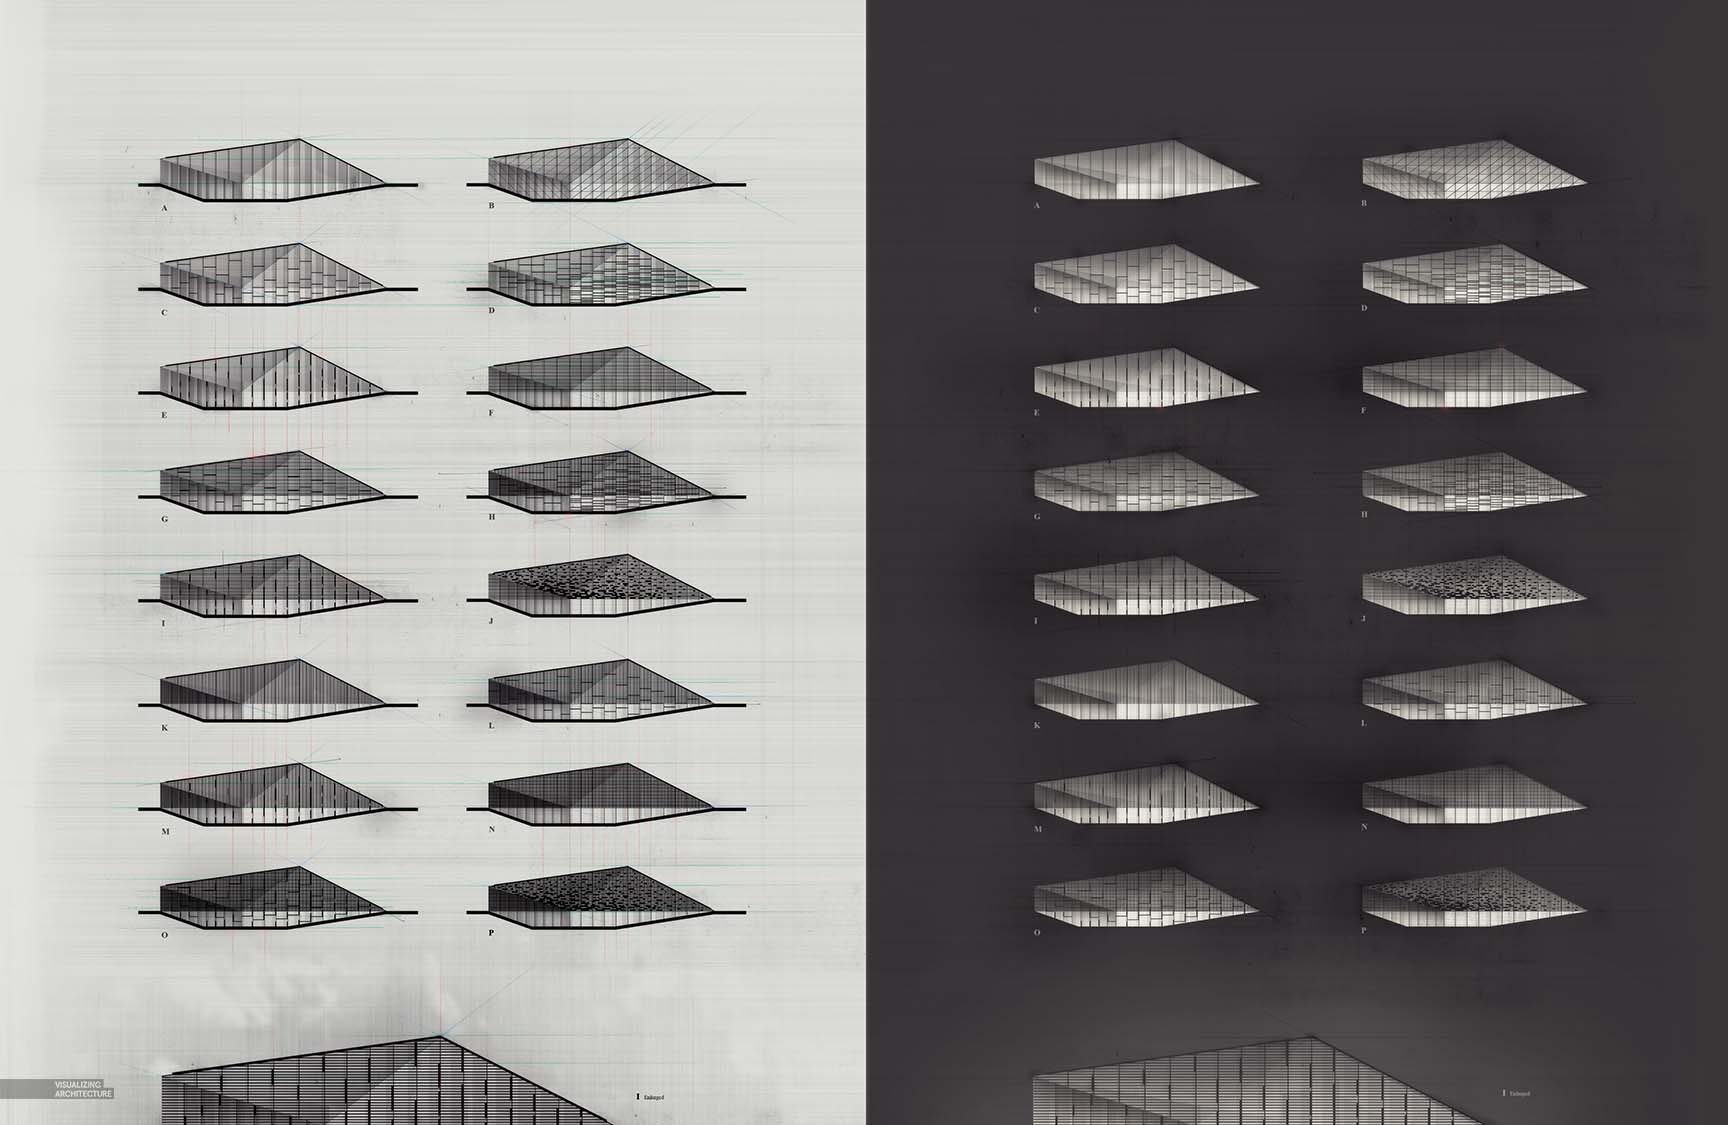
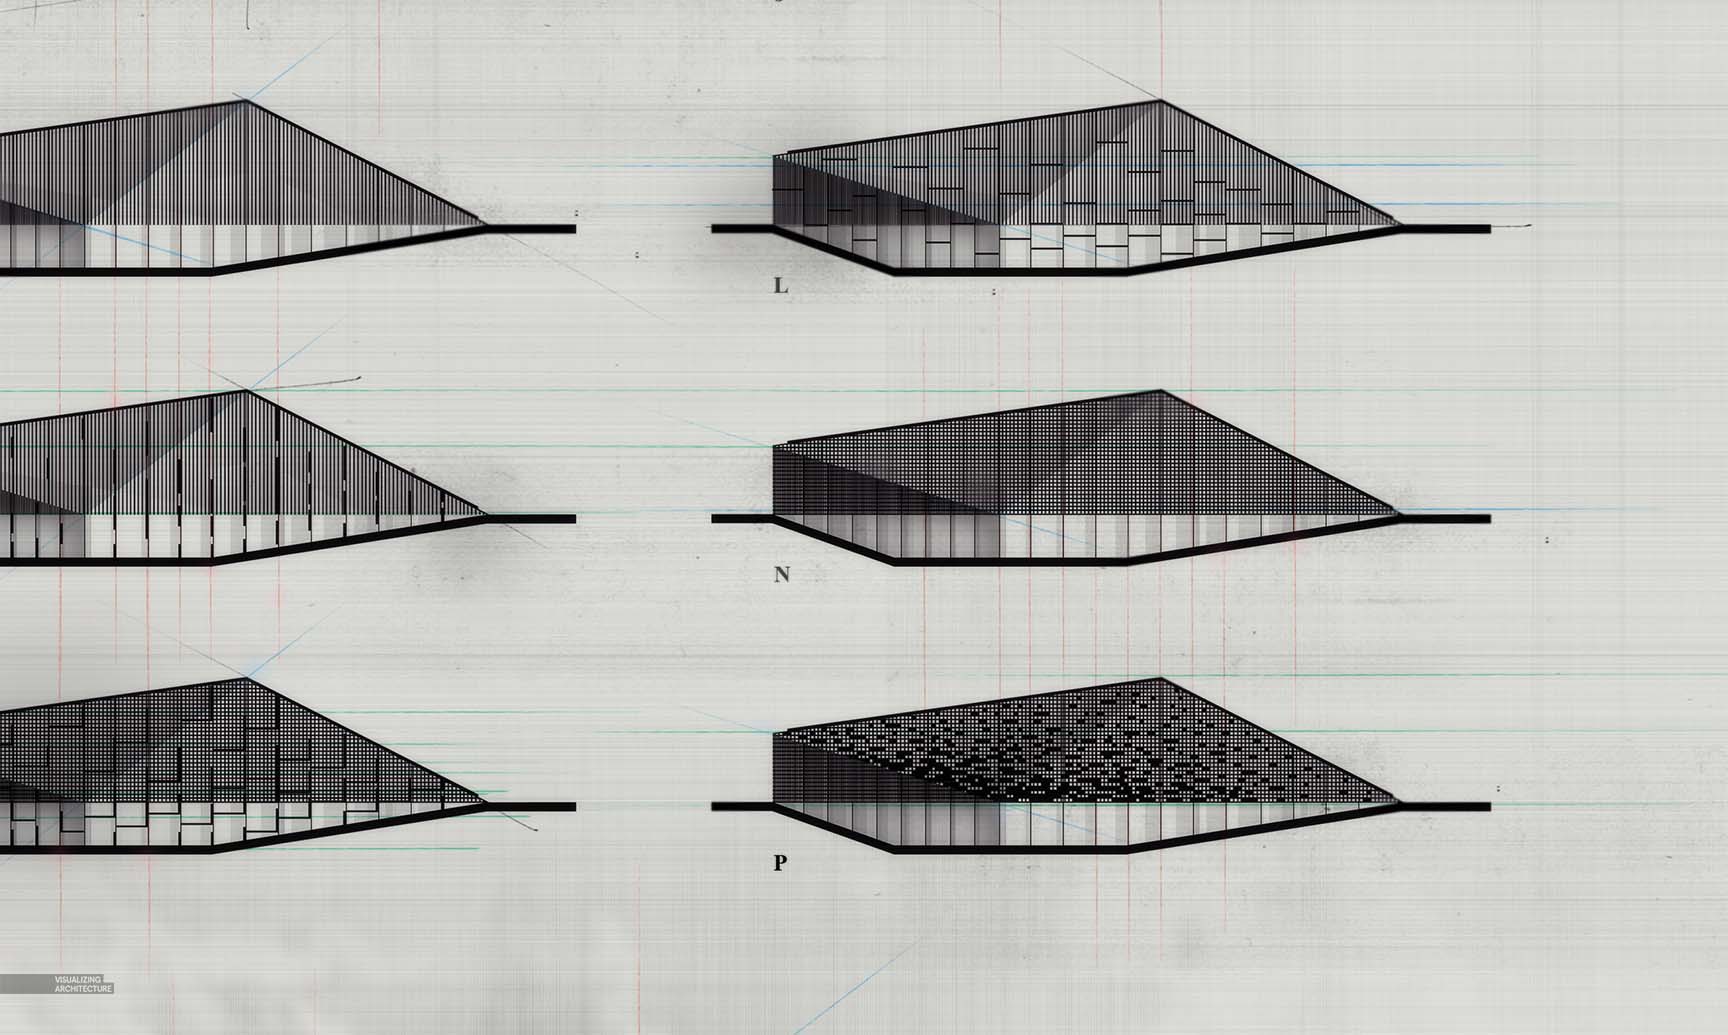
Setting up your files in a smart way will lead to cleaner images and huge savings in time down the road. As much as this illustration is Photoshopped and textured, it can still be edited quite easily. If later on, I come up with some new options, it will take no time to insert them into the spread or simply swap it out some other options.


Nice and impressive 😀
were the facade options just sketched out in PS, or were they linework from another software?
Awesome 🙂
impressive 🙂
Really great thanks for sahring
I Believe in This. Well done for articles.
Hi Alex did you produce the textures yourself or can they be downloaded from somewhere? Fantastic work by the way, a real help to everyone.
Wow…! its really beautiful….https://bit.ly/2sL4gIf