Layer blend modes in Photoshop are something that I use for every rendering I do. I often will add a color overlay to change the mood of the illustration and provide cohesiveness to the different elements of the illustration. This process is quick and the results are dramatic.
To begin, open the image in Photoshop. The image I am using has almost no color, however an image with lots of color will work as well.
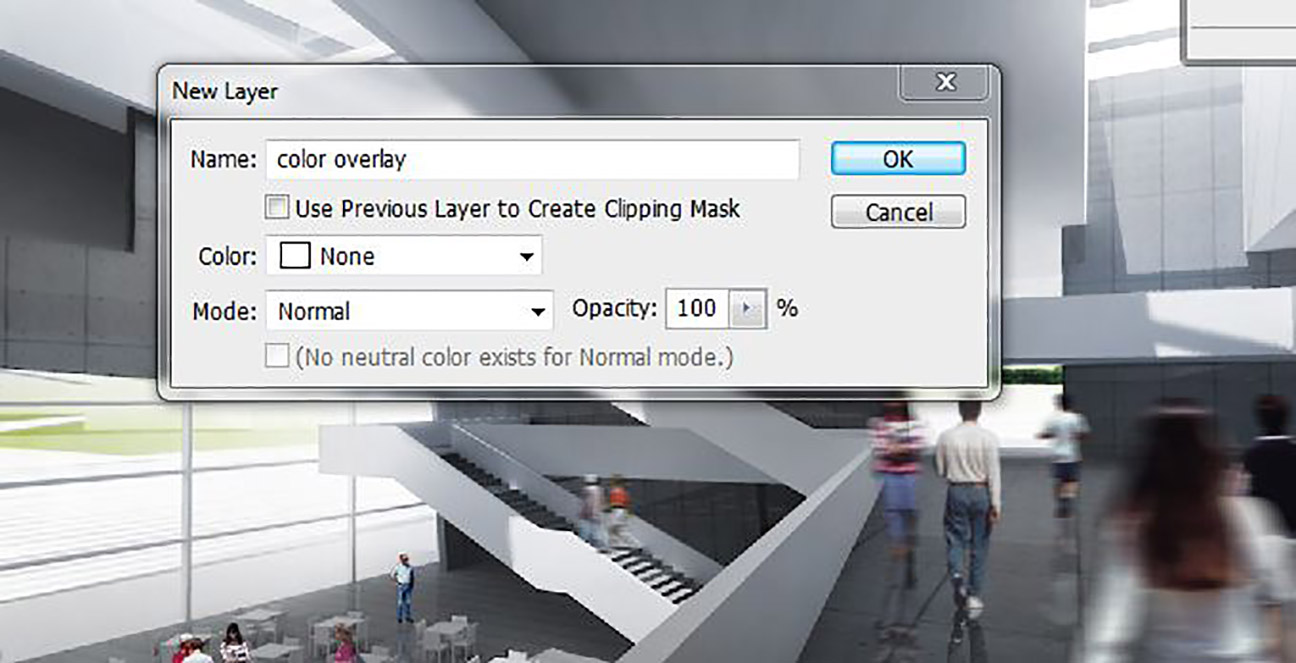
Create a new layer and move it to the top of the layers pallet.
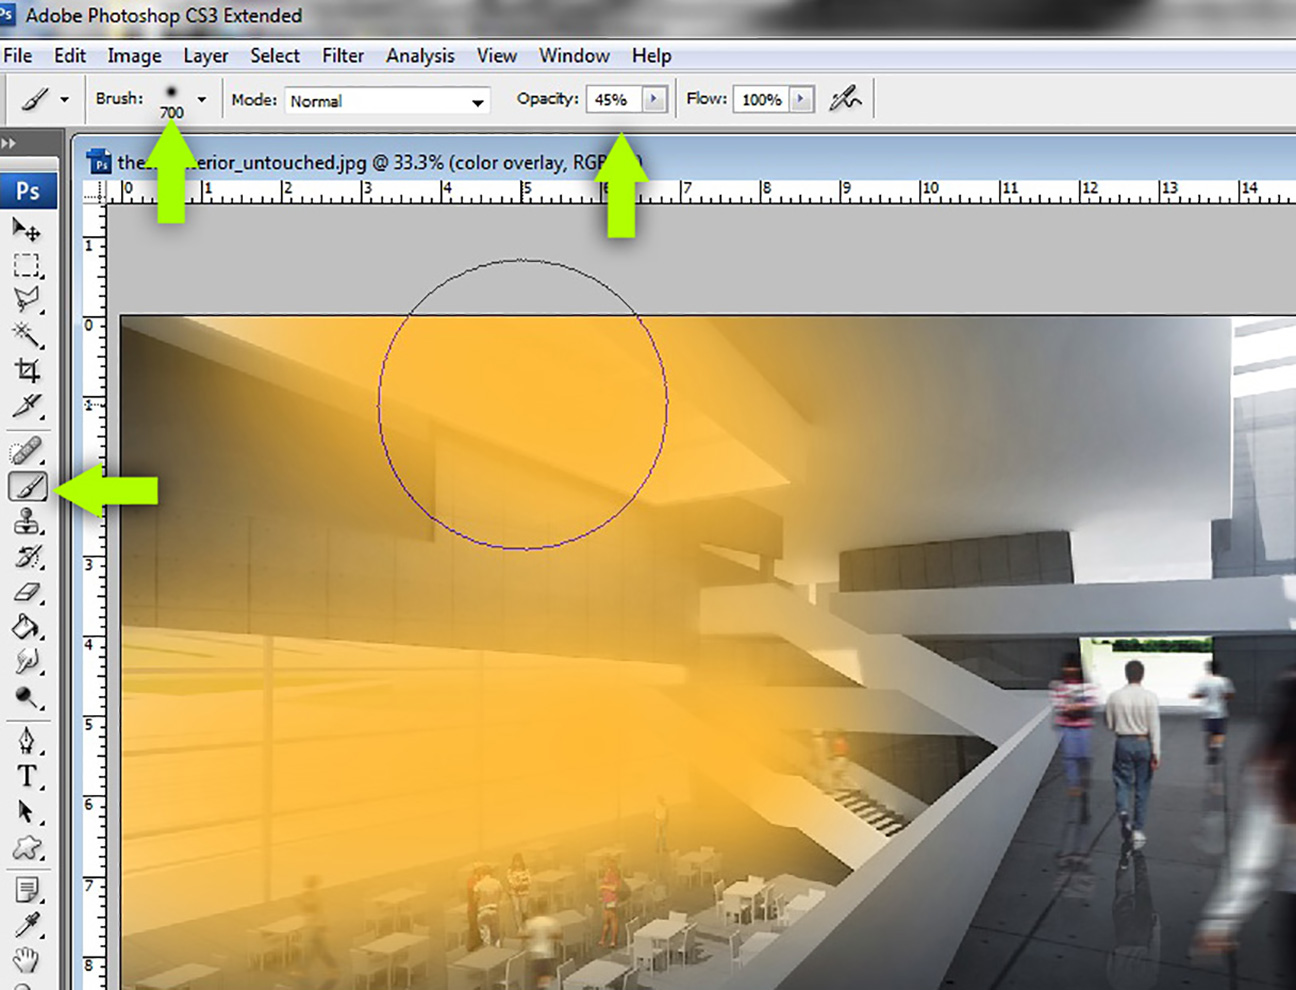
Next, select the “paintbrush” tool. At the top, switch the brush type to a soft brush and lower the opacity to below 50%. Choose a color for the paintbrush and begin painting. I usually paint color in areas of bright light first with less color in the areas of shadows.
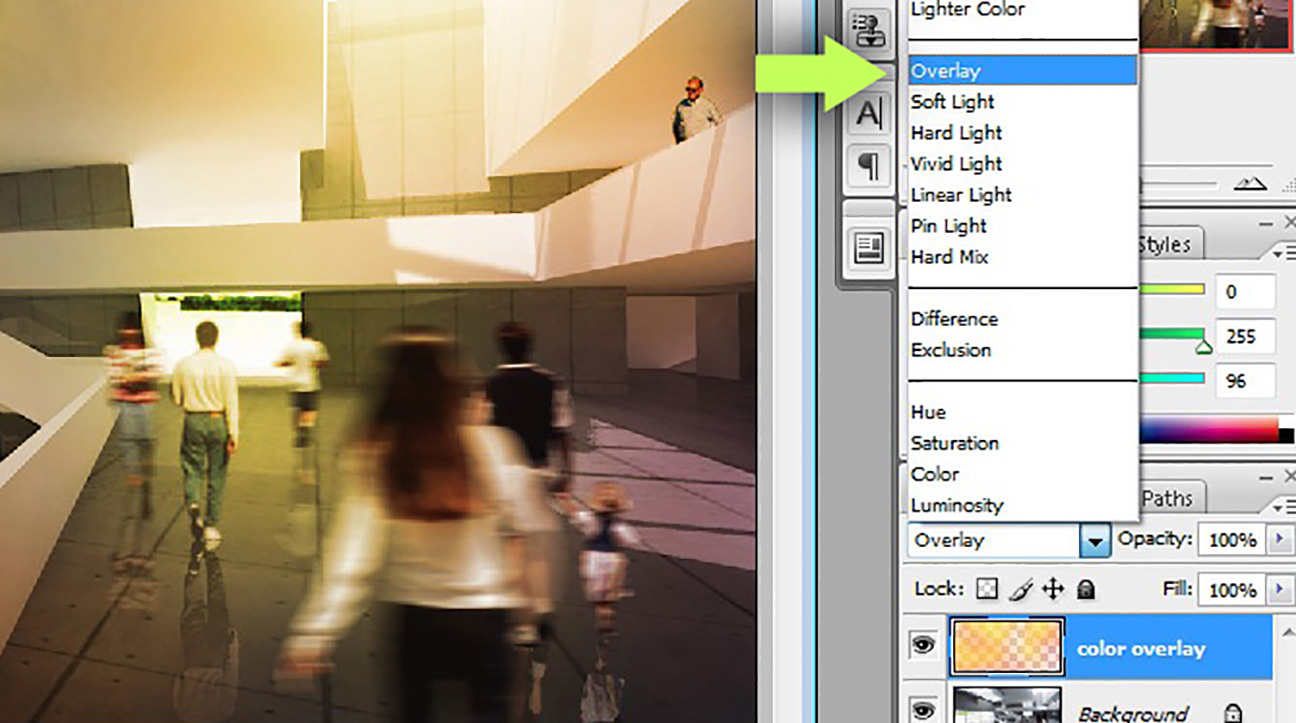
Once paint is applied, go over to the layers pallet and set the layer blend mode to “Overlay.” If the color is too strong, you can lower the opacity of the layer as needed. Overlay works most of the time, but it is worth experimenting with some of the other blend modes for different looks.
In just a few seconds, the illustration has changed drastically. Even if the layer’s opacity is extremely low, a subtle hint of color will go a long way.
And with blue and green tint.


Fantastic tip! Thanks for publishing all this stuff, Alex. It's very helpful for improving our renders. I'm a fan of your blog!!
Thank so much for these tutorials!!!!
Thank you so much. I am an architecture student and I will share this with my classmates. Anything that can take the sterility out of my base renderings is great.
Respect !
I appreciate for this awesome tutorial.
Thank you so much Alex for all the tips that you compare! 🙂
your blog is soo helpfull !!
Thank you Alex. Keep up the good work!
Thank you for sharing your experiences.
Man your tutorials are god like! very nice!
Excellent tip! Thank you much for sharing!
this is amazing stuff. thanks a lot alex.
Thanks!!!
Thank you alex!
Fantastic tutorial thanks Alex!
Thanks
THNX
Jempol
wow amazing, simple and aplicable. thanks
Amazing! Alex, you’re my guru!!!
Packers and movers banaglore
Transmoving movers
i just realised your web site and tutorials. They are awesome. You are explaining all tips very clearly. thanks for all of them
Thanks dear for sharing such an amazing blog. Visit Djcareerindia for Top 5 DJ Schools and DJ Course in Faridabad and Top 5 DJ Schools and DJ Course in Indore.
This tutor is so helpful!
I can always find my shortage in visualization through reading ur blog
Many thx!!
A landscape architecture student from China