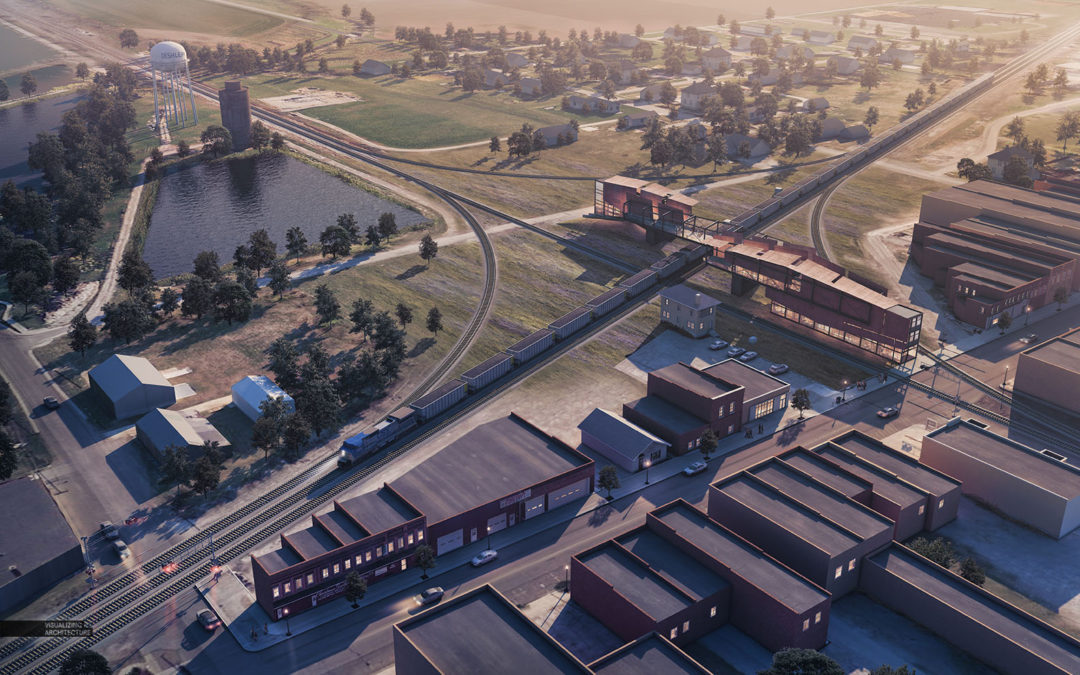
There are still some areas of Portfolio Vol. 4 that are missing information. One image that I just finished creating is an aerial of the train pavilion project that better shows the relationship of the new architecture to the iconic town water tower. I have several diagrams describing the relationship but no realistic imagery showing what the actual tower looks like. I figured an aerial rendering could help tie together the many different pieces of the project described in earlier pages of the portfolio.
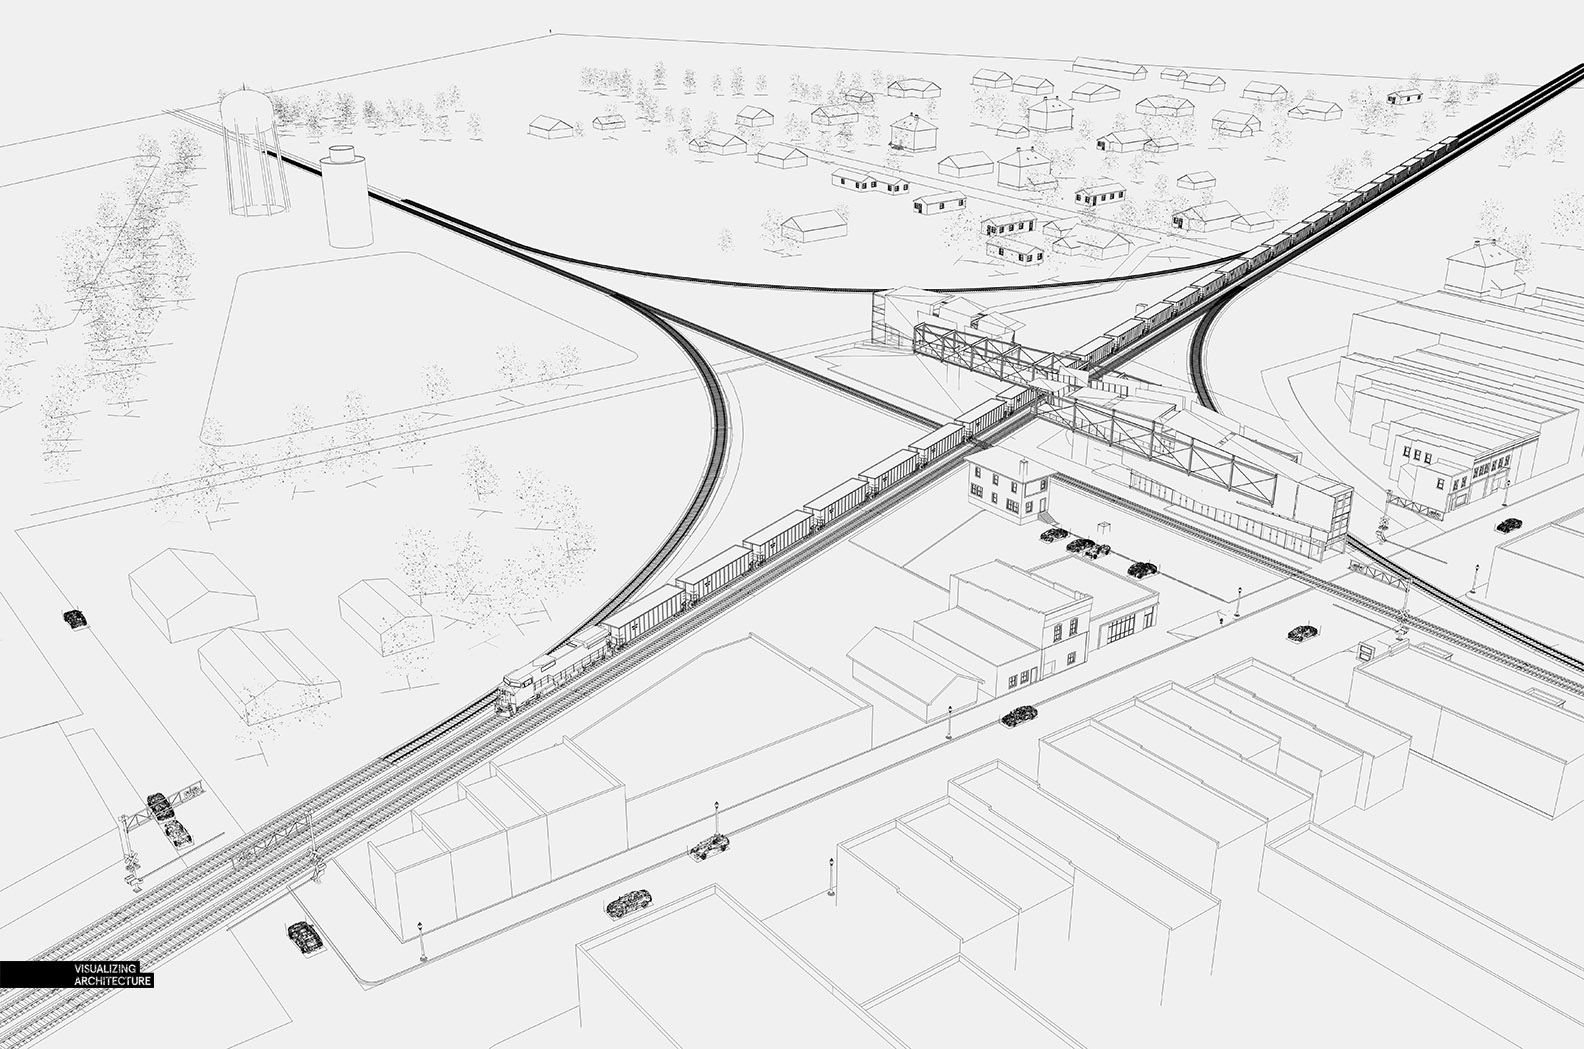
Above: Sketchup Line Work
Images like this are difficult because there are so many different elements involved in large quantities: Lots of buildings, trees, cars, ground plane textures, etc. Luckily, I had much of the town already modeled from previous renderings. However, I still needed to model some houses in the distance and add proxy trees and cars. If you are not familiar with proxies, they are a way for V-Ray to render heavy meshes like cars and trees without actually placing these high poly objects in the Sketchup model. Instead, only a simplified low poly wire frame placeholder of the object is used in the Sketchup model. This means you can load hundreds of trees and cars without ballooning up your model size or using up all of your ram during the render process.
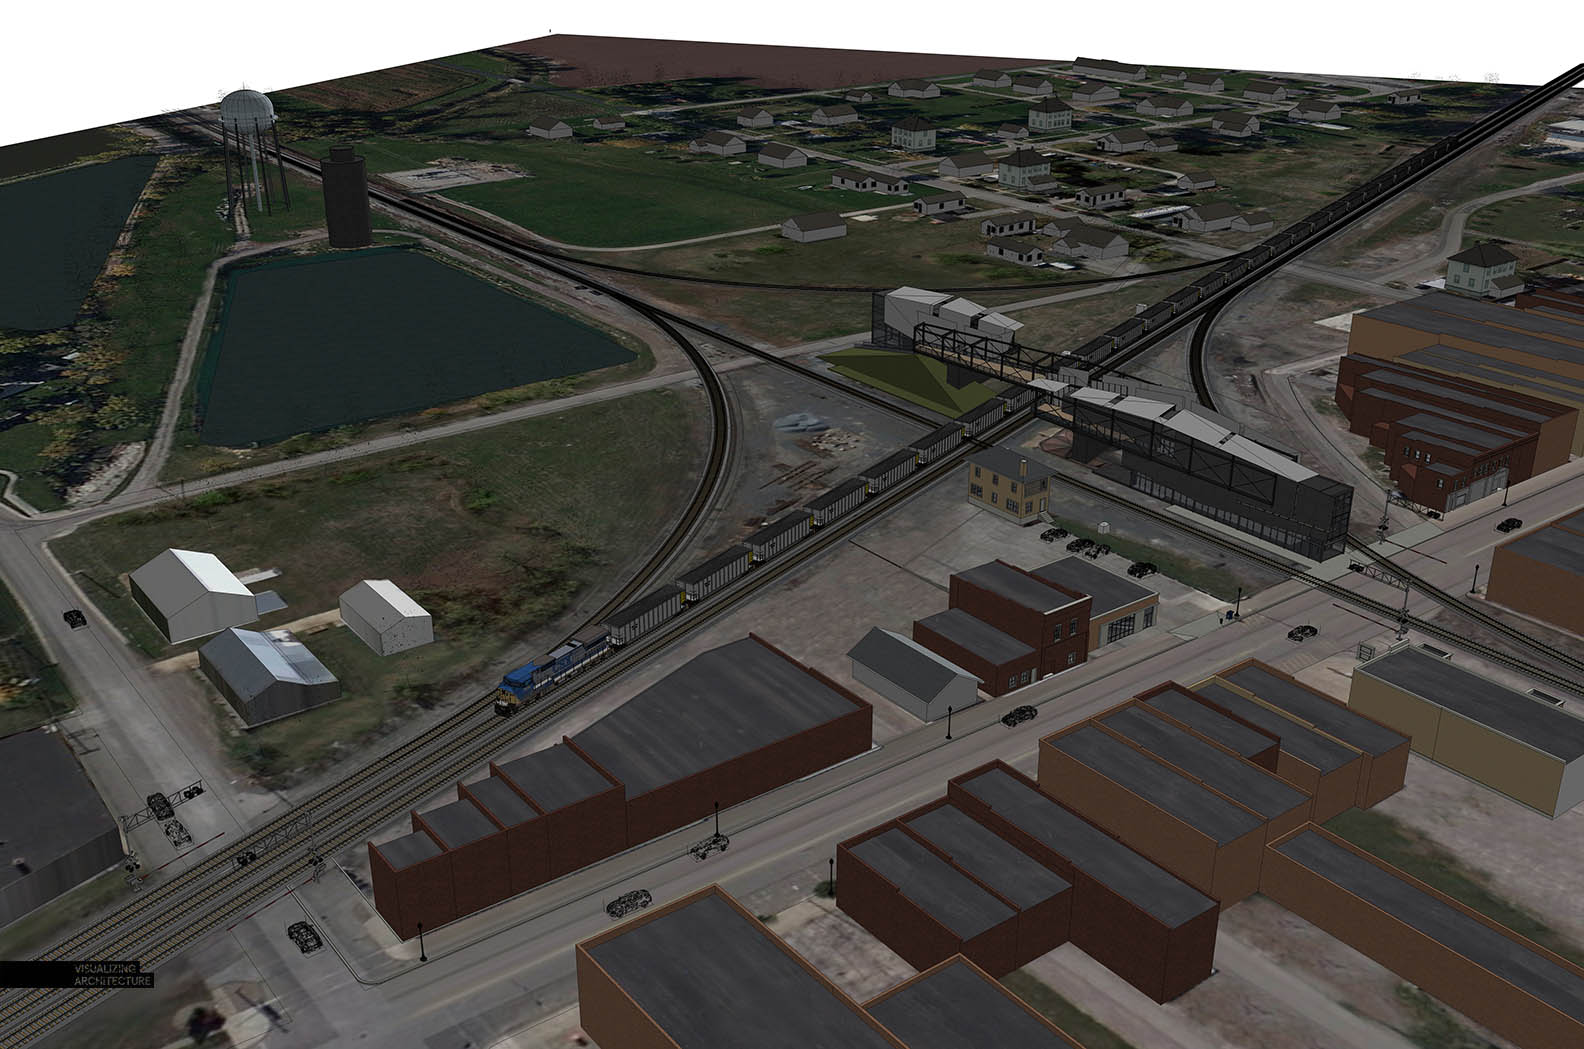
Above: Sketchup Model with Textures
Another difficult aspect of this image was the ground plane. There are lots of changes in textures happening and this was not something that I had time to model. Instead, I ended up using the aerial map as the ground plane. I modified parts of the image to remove cars and building shadows. The aerial map was not at a high resolution, but since the camera was so high in the air, this lack of detail didn’t matter much. In the image above, you can see the aerial map applied to the ground plane.
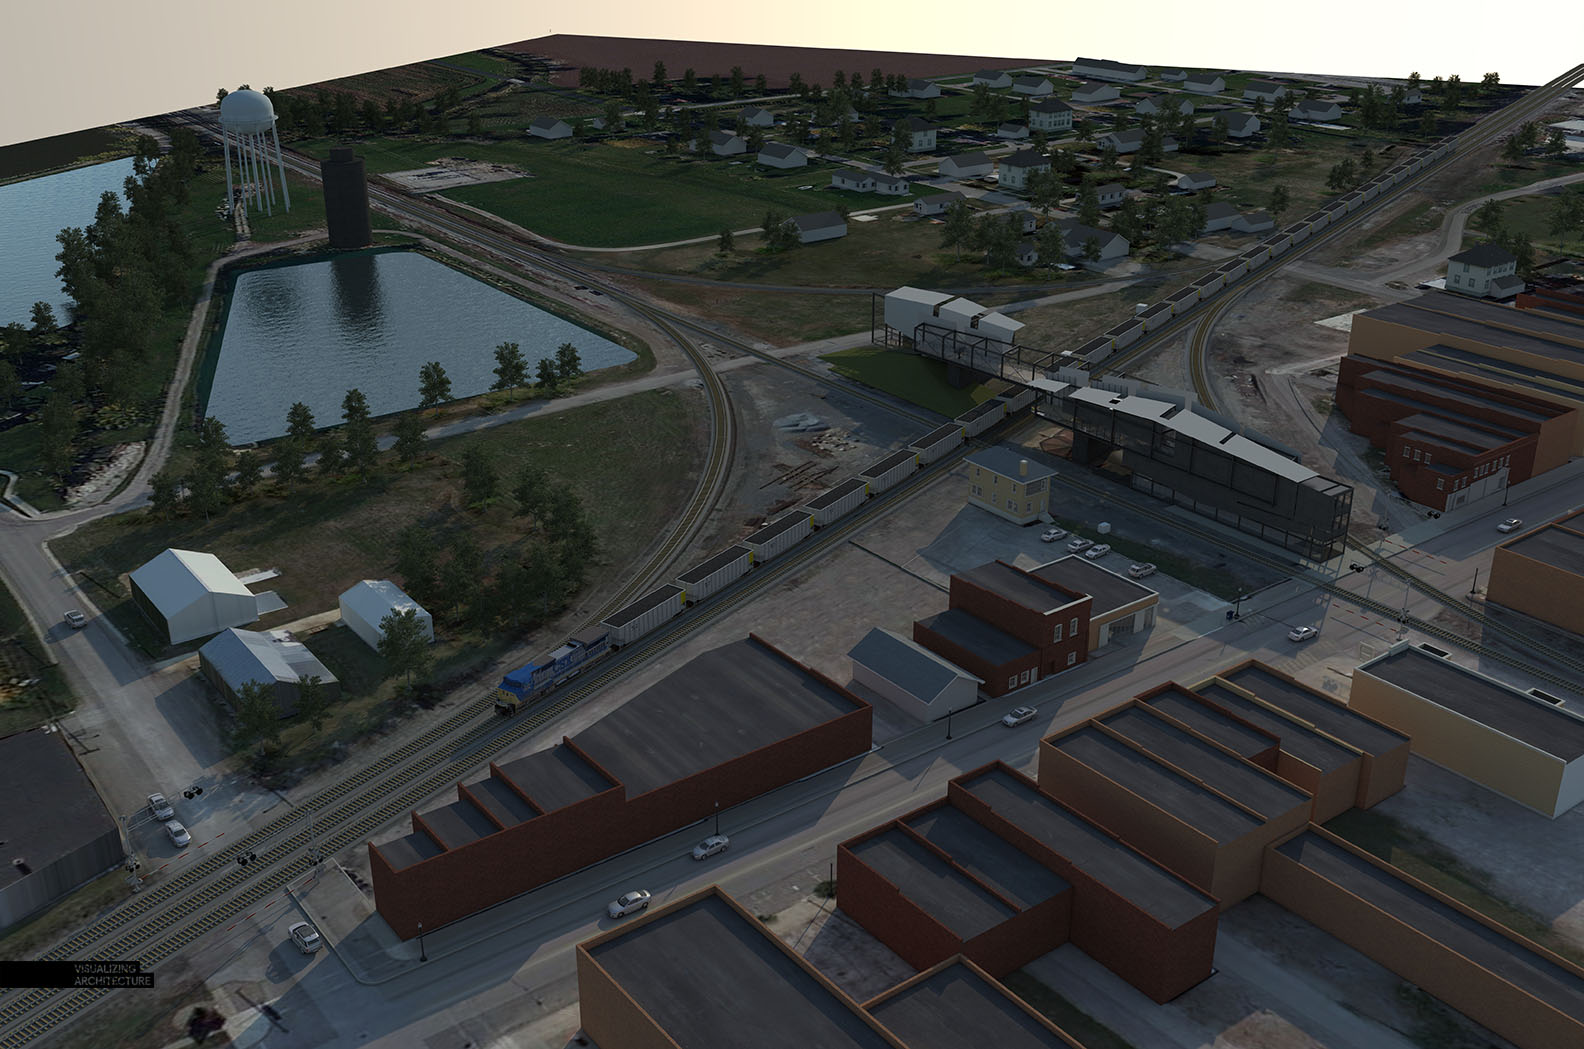
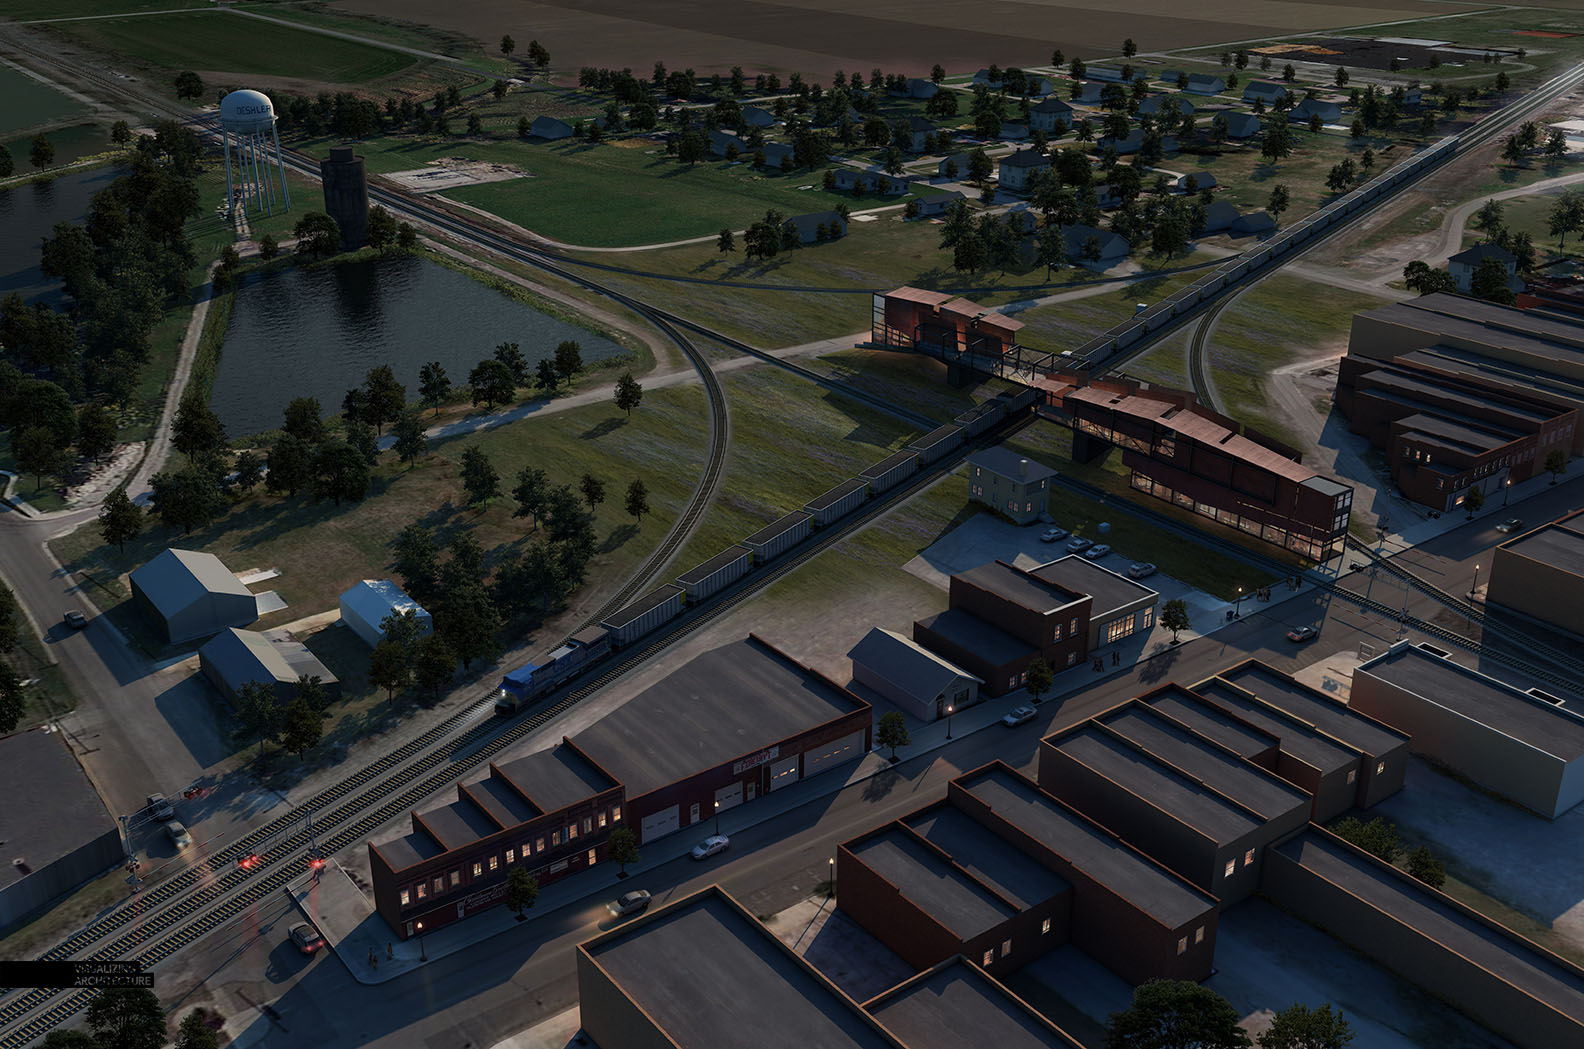
Above: V-Ray Base Rendering
The V-Ray base rendering still has a lot of things that need to be cleaned up in Photoshop, but I at least have a good start in terms of trees and context buildings. Trying to Photoshop in all of this stuff would have been doable, but would have take a ton of time and would not have been as accurate or clean.
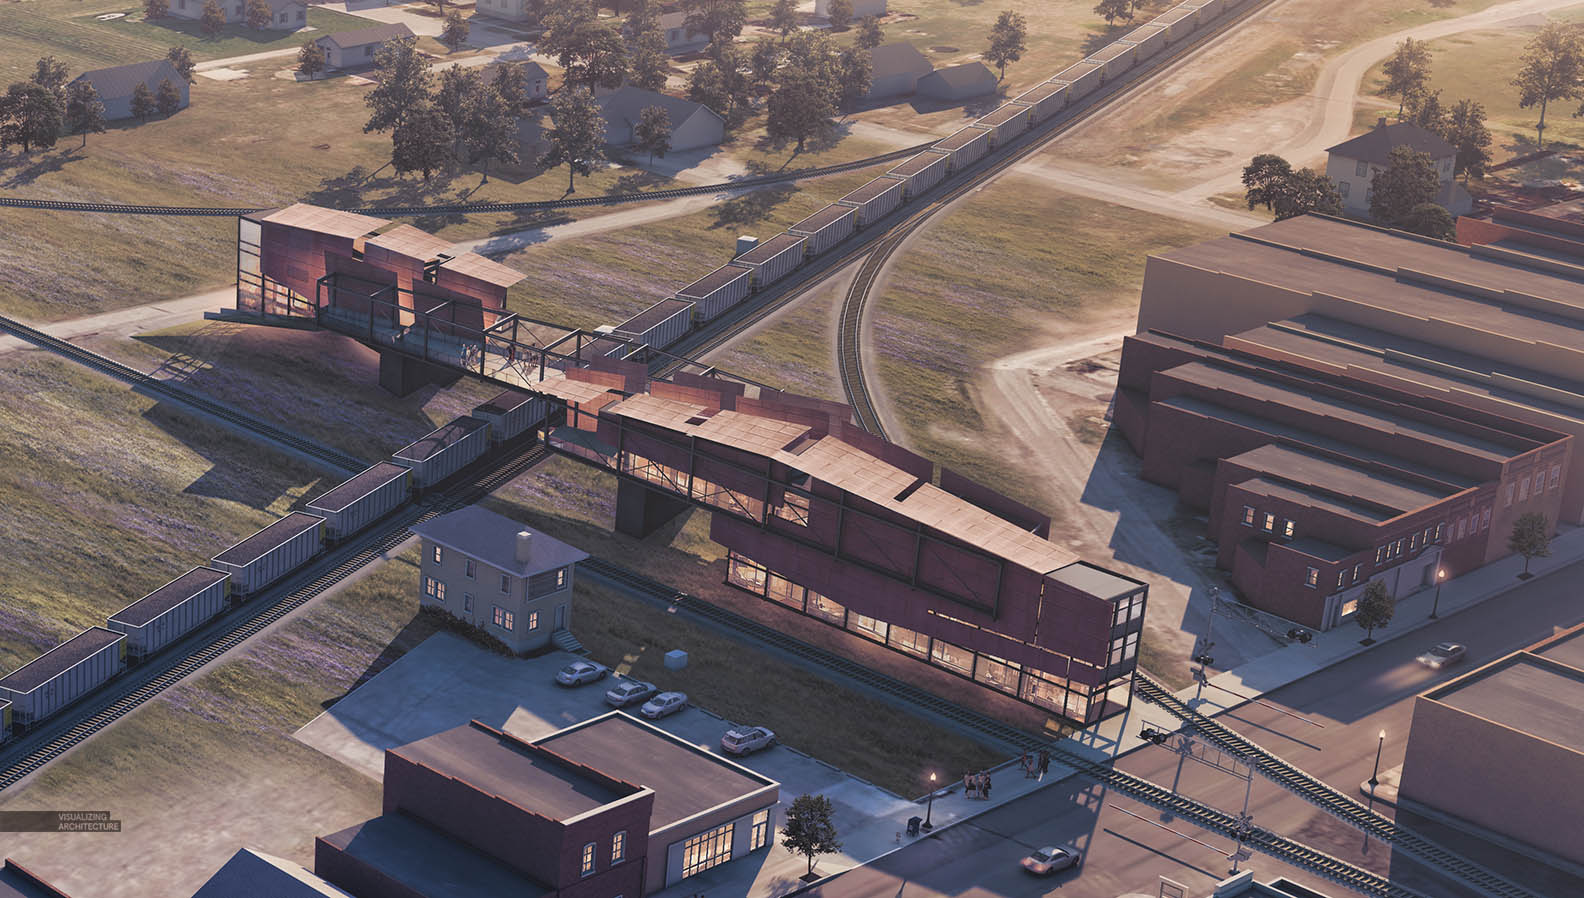
Initial Photoshop over base rendering
Once in Photoshop, I first worked on the landscape adding some more trees, wild grasses around the site, and adjusting the tone and reflections of the reservoirs. I then moved to working on the context buildings, bringing in facade details to the main street buildings, adding textures to the train pavilion, and lighting up the buildings. Finally, I added details like people, crossing lights, water tower text, and other misc. adjustments.
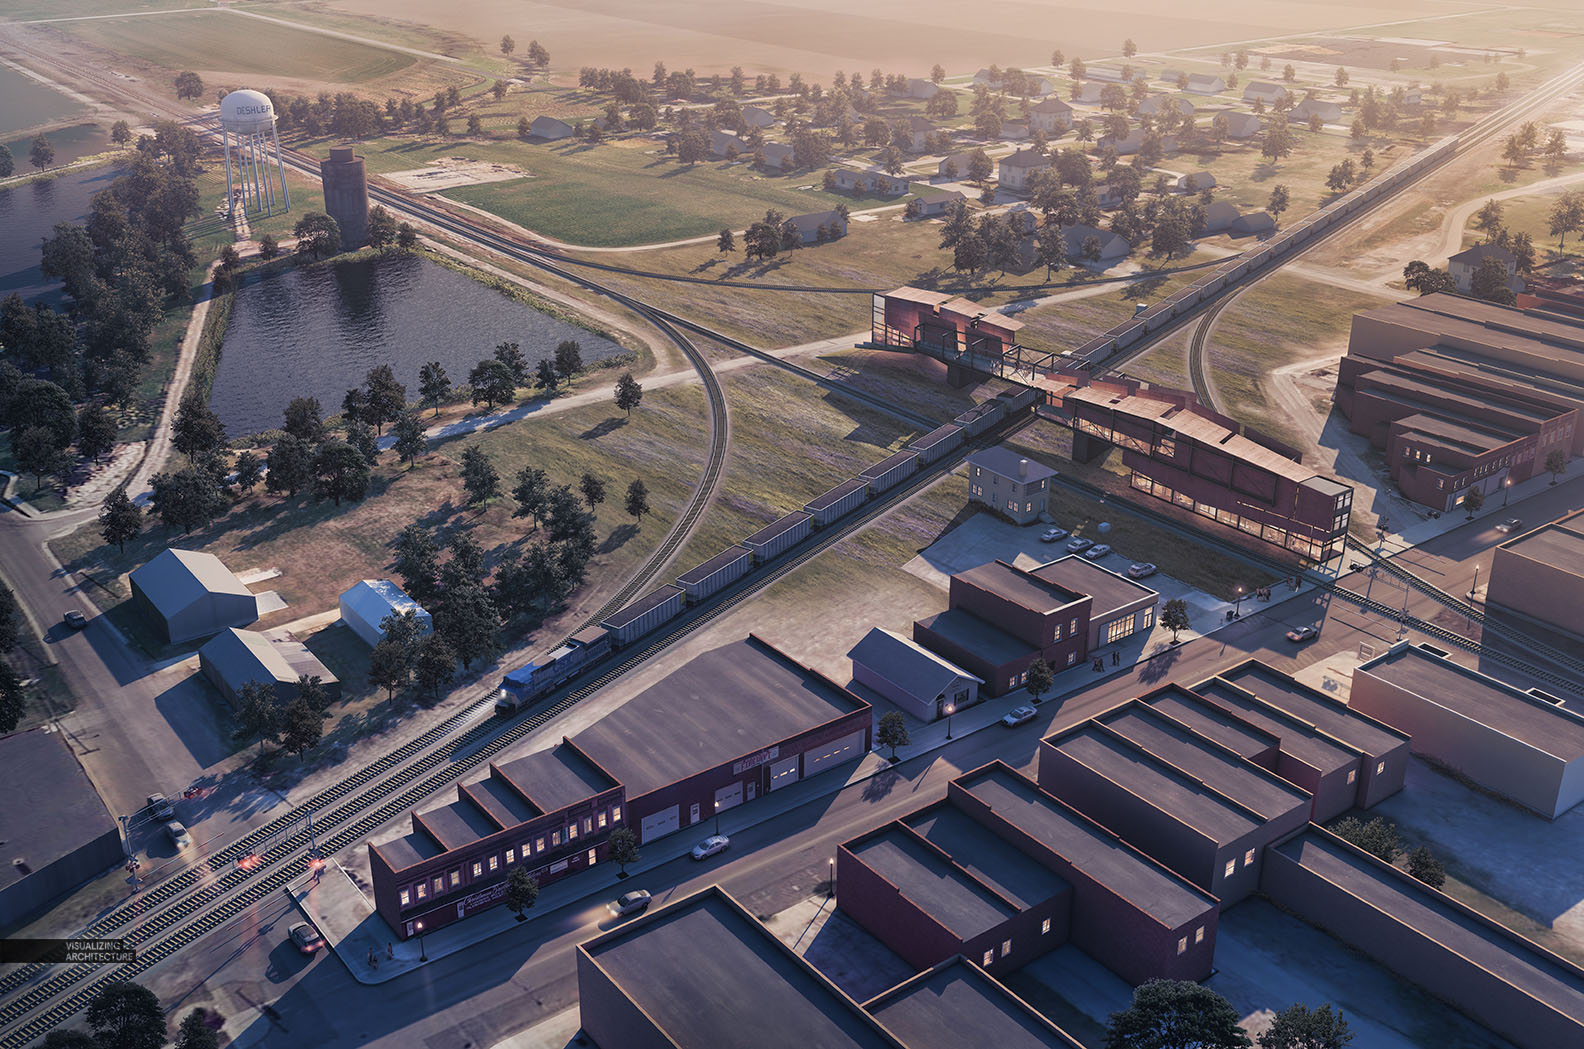
Above: Final Color Adjustments
I kept the color adjustments simple with a slight atmospheric haze in the distance, some yellow and blue color overlays, and some toning and detail adjustments made in Topaz Labs.


Some final notes, I chose the view based on where the fold of the spread would have minimal impact. Since the image is an aerial and all of the detail is so small, I had to make sure the view was designed in such a way that none of the important information was getting lost in the fold. I also rendered everything at a higher resolution than normal (6,500 px wide) so that the detail remains sharp as viewers get close to the page. This meant a very large Photoshop file of over 3.5 GBs though still easily manageable on my laptop.


Hi Alex,
Great + Inspiring work as always!
How do you calibrate the colours for CMYK printing as I believe Topaz labs filters are only available for RGB mode? What is your usual mode setup in Photoshop?
Thank you 🙂
Hi Alex!
I’m following you since a while and I’m still amazed by your creativity and skills. Today, for the first time, I’ve a question for you: is it possible to explain us how you process/work aerial map as the ground plane?
I’m not a very advanced user about sketchup, but you always give me motivation to go further.
Thank you by advance for your answer.
absolutely astonishing! As always, thank you very much to sharing.
Nevertheless me too should need more particulars about aerial map on ground plane.
Thanks again
What kind of laptop do you use, and what does it have in it?
I got curious about that too
Great tutorial, thank you! What kind of system / intel core do you use for to render the textures? I assume this is a large skp-file and takes a long time to render.
great tutorial…. i love it…. you should add a video tutorial for the begginers.
This is gorgeous Alex! Two quick questions for you:
1) Can something similar be done in Kerkythea if I do not have access to Vray, or is it beyond its abilities?
2) For the aerial photo, what did you use so that the items were not so pixelated? Did you use Google maps or a program like Nearmap?
Alex, great post and great images, as always. Now that you’re using VRay, are you taking advantage of the Render Elements tab? VRay renders the main render and ALL your other passes as individual images simultaneously. The additional passes give you much more control in post. For example, in this image, a ZDepth pass could have been used to create the atmospheric fog, and a multimatte element pass (I believe it’s called MatID in the sketchup version) creates an image with a color assigned to each different material. It’s incredibly helpful for selections and masking.
Keep doing what you do!
Man you are so dopeee!!! I remember when I had to redo my portfolio because I lost in hurricane sandy, and I saw your YouTube…I ONLY knew how to hand render, but then I followed your steps and I got to learn sketch-up and Photoshop, and I was so amazed that I learned these two software….I am currently trying to get int o V-Ray because I just loveeeeeee the photo realistic look but its a tad bit expensive for me at the moment, but soon I will def get into that. Thank you for inspiring me, I never thought I would have be able to do it.
Hi Alex,
In many images, the mood and life come in the final adjustments, would it be possible for you to do a more detailed tutorial of your process? I would imagine it is a balance between Color Overlays, your Softening technique, and Topaz Labs, but a walk-though would really be helpful.
Thanks.
Hey Alex,
Could you please share some links from which you download these awesome texture and images…
Regards.
great post and great images, as always. Now that you’re using VRay, are you taking advantage of the Render Elements tab? VRay renders the main render and ALL your other passes as individual images simultaneousl smart design and programing dude
Some final notes, I chose the view based on where the fold of the spread would have minimal impact. Since the image is an aerial and all of the detail is so small
This is some beautiful work! I love it
Thank you so much.
very nice site with amazing information.
Some final notes, I chose the view based on where the fold of the spread would have minimal impact. Since the image is an aerial and all of the detail is so small good
absolutely astonishing! As always, thank you very much to sharing.
Nevertheless me too should need more particulars about aerial map on ground plane.
Thanks again
Since the image is an aerial and all of the detail is so small, I had to make sure the view was designed in such a way that none of the important information was getting lost in the fold
Is this drawing created from v-ray and sketchup?
Great! I don’t think it’s possible to create such a complicated drawing! Can you share how to do it?
Since the image is an aerial and all of the detail is so small, I had to make sure the view was designed in such a way that none of the important information was getting lost in the fold
very good looking drawing and interior design, this give me lots of inspiration in my work, thank you for sharing, keep up the good work.