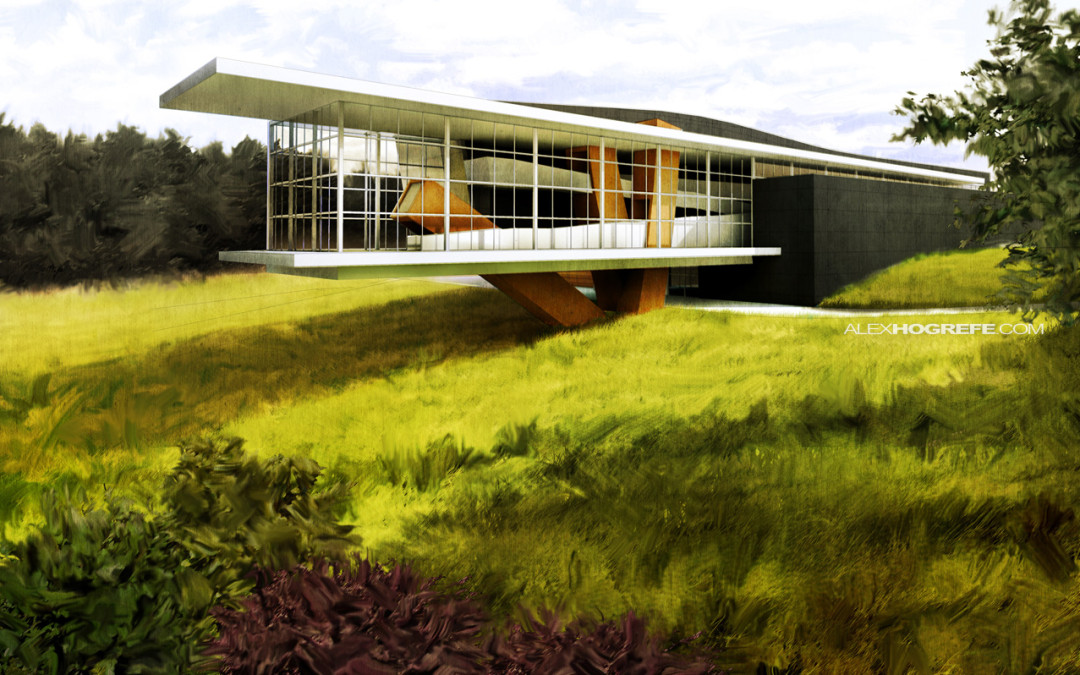
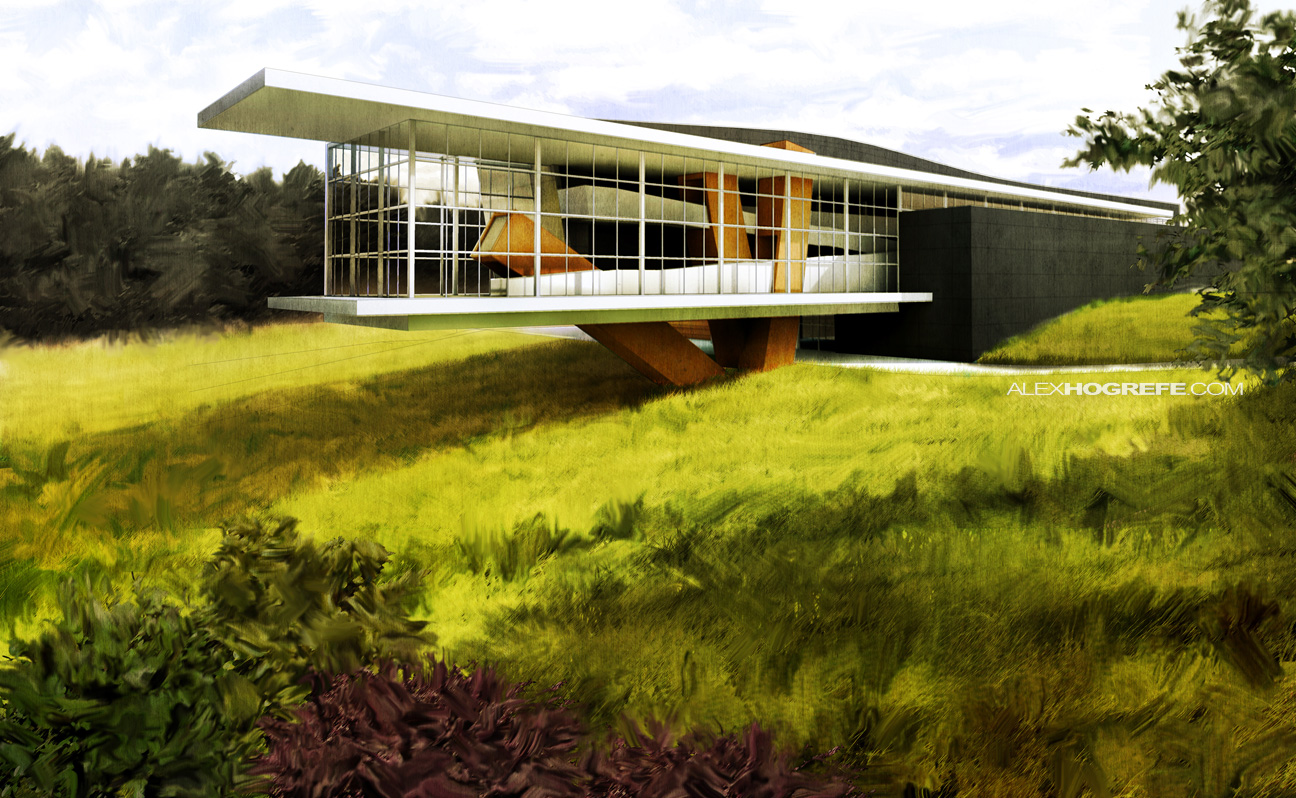
Every so often, I come across situations where I want to loosen up my illustrations and give them a more gestural quality. Growing up, I painted a lot and I have always experimented with ways to carry over the brush stroke into my digital architectural illustrations in an attempt to escape the machine generated look. There are plenty of filters in Photoshop that offer up painted styles but they all look too mechanical and clearly like a Photoshop filter. I prefer to do things manually giving me control with where and how I create the strokes. This also provides an opportunity to make unique and controlled gestures that work with the geometry of the illustration. For example, grass will have different brush strokes compared to trees and bushes. For the above illustration, I only applied the painted look to the landscape to develop a stronger contrast between the built form and the surrounding context.
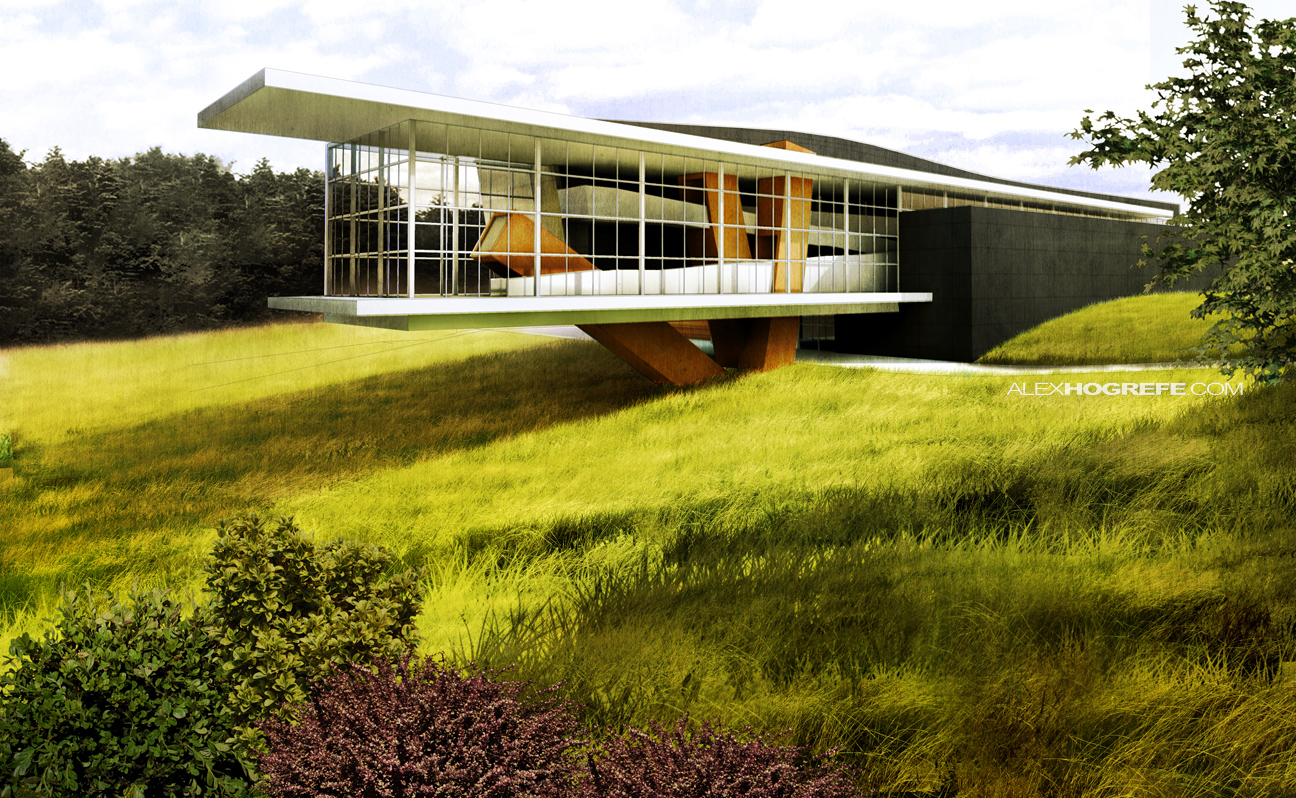
The image that I am going to be starting with already is at a good place and I could just stop here. However, there is a lot of detail in the landscape and the painted effect will work to tone it down.
1. The first step oddly enough is applying a Photoshop filter. I do this to “rough up” the original image and prepare it for the smudging that will come later on. Choose “Filter>Brush Strokes>Angled Strokes”.
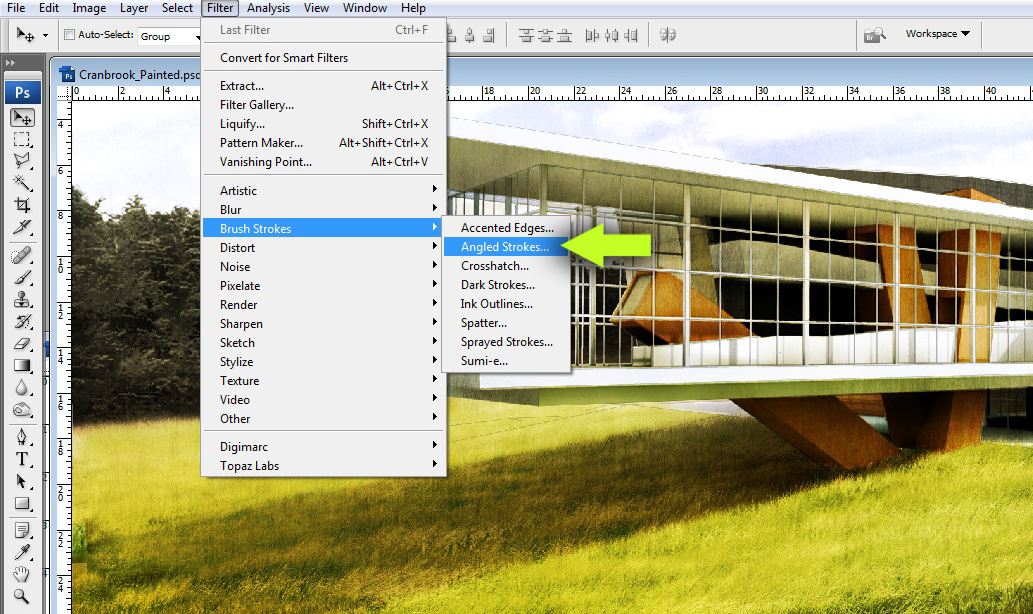
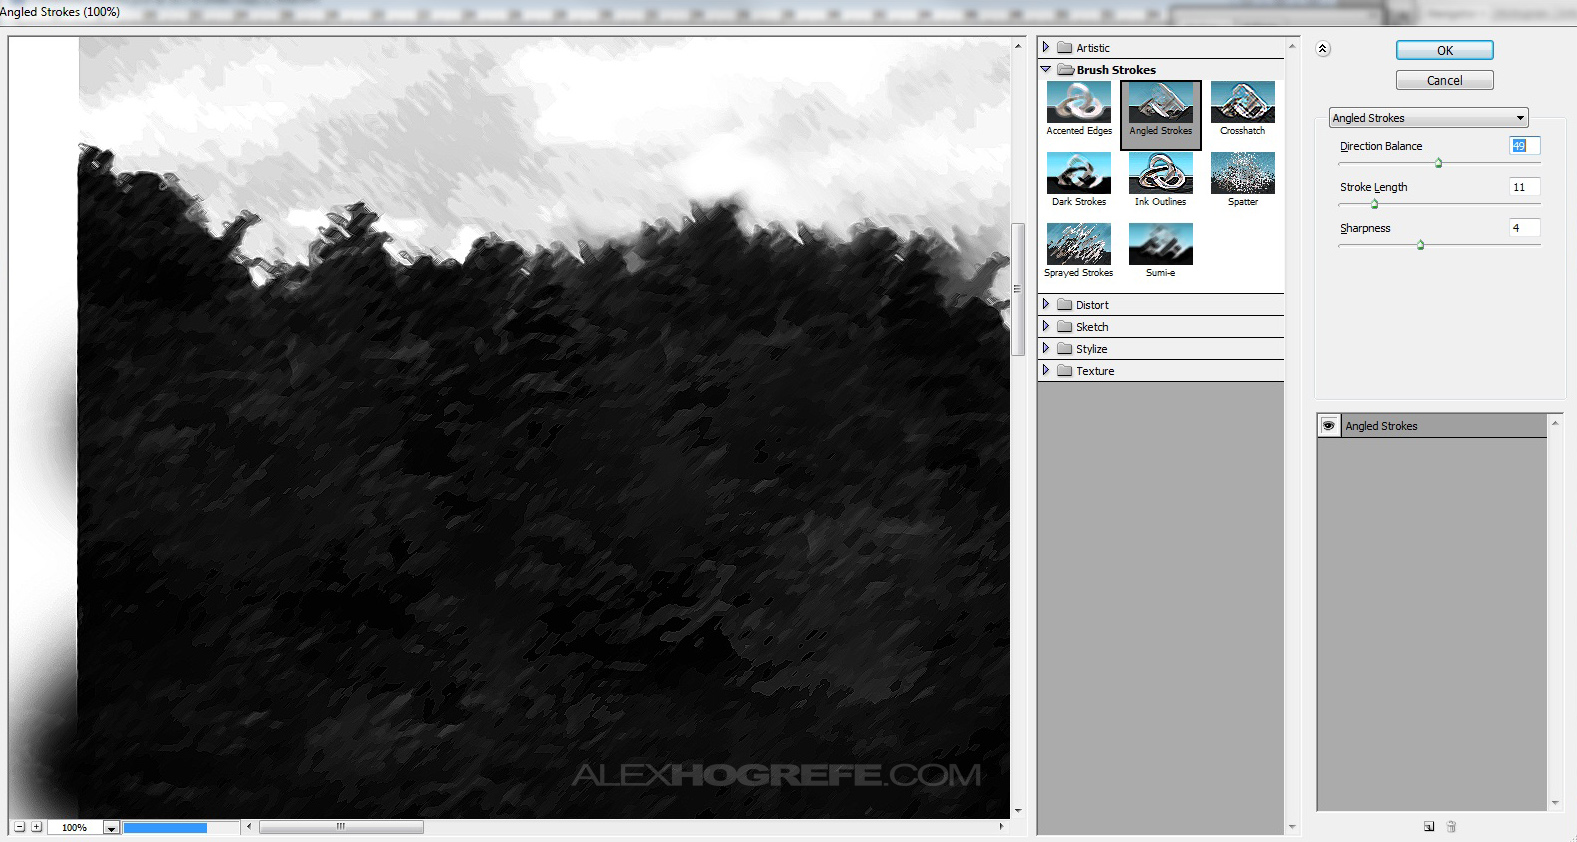
2. The settings that I used in the angled stroke dialogue box may differ from image to image. My goal with the settings is to avoid aggressive and sharp brush strokes. Instead, I am trying to remove some of the detail and blur the edges of the geometry in the illustration.
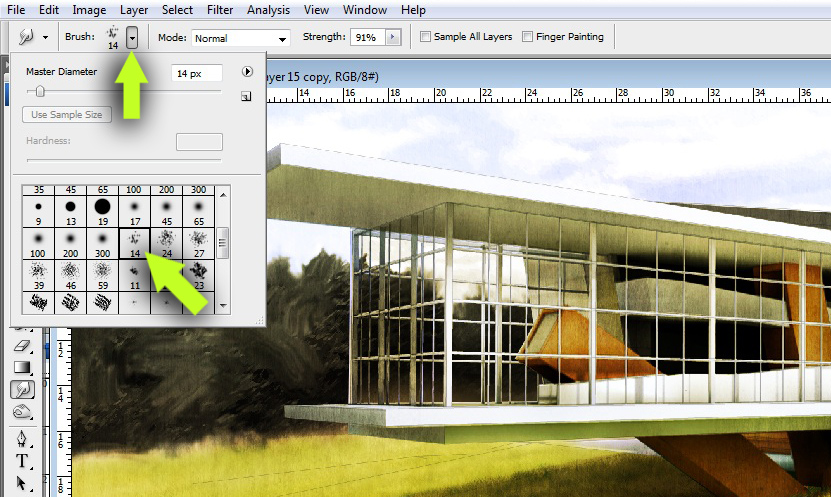
3. Next, choose the “Smudge Tool” in the left tool bar. The settings are crucial here. Set the “strength” of the smudge tool to around 90%. Then select the drop down menu next to “Brush” and choose the “spatter” brush or something similar to the one chosen below with a diameter set to 45. This brush should come standard with all CS versions.
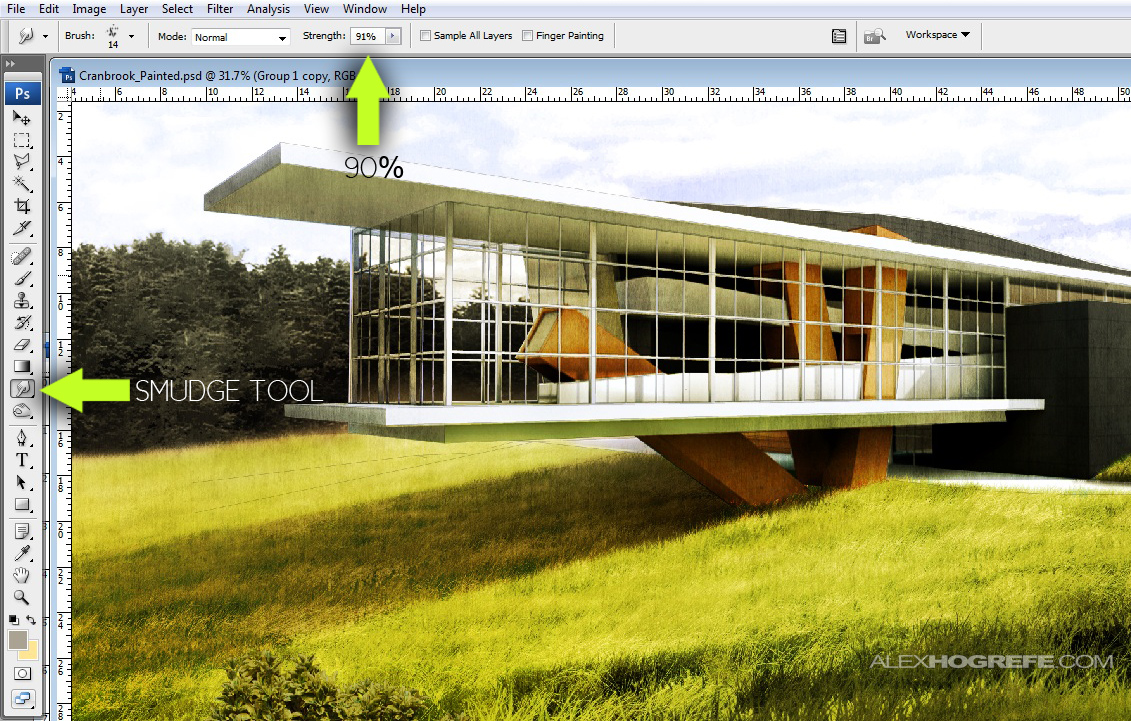
4. With the correct settings in place, begin smudging the image. Use short strokes in all directions. Think about how the image would be painted and use gestures accordingly.

The final result is a illustration with a lot of depth and character that is hard to get with computer generated renderings. It’s not a technique that I use often, but one that I have a lot of fun experimenting with and one that steals a lot of attention.


the level of awesomeness of your blog is too damn high!!!!
Haha, thanks Ore
hey alex, i really like the style of your render/drawings. is that possile if you can show us how did you render this building from your drawings? i like the tones, the colours. or may be you can just tell me in text.
And your webiste is very very helful for me, and realize how powerful sketch up is!!.
and also i wanna know, have you try vray in sketch before?
i use to do the render in rhino via vray..it will be great if you can give me some sugesstion.
i am a third years architecural students from australia.
thank you!!
Great Work for all people. Young and old, everyone can learn something from your blog. Thanks a lot.
Great render, make a tutorial about the grass, it's amazing how you manage to workout the landscape.
hi mr alex .
i love your presentation TUTORIALS .
please let me to translate your tutorials to Persian and put them in my blog with Resource Links for Iranian peoples.
i am mostafa an Iranian Architecture Student …
The detail is great but what i liked most is the whole idea behind the building. The way that you see the green grass combining with the white structure and in the middle the brown color of the wooden base of the house is simply brilliant. Excellent job mate.
Very nice work Alex. Not only are the techniques awesome in the truest sense of the word, the designs are great too and the rendering techniques seem to match the designs seamlessly. I teach the software and can model pretty much anything given enough time and plugins but my appetite for rendering has waned due to lack of interest. I think you might have just spurred me on to break out photoshop and get inspired.
Thanks for these, they are excellent.
regards
Paul
im more than glad to find this blog before i start my portfolio work… thank you soo much!!
hey alex.. thanks a lot for sharing ur knowledge and skills with us. It helped me a lot. Third year architecture
student from Bangladesh.
Thank you so very much, your tutorials changed my life, seriously.
Wow I like the new look. Painting the grass gives the whole picture a very different look. Really like the glass building and how the glass lets you see the interior of the building.
Love the passion.
thank you so much for sharing all this tips with us …. it is really teaching as well as inspiring ! you are very talented !
This beautiful picture is a successful example of the programmatic goal to combine art and technology in a formal unity.
Two of my boys fatviroes are Polar Express and Fred Claus. I love the classics like Charlie Brown Christmas and my all time favorite movie, It's A Wonderful Life 🙂
Hi Bethany,This looks like a wonderful project and you know I wouldn’t miss it.You have some great projects, thank you for sharing.Big HugsMarcie
books on the topic is How to Make Your Business Run Without You by my colleague Susan Carter (book review here). Susan’s no nonsense approach can help you be
Deanna, your son SHOULD be proud of it! And I think the doggie door on the back is too funny! You guys really did such a wonderful job! Thank you so so much for being a part of the contest. What a fun memory for the two of you! And people actually have until the 9th to enter, instead of the 7th. So it gives them a couple more days to get one done! xo
Furnishings may be the principal element that completes any house. Furnishings is designed certainly to match each and every space. For example a drawing place would possess the sort of furnishings that’s demanded to seat visitors as well as spouse and children.
O Button vai se arrepender amargamente de ter saÃdo da Braw ou melhor mercedes…e o maior prejudicado com isso tudo foi o Barrichello, que só saiu da equipe do Ross por que a mercedes queria o Nico…se o mercenário tivesse avisado antes que queria sair por causa de grana, provavelmente o Rubinho andaria de mercedes ano que vem e não aceitaria a proposta do Frankão.
wow.. why dint find your blog before one year… good job alex.. really i learnt a lot from you.. best wishes from india..