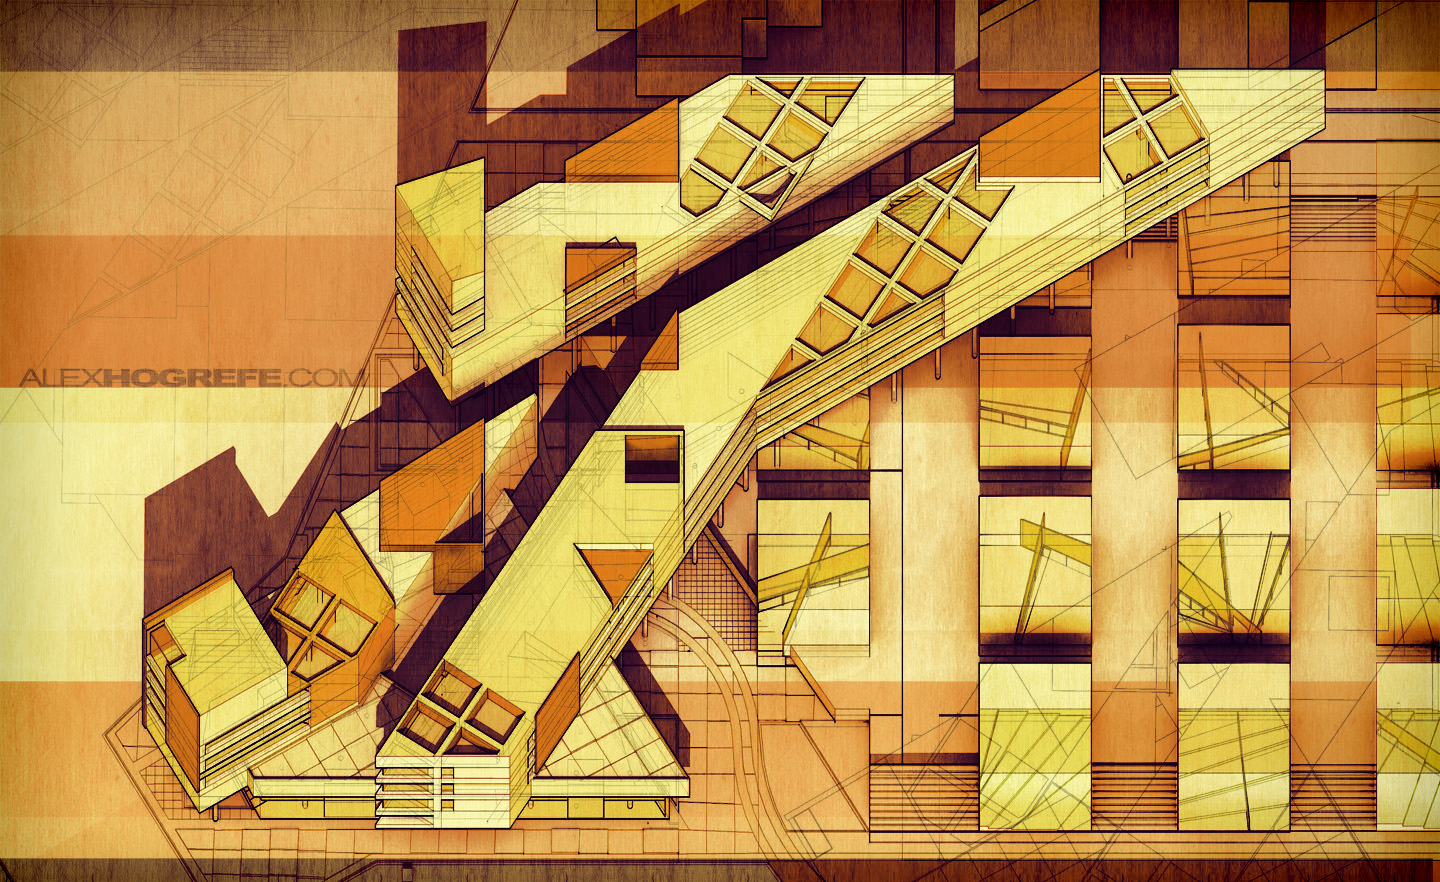
I have been experimenting with some old-school plan oblique illustrations. This was one of the first 3-dimensional views I learned to draft by hand in school. What is great about these types of illustrations is that they can be used as scaled measured drawings in 3 axes. This is possible because the plan (x and y axis) is not distorted but is parallel to the viewing plane. The z axis is also drawn to true length meaning this can be measured as well. Sketchup cannot generate this view directly within the program. However, with a few tricks, a little geometry know-how, and Photoshop, it is possible to recreate the drawing. Overlaying textures and colors on top of this view can produce some really unique imagery that can set your stuff apart.
This first part will describe how to generate a true plan oblique view. Later posts will describe the methods I used to add color and texture.
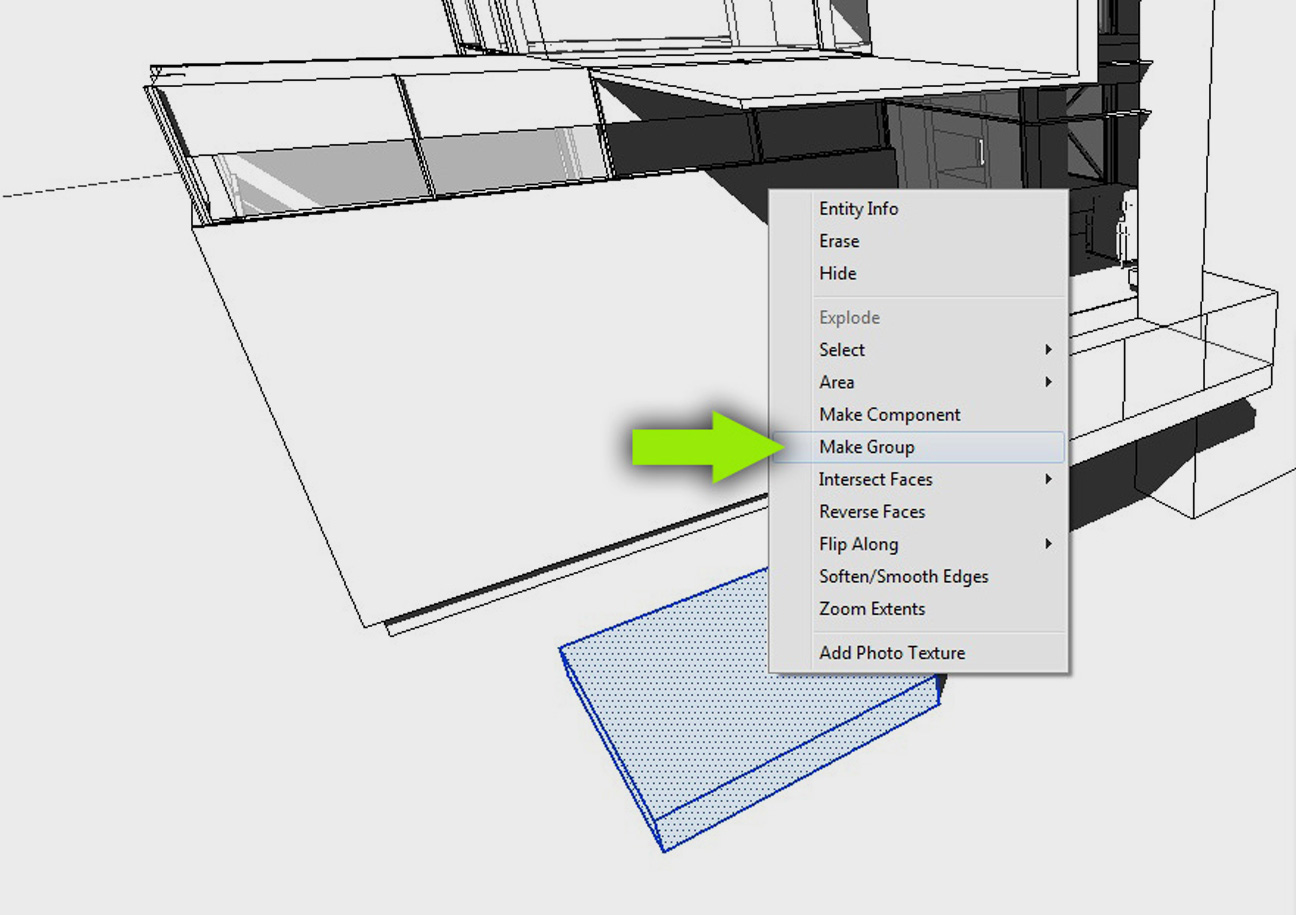
1) First, create a square surface and then extrude it a little to create a cube. Then select all of the cube surfaces and create a group so that everything can be rotated easily.
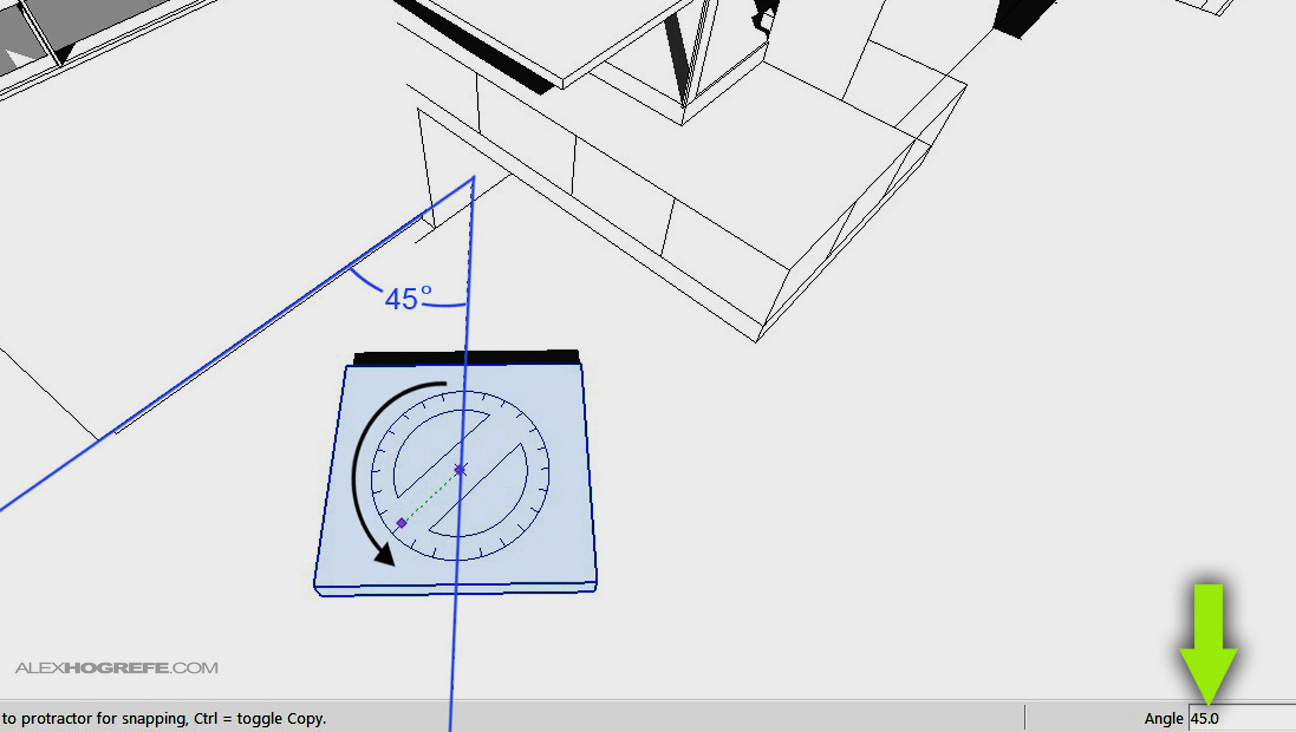
2) Next, rotate the cubes 45 degrees around the z axis. The surface of the cube will be used to set the view. Essentially, you want the cube at this step to be at a 45 degree angle to your model. This will make more sense later on.
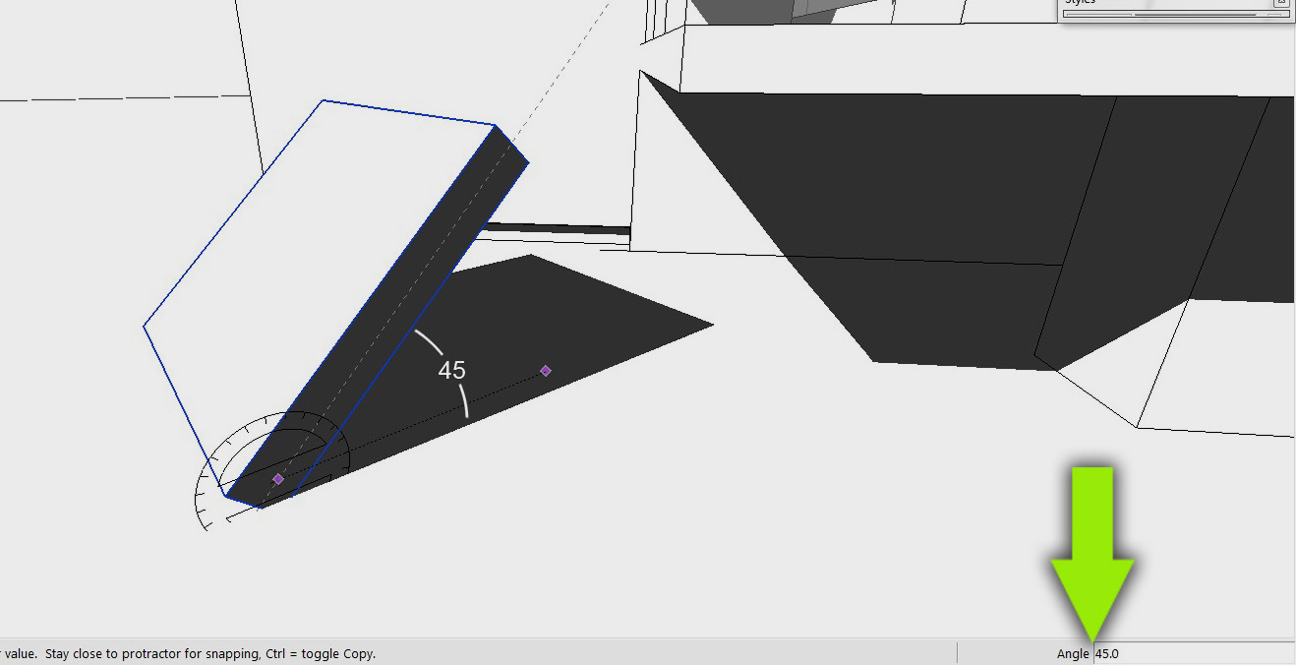
3) Rotate the cube up along the x axis so that the front face is slanted at a 45 degree angle as shown below.
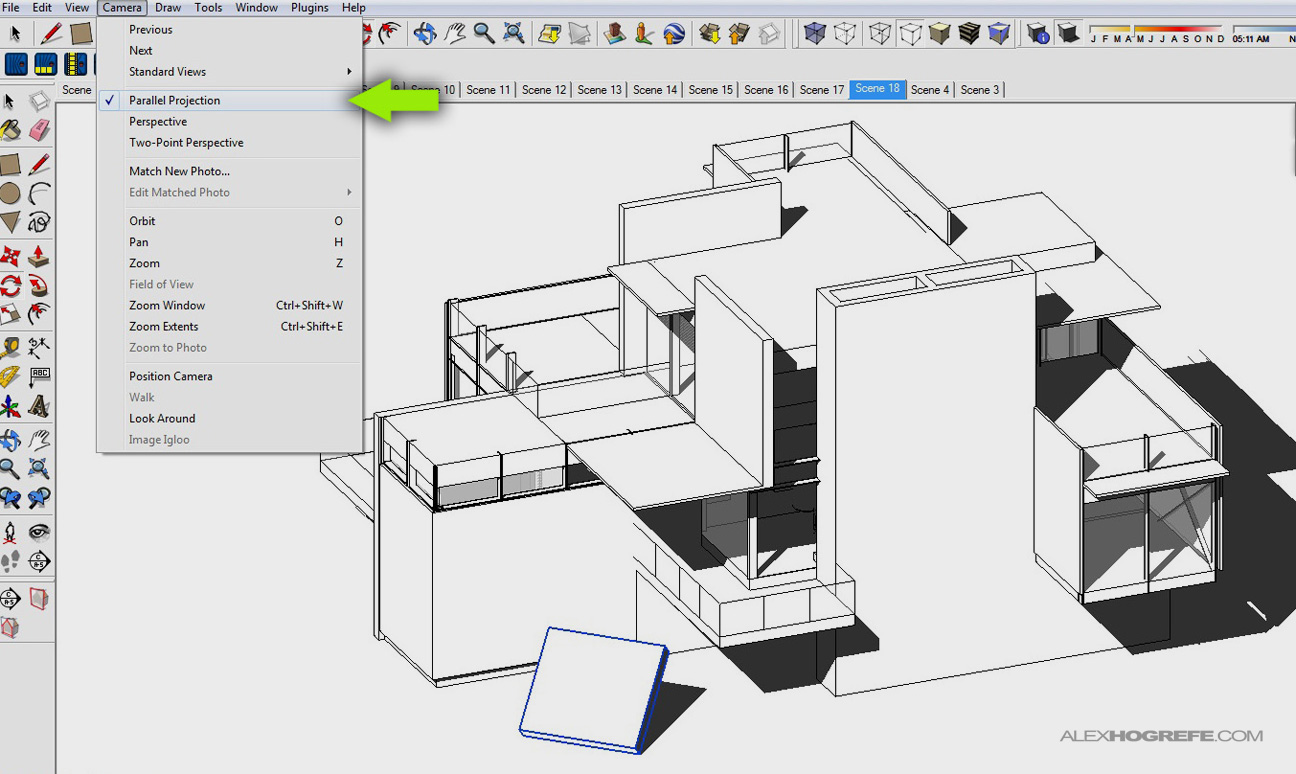
4) I need to switch from perspective to parallel projection. To do this, go to “Camera>Parallel Projection”.
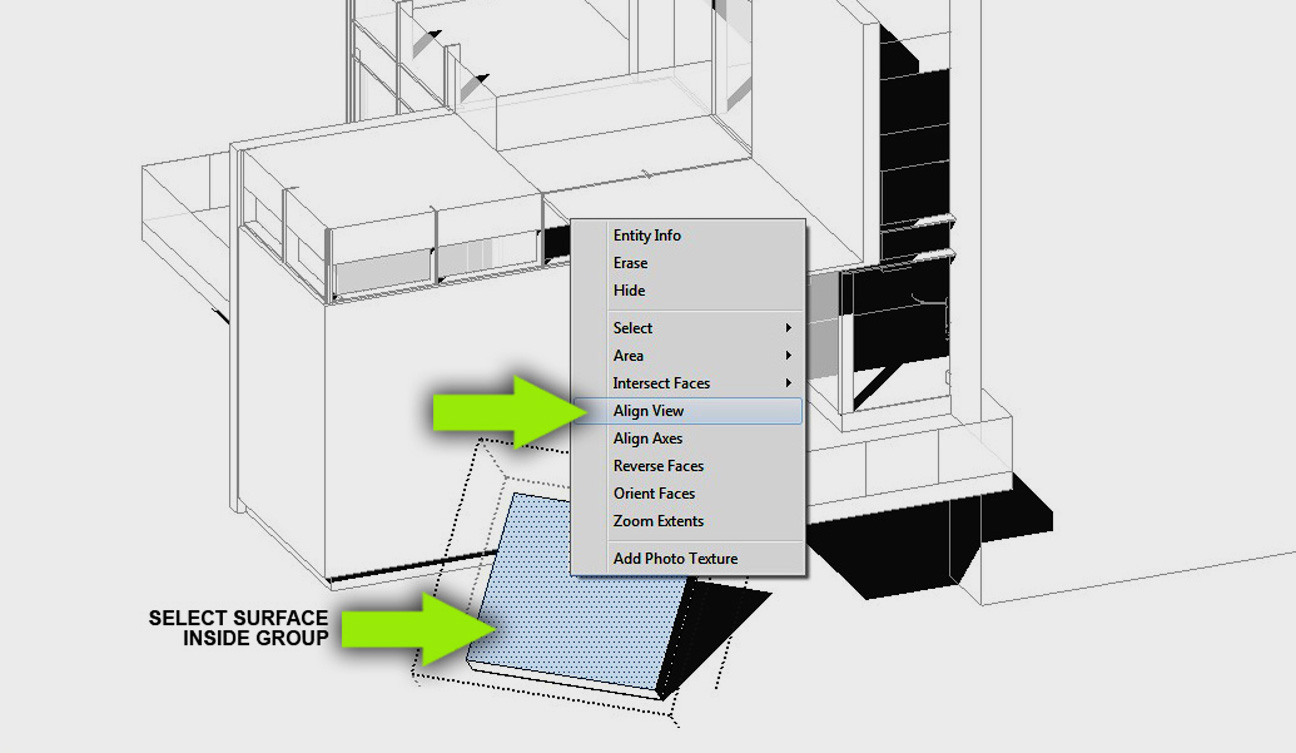
5) With the camera set to parallel projection, I now want to align the view to the surface of the cube created earlier. Simply double click to enter the cube group, select the front surface, right-click and choose “align view”.
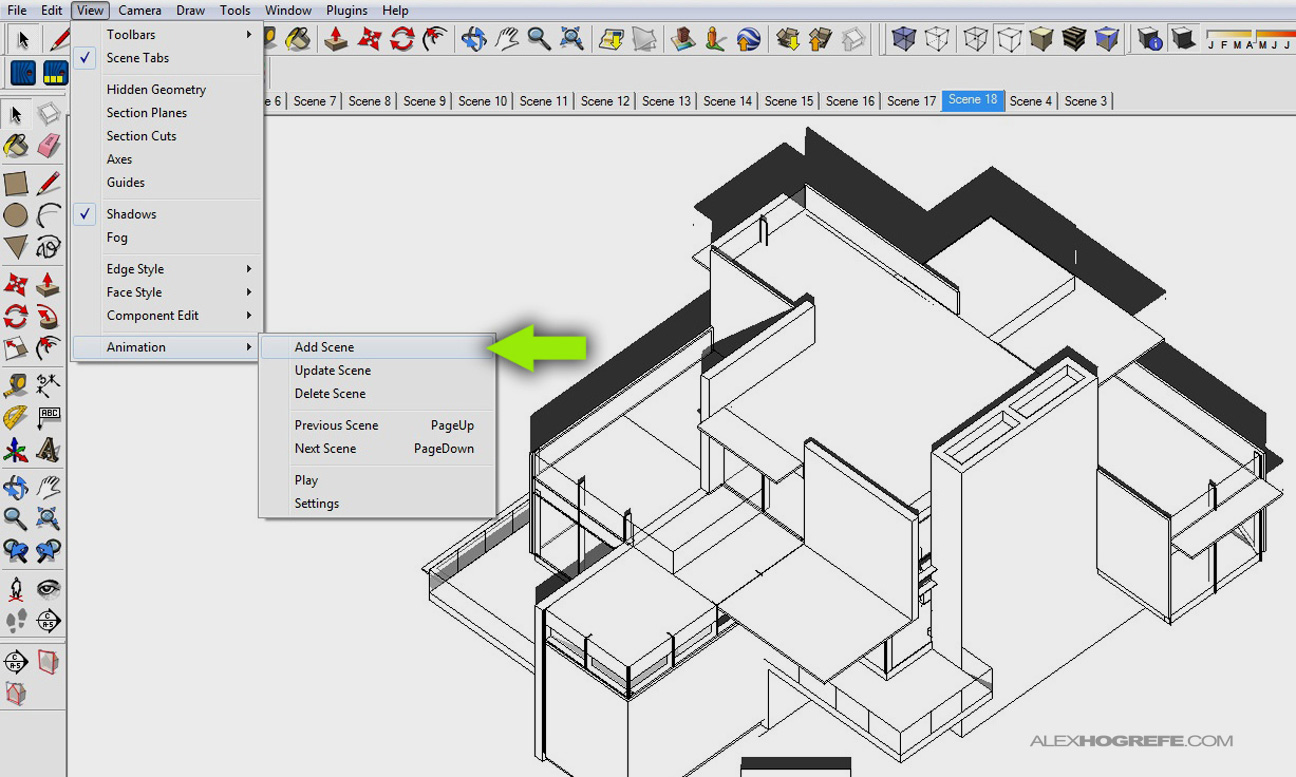
6) Go to “View>Animation>Add Scene” to save this view.
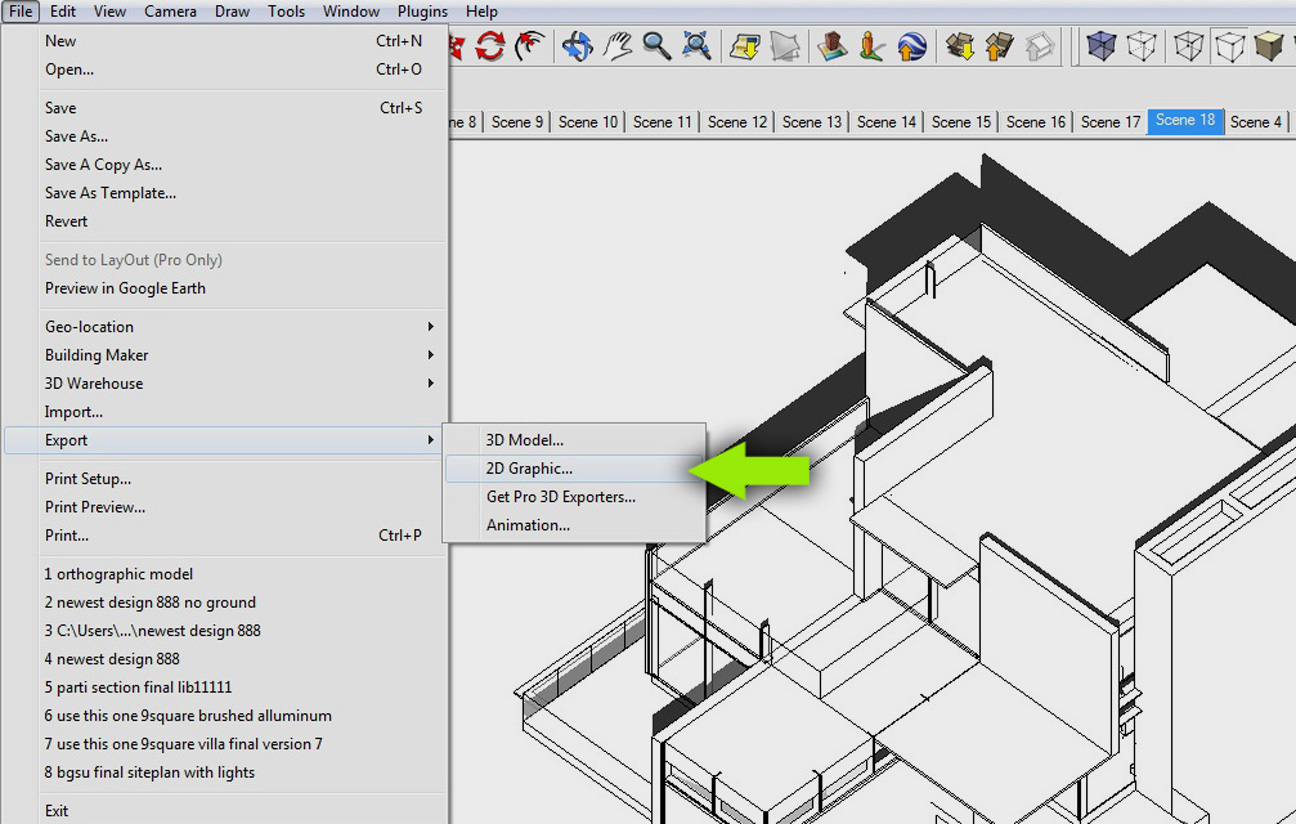
7) I now need to export the model as a 2D image to continue the process in Photoshop. Choose “File>Export>2D Graphic”. I typically save the image as a JPEG at a width of 4500 pixels.
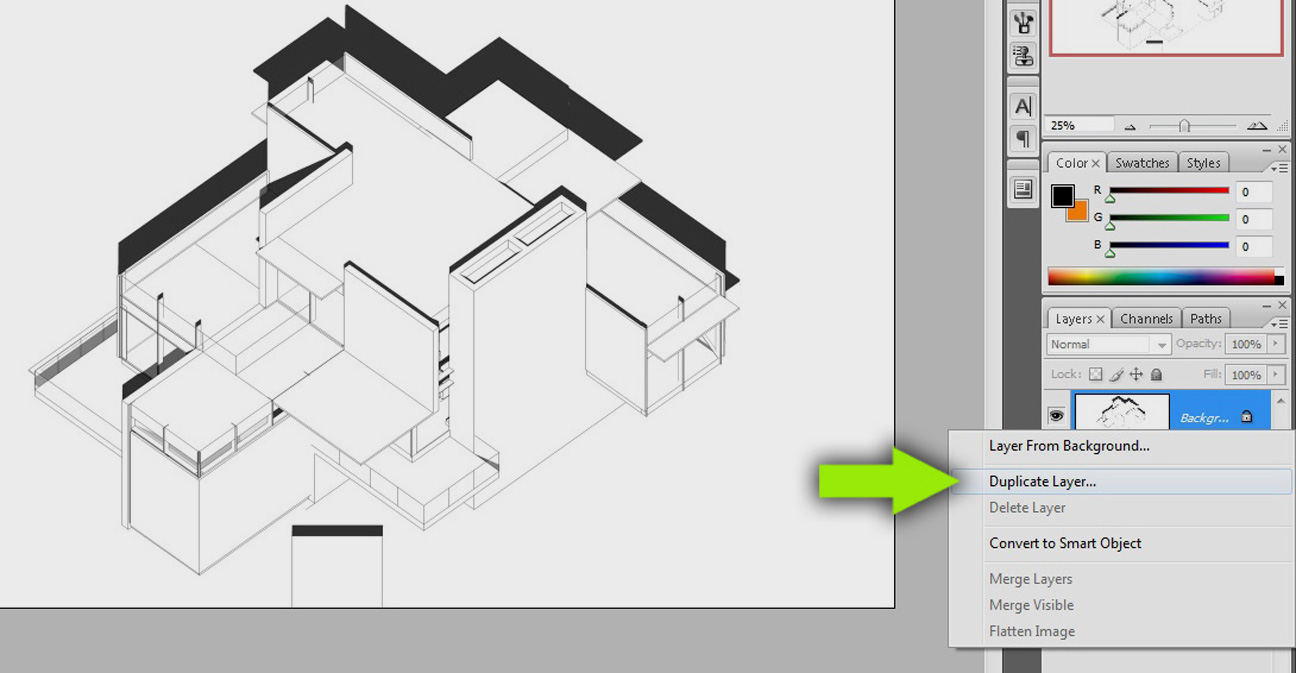
8) Open the exported JPEG in Photoshop. Right-click on the background layer and “Duplicate” the layer.
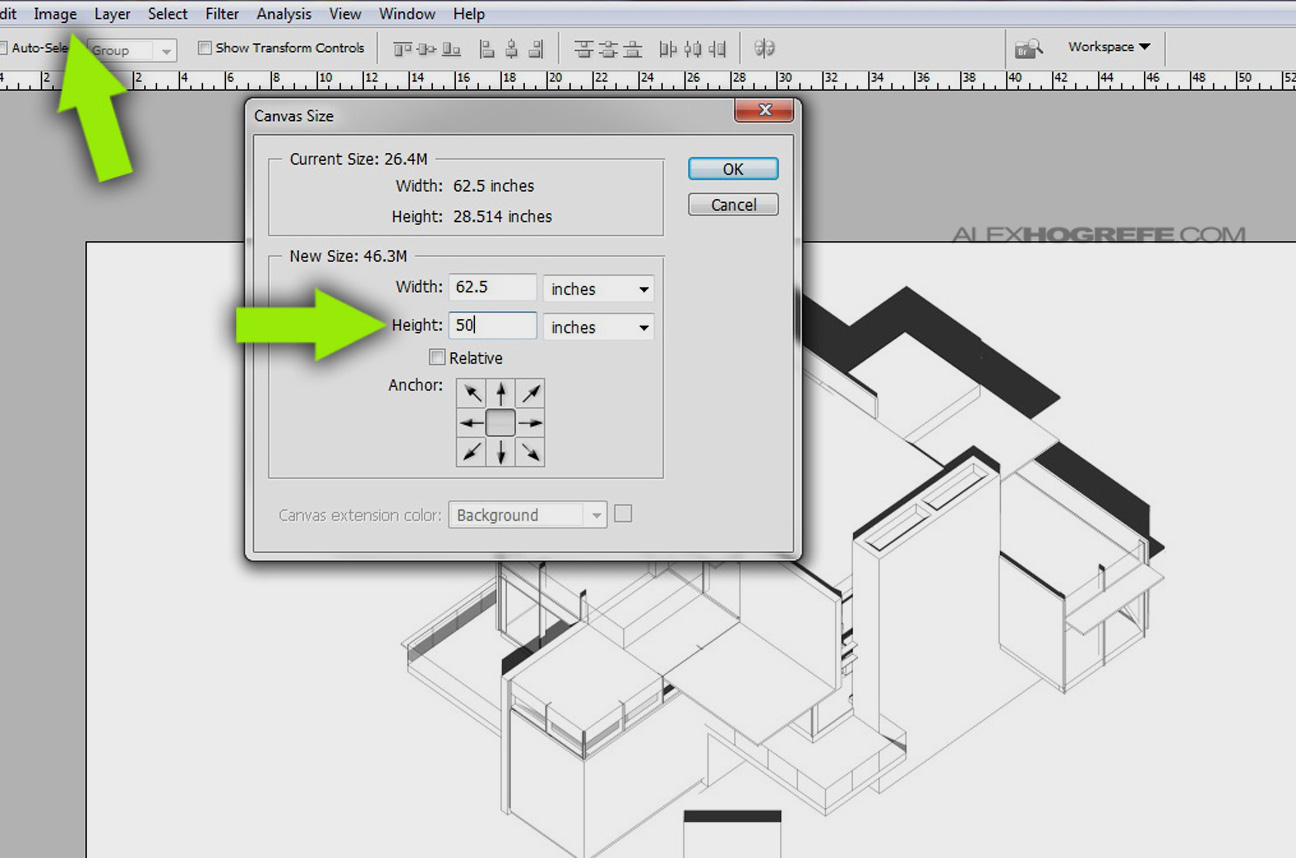
9) I will be stretching this image, so I need to increase the canvas size to make room for the larger image and avoid having the line work go off of the page. Go to “Image>Canvas Size”. In the dialogue box, increase the height to about double of what was originally there. I went from 25 to 50, however, your image may be different. It is not necessary to increase the width.
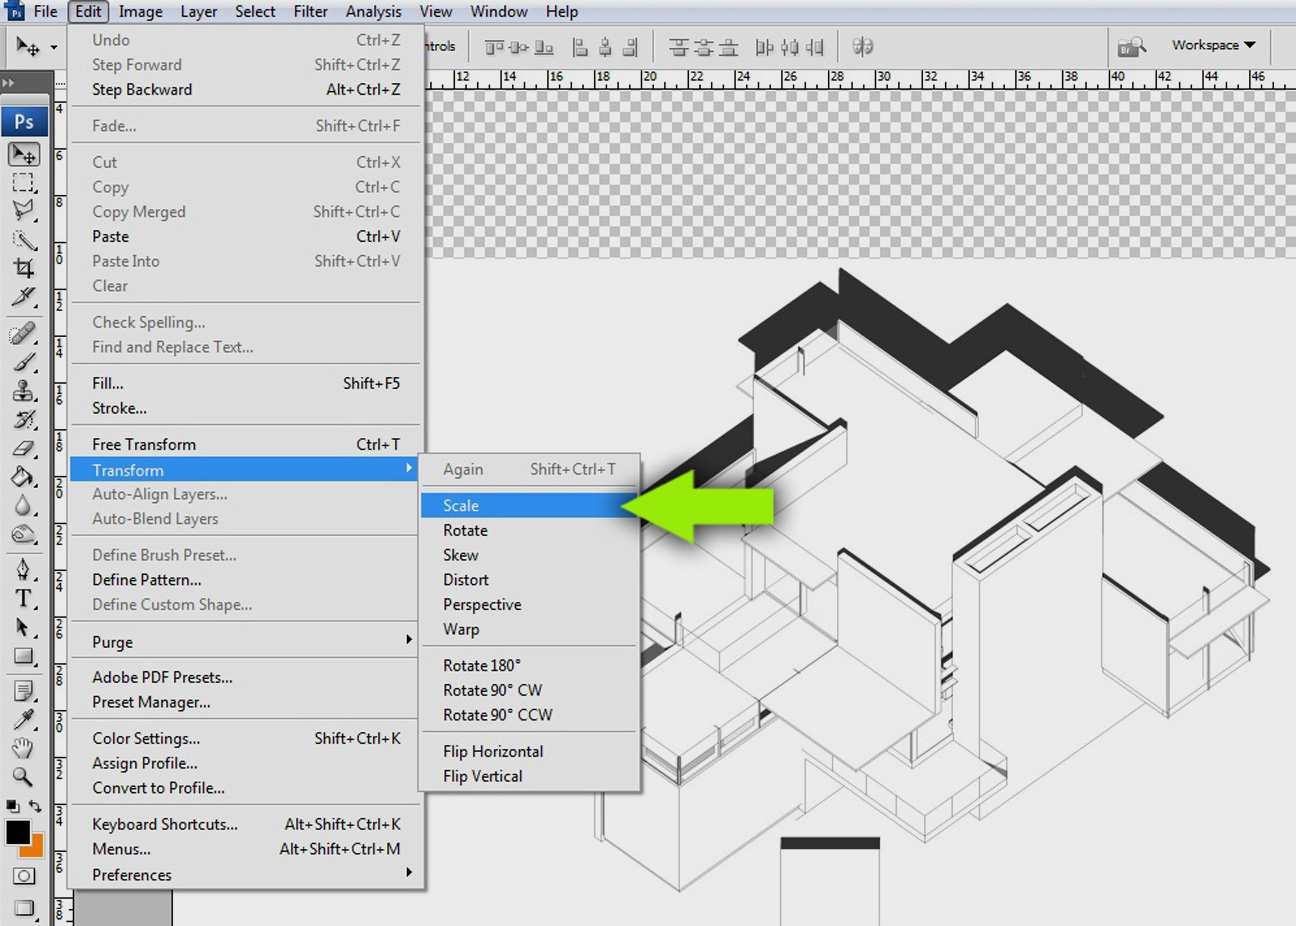
10) In the layer palette, select the duplicated layer. Then go to “Edit>Transform>Scale” at the top.
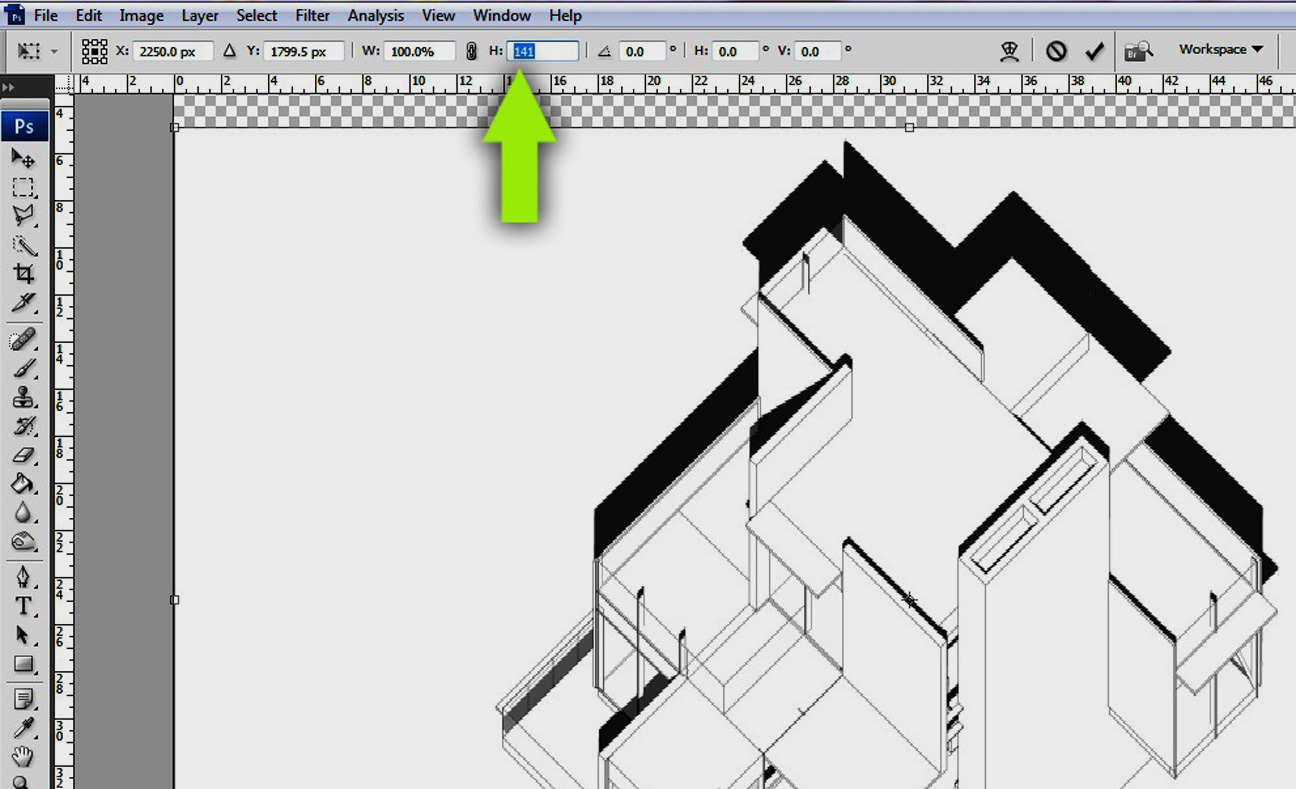
11) At the top next to the “H”, change the number from 100% to 141.42135%. The image should now be an almost perfect plan oblique drawing. Why 141.42135 you ask? If you look at an isosceles right triange, the ratio of the sides are 1 : 1 :  . The square root of 2 equals 1.41421356. Turn that into a percentage, you get 141.42135%.
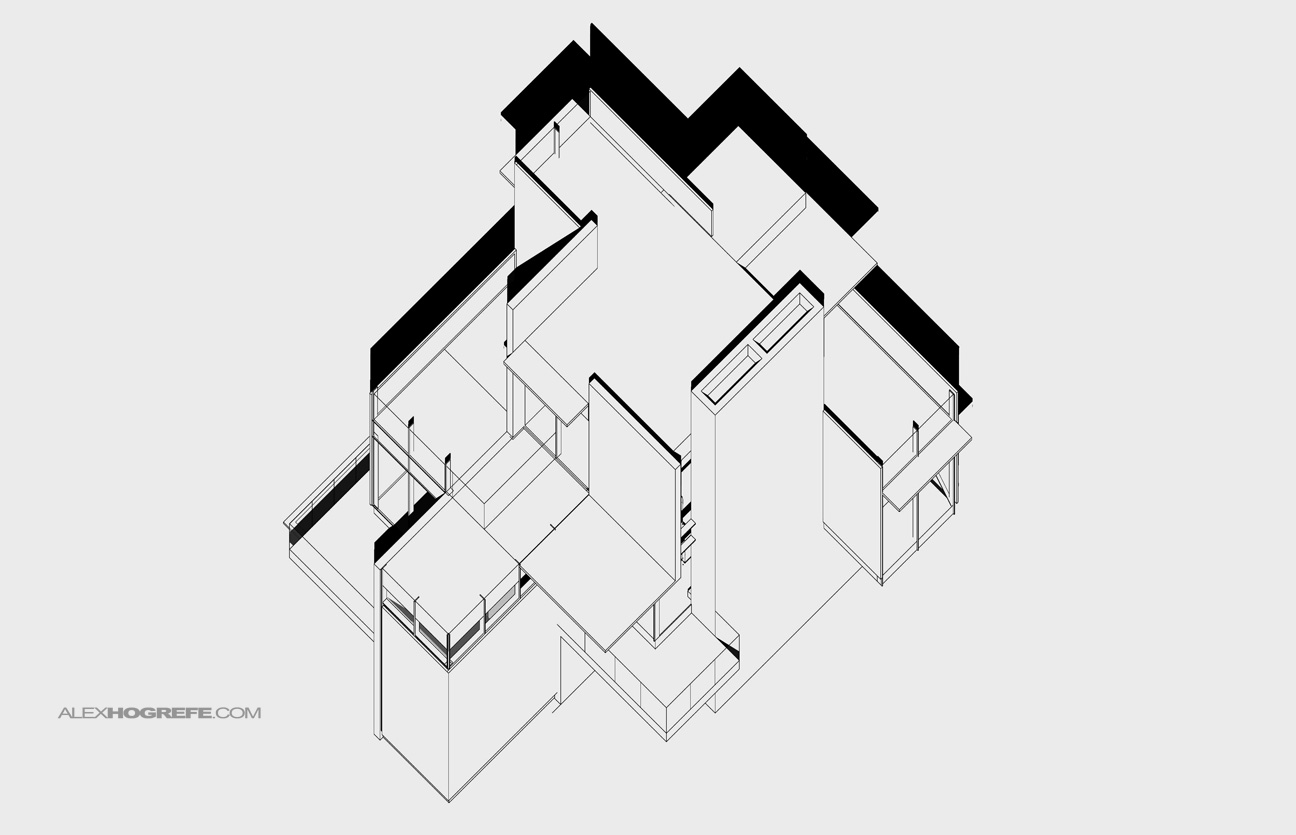
Below, the final plan oblique image.
One thing to note is that the above image is still not to any particular scale. However, this can be achieved by exporting a scaled image of the floor plan from a program such as AutoCAD or Revit, then scaling the plan oblique image to match the exported plan in Photoshop. Check back later for the final post processing of this image involving adding color and texture.



Wow, nice tips 😀
thank you thank you thank you thank you!!!!!!!
thats very cool step to drawing obligue plan from SU,..thanks!
This tip is well done. Thank you.
nice alex
great! i suggested to the sketchup's team to include also the cavalier axonometry, but several others did not thought it useful.
Alex, this is a nice look – something you see particularly in architecture books where these kind of images are sometimes section cuts or exploded axonometric drawings (Japanese houses spring to mind). Could you not skip all the cube building/aligning in the first few steps simply by rotating to roughly the correct angle, switching to parallel projection, and then clicking the 'iso' view on the Sketchup Views Toolbar? It's worked for me!
@Alex,
When you switch to iso mode, it actually rotates the view vertically to something like 30 degrees instead of 45 degrees shown above. Therefore, if you take the iso view into Photoshop and stretch it the 141.421%, you won't get a true plan oblique drawing.
Thanks Alex for your nice and detailed explanation!! It really helps!!
Alex, I just came across your website looking for some rendering tips and you have a lot of useful information here. Your work in college at BGSU was awesome…and still is. I knew you would do well and I am glad to see you are now sharing tips and helping others with your tutorials. Thank you and I look forward to seeing more. Good luck to you. Joe Lis
Joe,
Thanks, its been a while. I hope all is well. Take care
I'm modeling in Rhino, and when I export to .3ds and import into sketchup, every surface has a diagonal over it…how do i get rid of this? :/
I was searching about this technique … Thanks Alex
Hi Alex, thank you for this great tip. what you explain here works for 45/45 oblique. is there a way to do the same for a 30/60 oblique?
Wonderful!
Thank you sharing.
I’m trying to do that but my model is WAAAY too heavy and sketchup keeps shutting down when I try to do the section (via zorro). any tipos?!
useum-quality poster made on thick, durable