I tend to use a lot of line work generated by Sketchup models as overlays for architectural illustrations. Because of this, it’s often crucial that the line work in my Sketchup models read clearly and appropriately. Before exporting the line work, there are a few techniques that I use to clean up the models to get rid of unwanted line work as well as add lines in areas that need it. While these techniques are somewhat basic, I still want to show these steps to help clarify an area of my workflow that I don’t talk about much.
Soften/Smooth
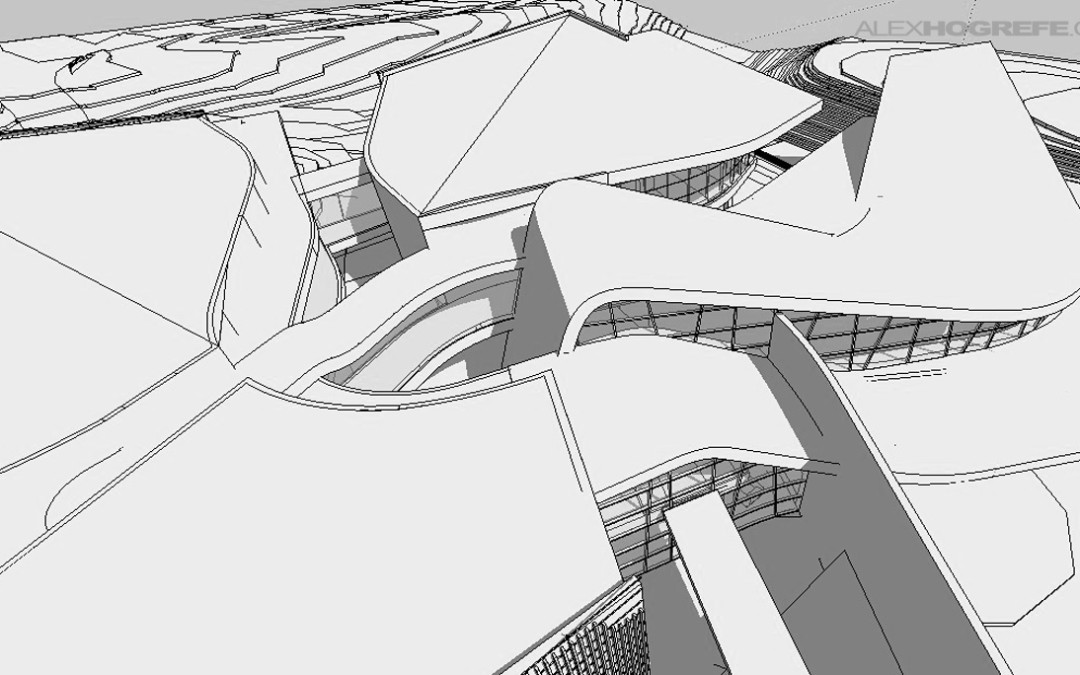
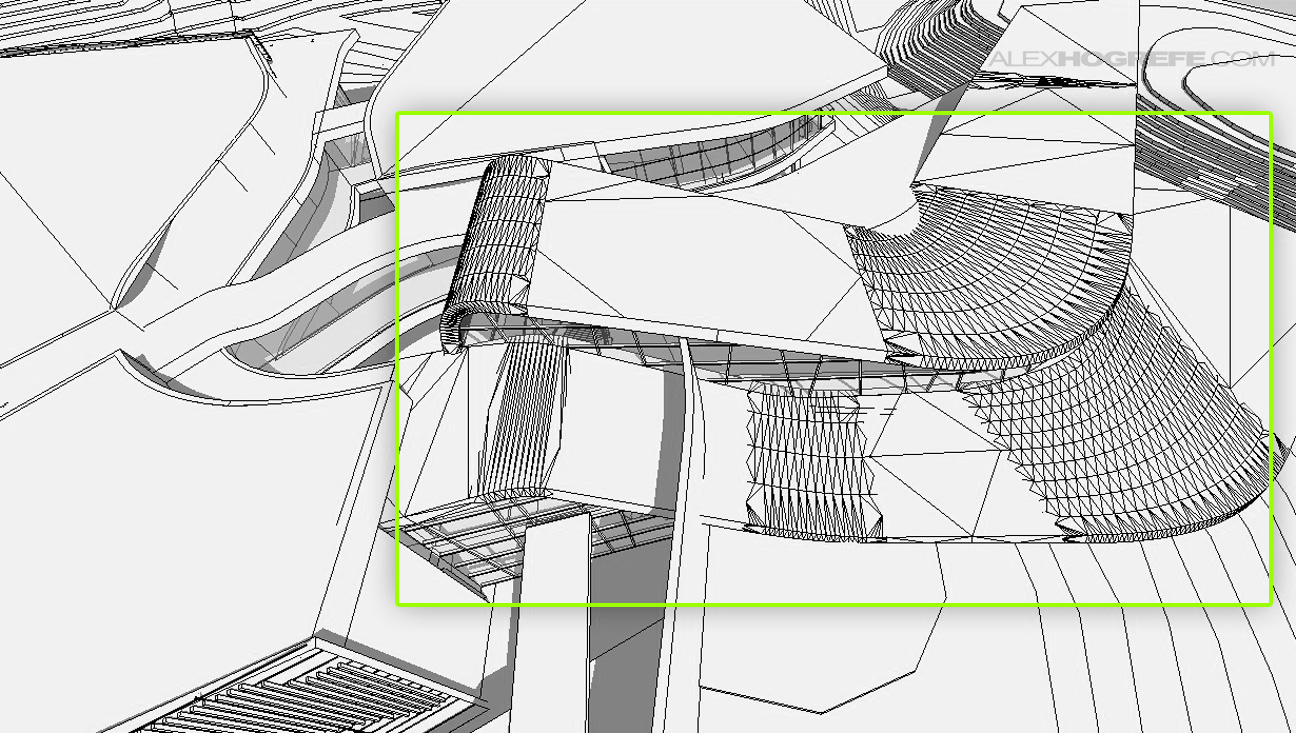
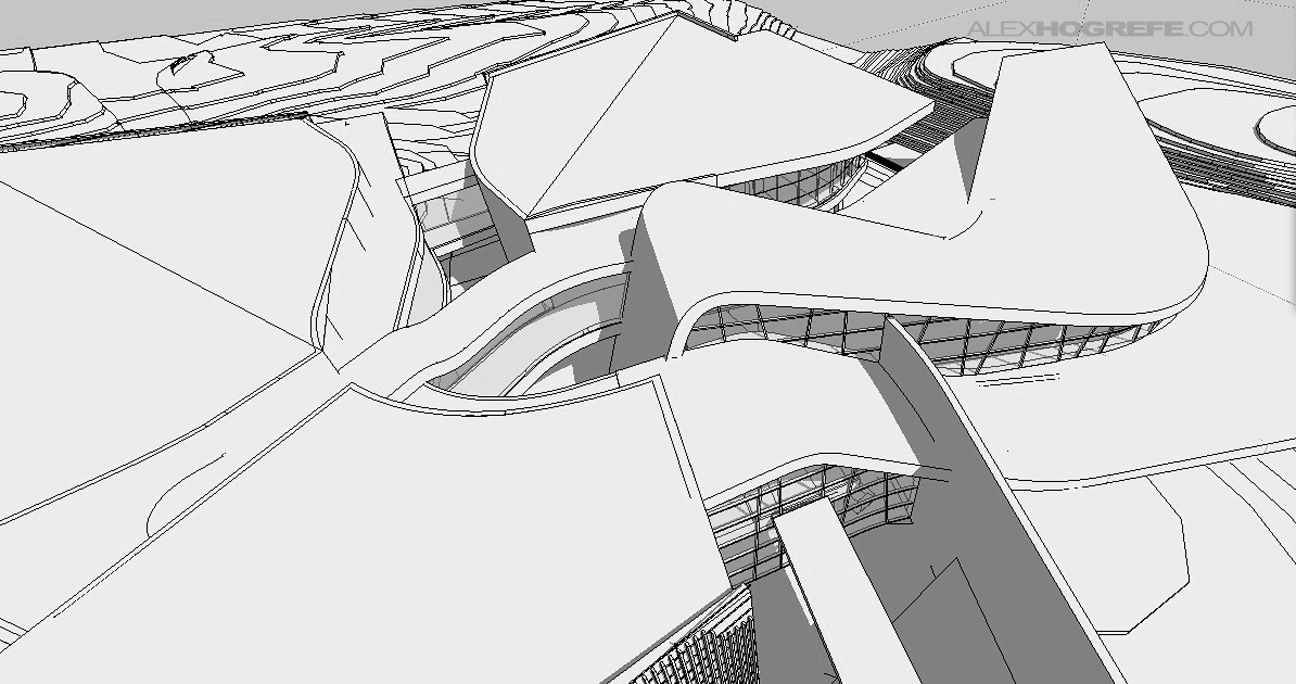
This is something that I use on a daily basis. It is especially useful when importing geometry into Sketchup from other modeling programs. For the example below, I want to cleanup some geometry that was originally modeled in Rhino, then imported into Sketchup. You can see that the geometry is complex, and has been triangulated in many areas. The line work is confusing, distracting and not suitable for presentation.
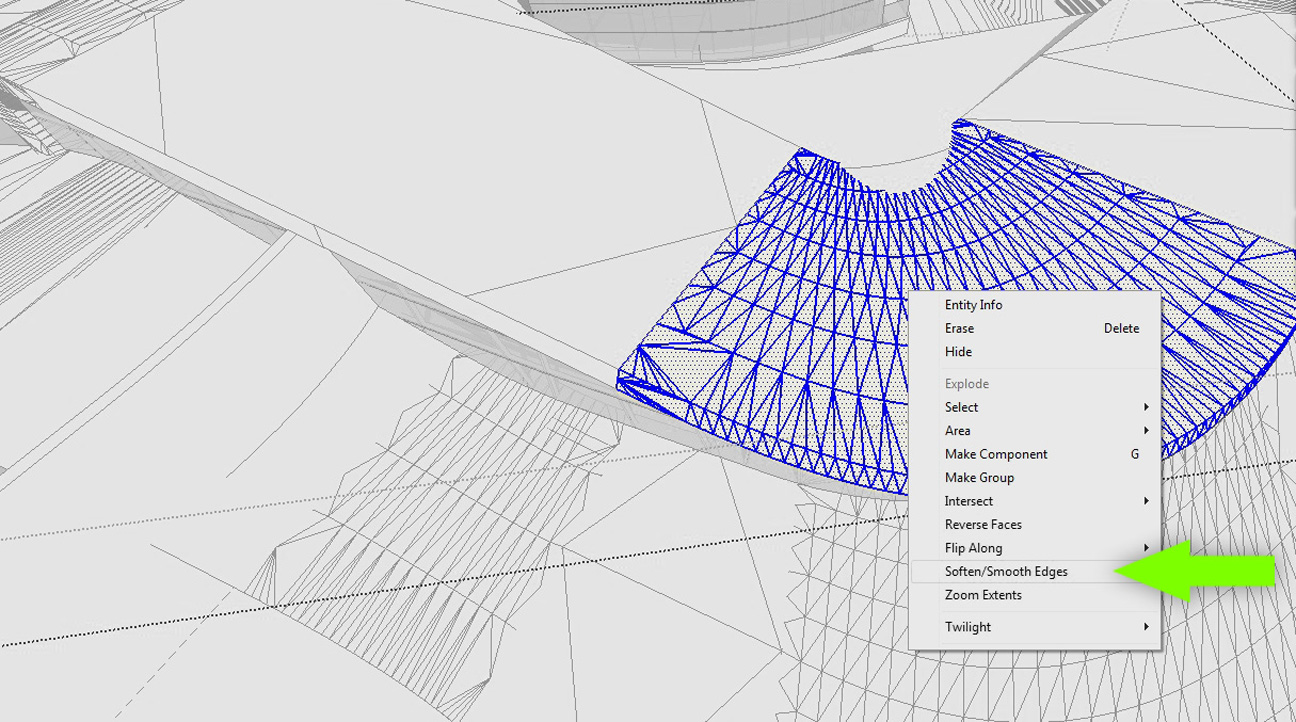
1. This can be cleaned up in a matter of minutes. First, select the surfaces that need to be cleaned up, right-click on the selection, and choose “Soften/Smooth Edges”.
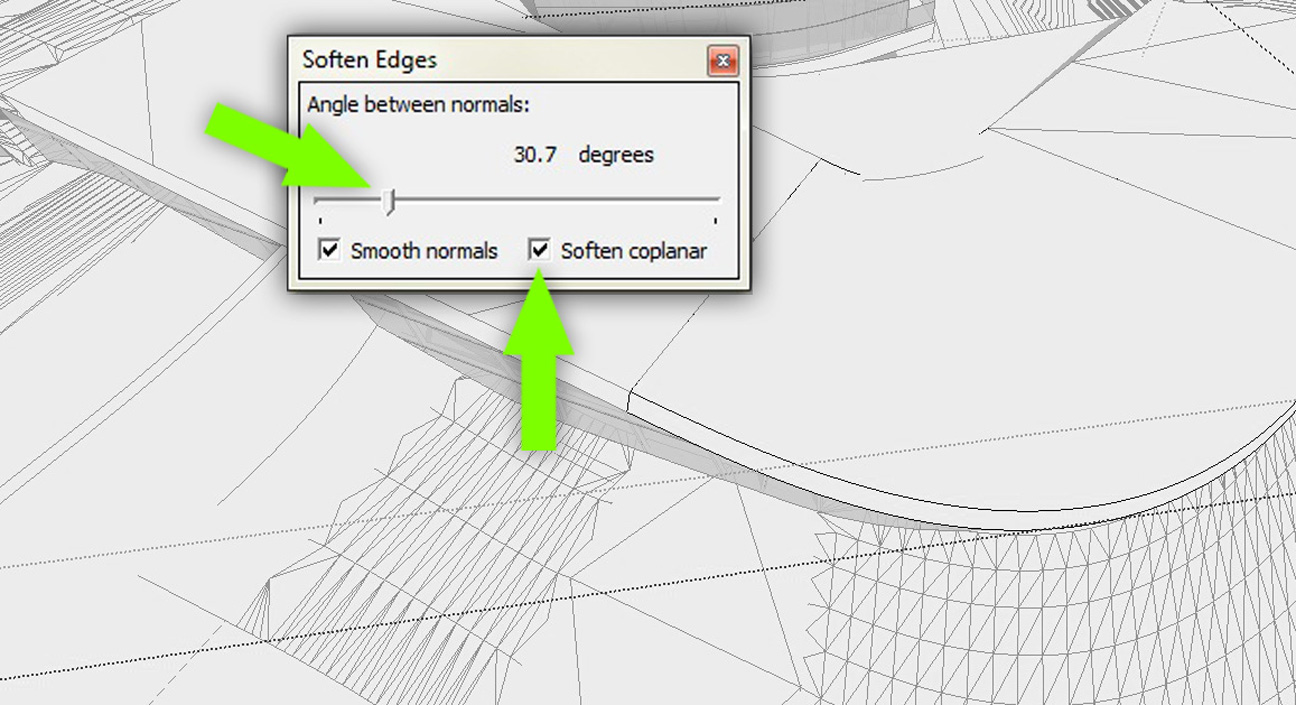
2. The “Soften Edges” dialogue box will appear. Check both the “Smooth normals” box and the “Soften Coplanar” box. Then adjust the “Angle between normals” slider until the geometry is cleaned up.
The form of the roofs read much clearer now and don’t have the appearance of being imported from another program.
PROFILES
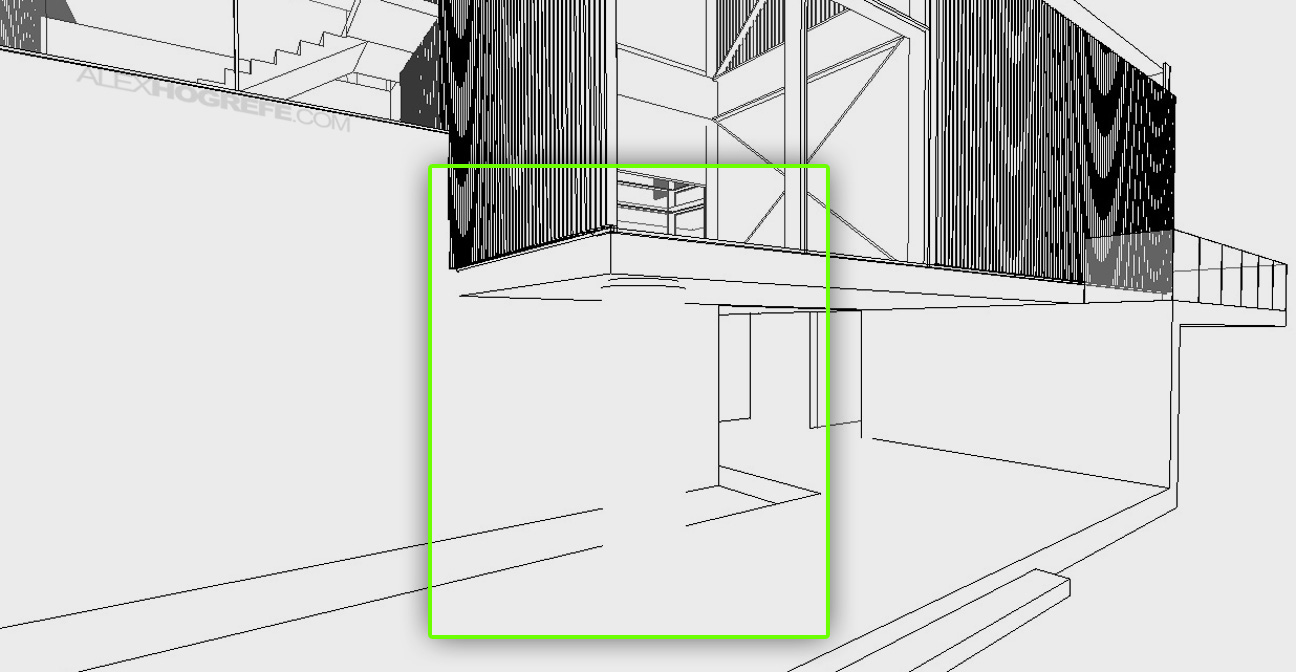
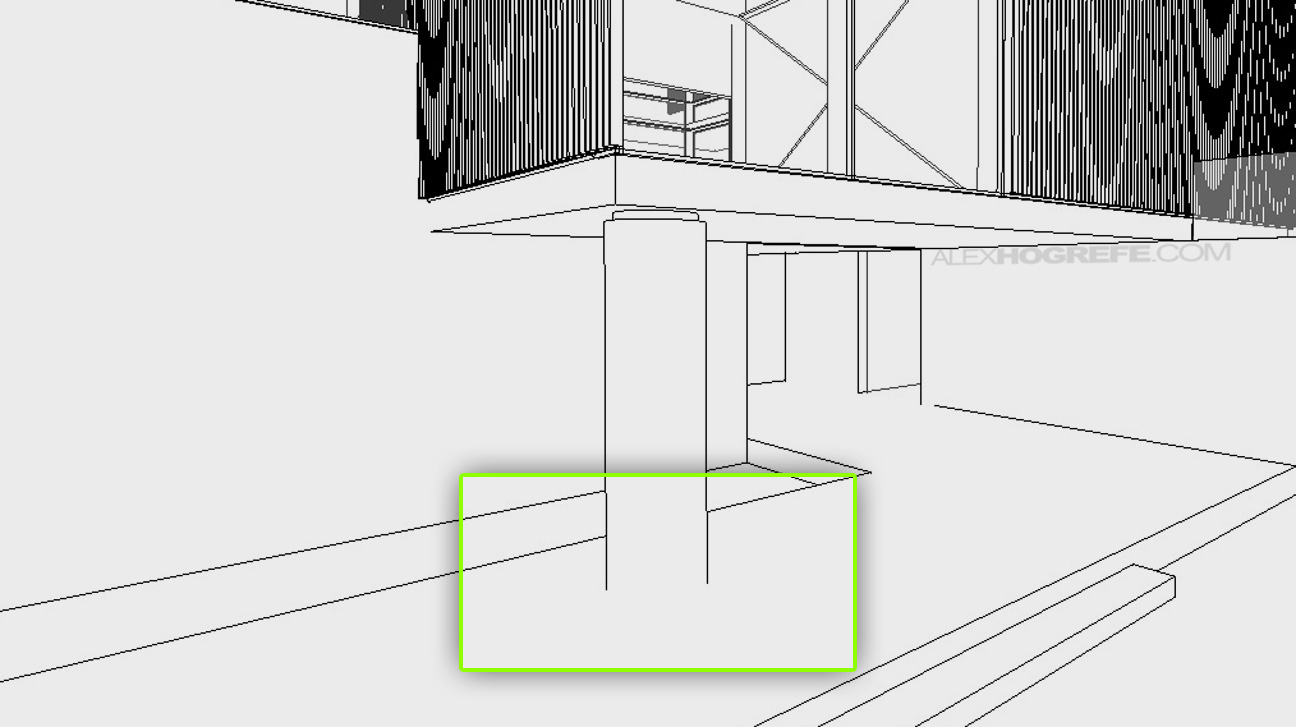
There are certain situations, often with curved surfaces, where Sketchup doesn’t render a line at the edge of the object. For the example below, the round column is barely noticeable. There is an easy way around this by turning on profiles.
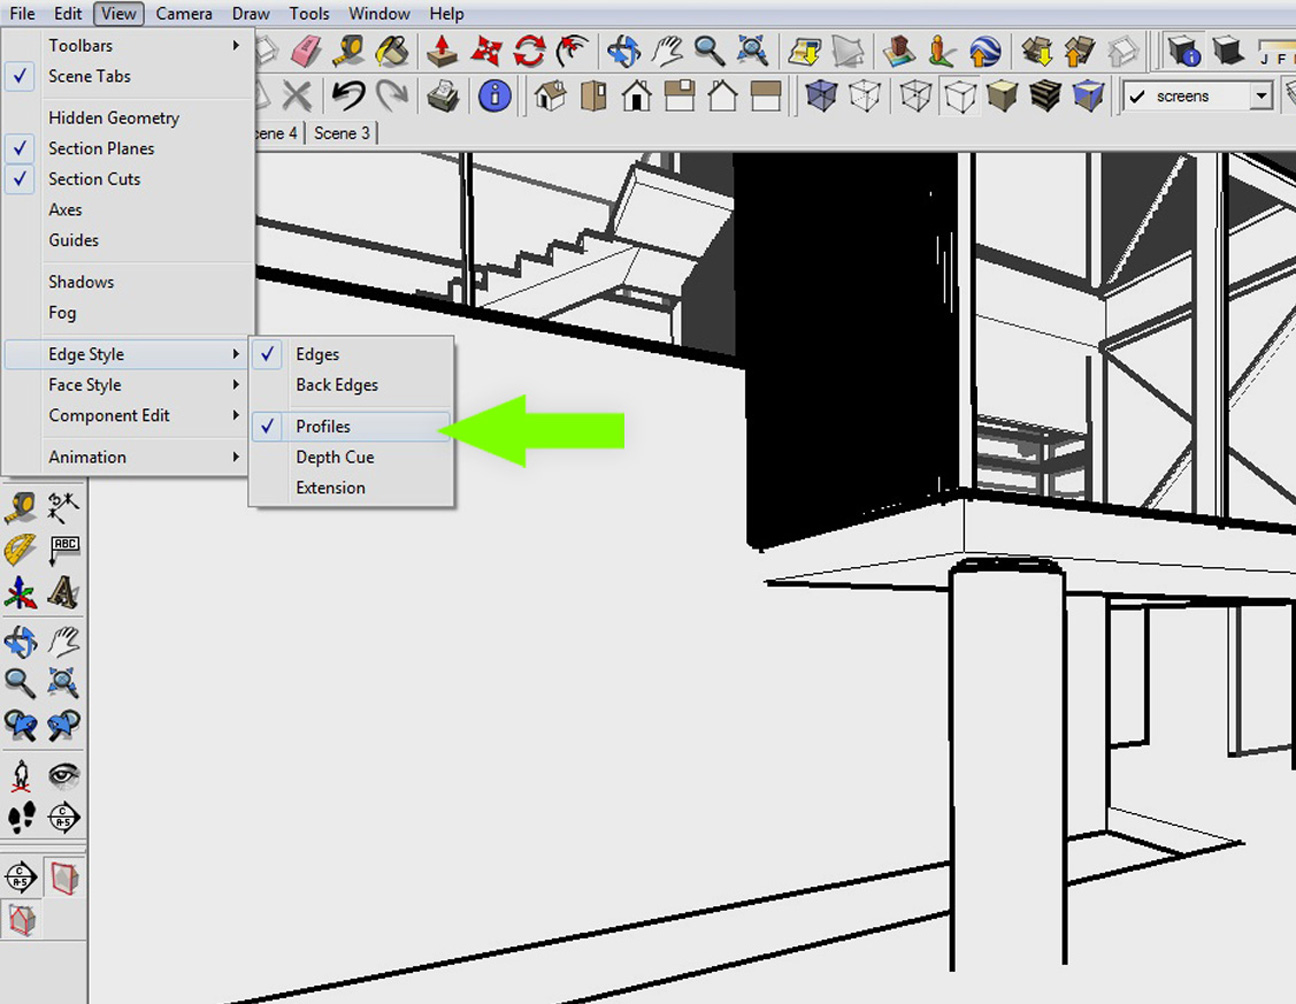
1. To begin, choose “View> Edge Style> Profiles”.
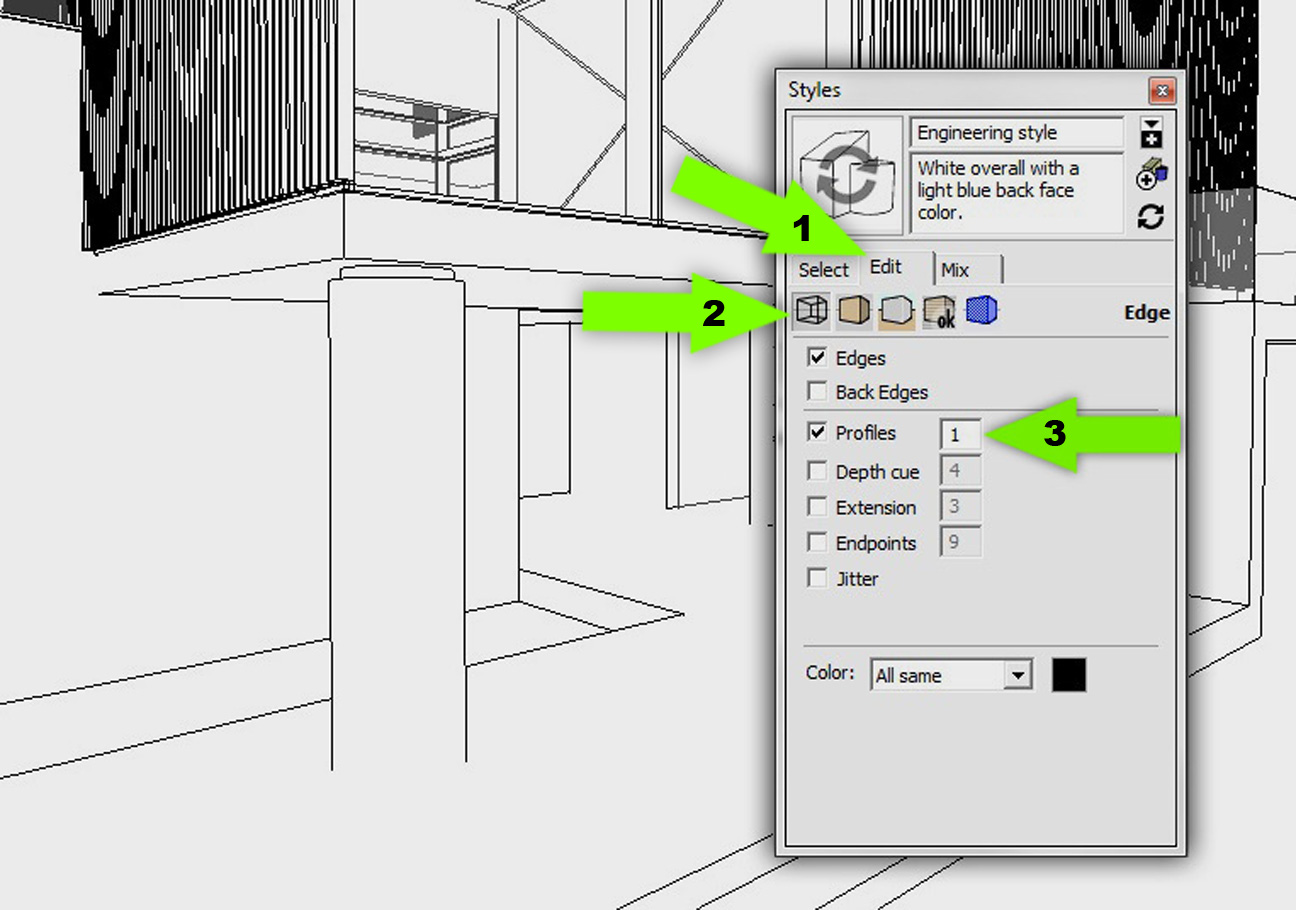
2. You will notice that the profile lines are much thicker than the rest of the line work, however, this can be adjusted. Choose “Window>Styles” at the top to bring up the Styles dialogue box. In the Styles dialogue box, first choose the “Edit” tab, then select the “Edges Settings” box (wireframe icon). Finally, change the profile number to “1” pixel. This will give the profile lines the same thickness as the rest of the line work.
Intersect Faces: The above technique solved part of the problem with the column, however, the bottom edge is still missing. This is due to the fact that every part of my Sketchup models are made up of groups. This leads to edges missing where planes intersect with one another such as the case with the column.
1. A temporary solution that I use a lot is the “Intersect with Model” option. I say that this is a temporary fix because I’m only doing this for representational purposes. In order to keep the model cleaner and more editable, I often don’t save any “intersect with model” changes.
Select the geometry that is missing the line work. Right-click and choose “Intersect Faces> With Model”.
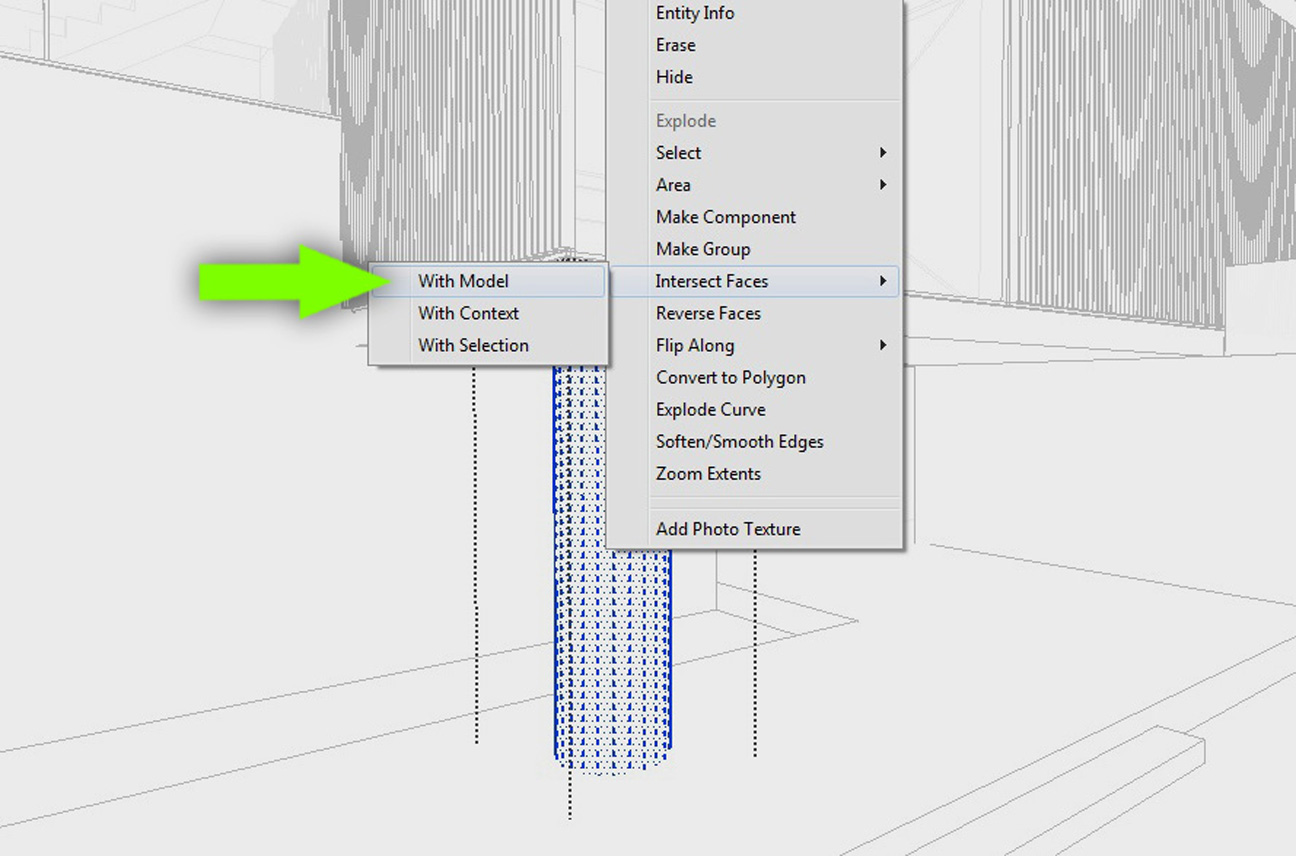
The column is now clearly represented. In this case, it would have been easier just to extrude the bottom of the column up to the surface. However, there are many situations where the geometry is more complex, and the intersect faces options can save a lot of time.


Thanks 🙂 Great tutorial.
I use a plugin that's worked really well for me. It's called CleanUp and it usually cleans up the extra lines really well with just a click of the mouse(at most 2). Definitely worth checking out.
I tried to post the link, but I don't think it let me, so just look it up on google. Great little tool that saves a lot of time.
Really nice work.
Registry Cleaner
Hi,
Why do you use Sketchup? It's free but apart from that why? I haven't spent much time with it but it seems that it is not as precise as Rhino for example. I guess for the purpose of illustration sketchup is good enough right?
I must also ask why if output illustration is the goal why not just use the Rhino model and use the Make2D command and make appropriate adjustments through Illustrator?
I can however see this being very useful if parts of the model were modeled in rhino and parts modeled in sketchup. this has been a great help as some of those in my office work in Sketchup and I work in Rhino…the ability to go between the two is certainly an important one. I'm curious to discover and work with a seemless transition to allow various types of illustrative output through either program, be it a looser SKP image, or an illustrated MAKE2D ->Illustrator diagram/drawing.
In either case, great work…while I don't use sketchup, your techniques and illustrative ideas transcend the programs and are certainly an inspiration.
Thanks Alex! This couldn't have come at a better time…weird how the past couple says I was distraught with rhino imported into sketchup. I recently imported a Rhino file into sketchup and nearly died when I saw how many artifact lines there were in the sketchup model (and boy did it slow my model down). I will give this a go.
Might I add, I've been utilizing tips from your other tutorials and have taught myself so much. Thanks and never stop these tutorials!
Dan,
thanks for the tip. I have used that in the past, but most of the time, but I prefer making a few manual adjustments so that I have more control of what gets cleaned up and what doesn't.
Zoli ,
I mainly use Sketchup because of the simplicity of its interface. I went through school teaching myself the software, and sketchup was the easiest to start with. It will model about 90% of what I want. The other 10% I use rhino. In terms of precision, Sketchup is as precise as any other program. The only place I could see it falling short is when modeling really complex curves, in which case I would use Rhino.
Lilmac024,
That is another good way to get the same look, but with Rhino. In terms of learning curve, I think its a tougher method because you need to bring in a second program (illustrator) to get the same look. On the other hand, you also get more control of linewieghts and ultimately better line quality. You could import the Sketchup linework into illustrator as well by exporting a Sketchup 2D graphic as a CAD file.
First off, great tutorial. As you stated, though this is a basic function of SketchUp, it's an extremely useful process when generating clean deliverables.
As with the others, I was wondering why you were using SketchUp in conjunction with Rhino. After looking through some of your tutorials, I saw that SU does allow for some very nice layering of images that can be quickly generated with a few option adjustments (xray, line, shadows, etc). Basically, I get it! Though you could do the same with Rhino, laying a render, xray, and Make2D would take a bit more steps. As you said, it's all about efficiency and comfort.
Regardless, amazing work! You're contribution to our field is much appreciated!
Trace or sketch your floor plans for a better understanding of the room. Designer's always plan a room with sketches and drawings. A floor plan will also help avoid constantly moving furniture around the room to find the best position. Graph paper can be purchased at any art/craft store.
Question: When trying to make a line drawing using Sketchup, I try to have all the edges display following your tips but when I edit the edge size under the style menu, it would not allow me to edit it down to 1. 2 is the lowest number that the profile edges would go but it is thicker than the rest of the edges. Can you please help.
Thanks for all the useful tips and more power to you.
Thanks for keeping up all the great posts Alex.
You're making the art of presentation so graspable.
Best of luck on you're work. I hope you keep managing
finding time to feed us with your insights.
All the best from Amsterdam,
Ryan