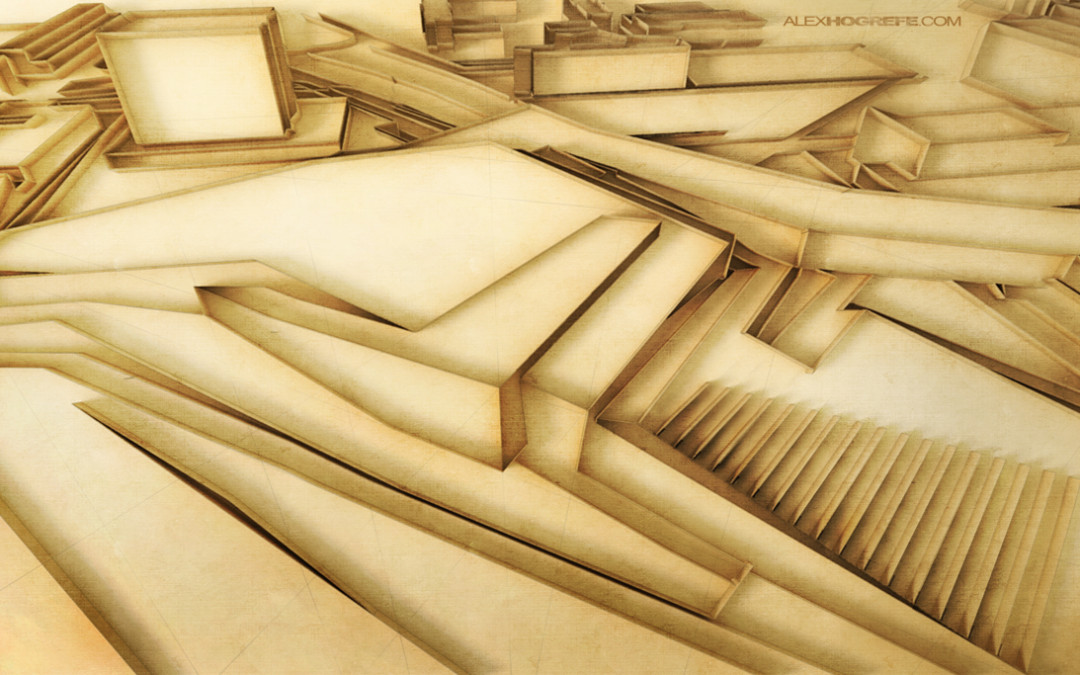
I came across the concept of “quilling” a few weeks back and instantly began thinking how could I translate this digitally to generate a unique architectural illustration for marketing or portfolio purposes. The style had a great look to it and I knew that Sketchup had some plugins that could make the workflow really simple. All you need is Sketchup Pro so that you can export and import AutoCAD files, and the “TIG” plugin called “Extrude edges by Vector”.
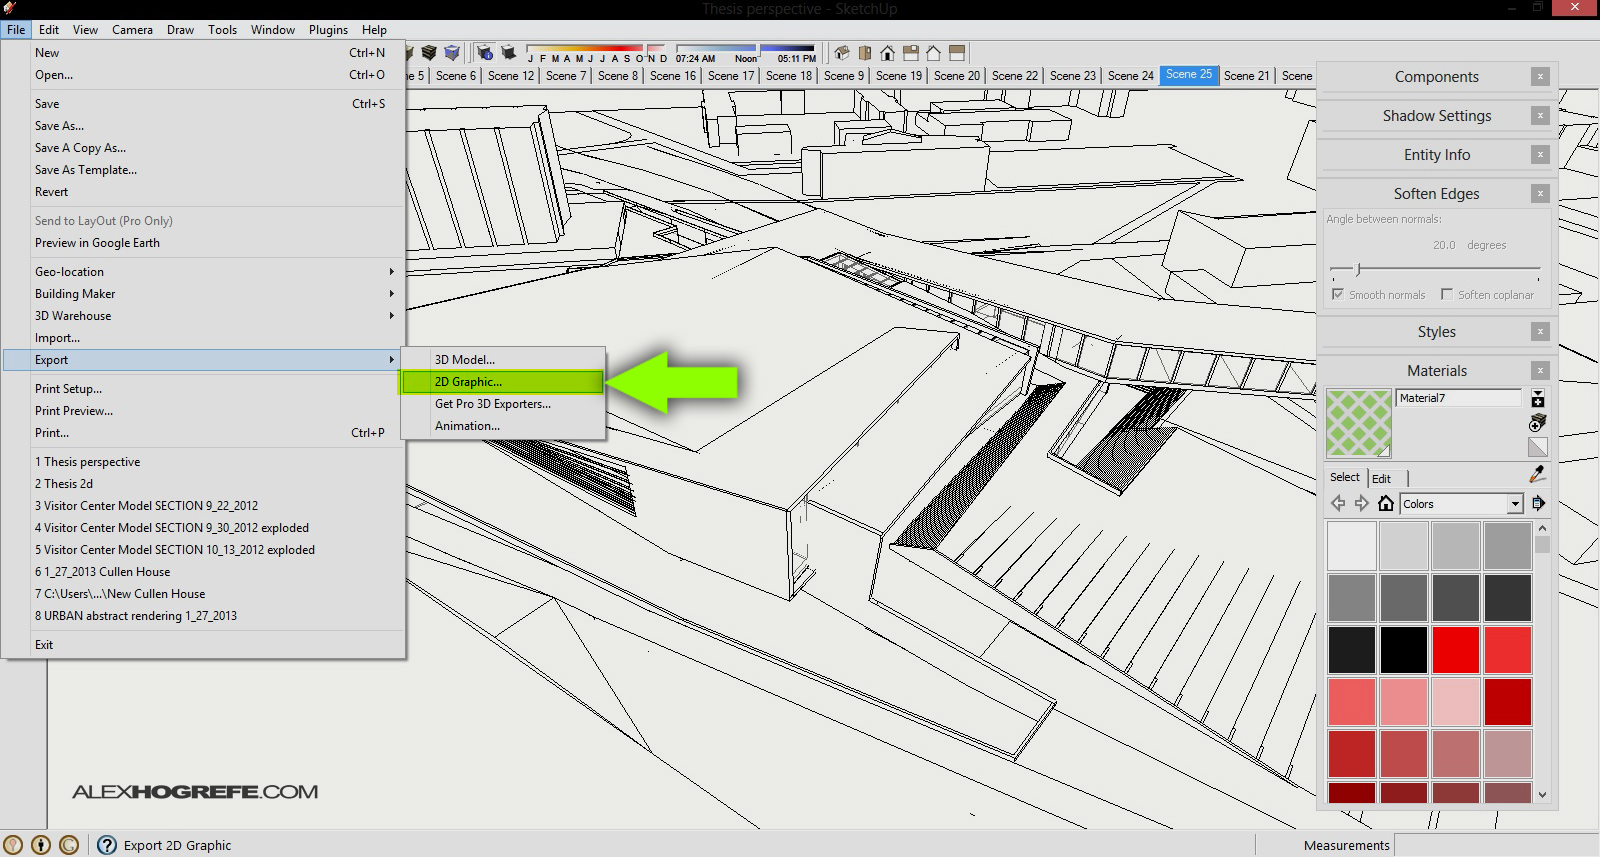
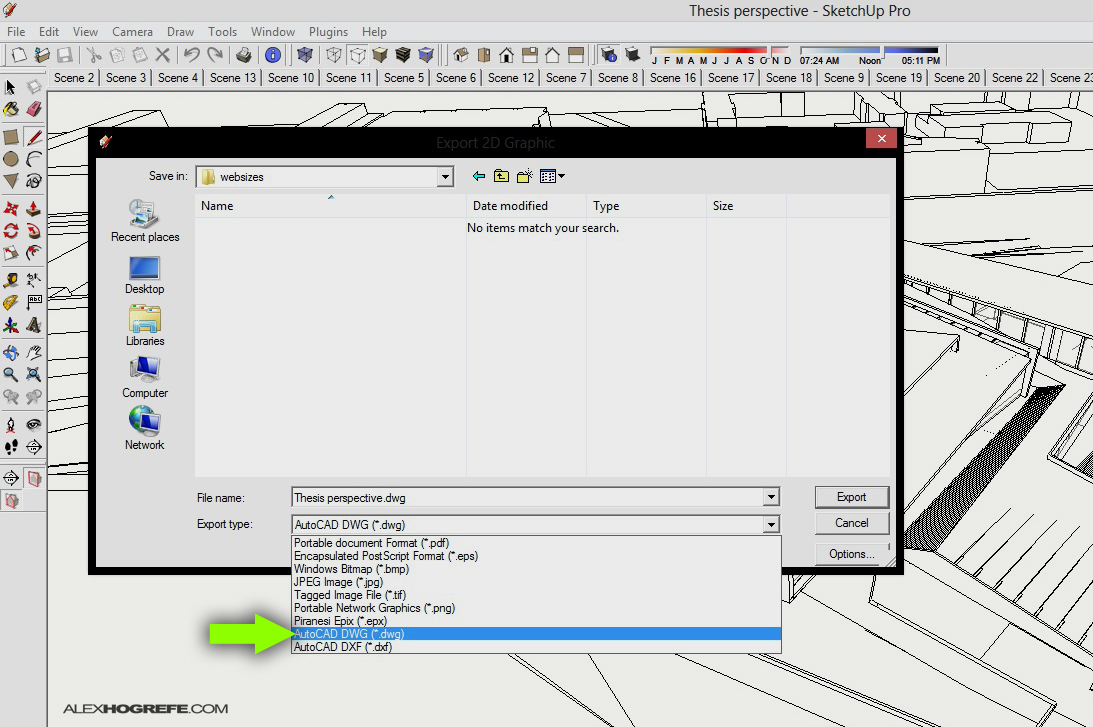
1. The first step is to export a view of the sketchup model as 2D AutoCAD line work. As I mentioned above, you need Sketchup Pro to be able to export AutoCAD files. In Sketchup, choose “File>Export>2d Graphic”. In the export dialogue box, set the export type to “AutoCAD DWG” and then export.
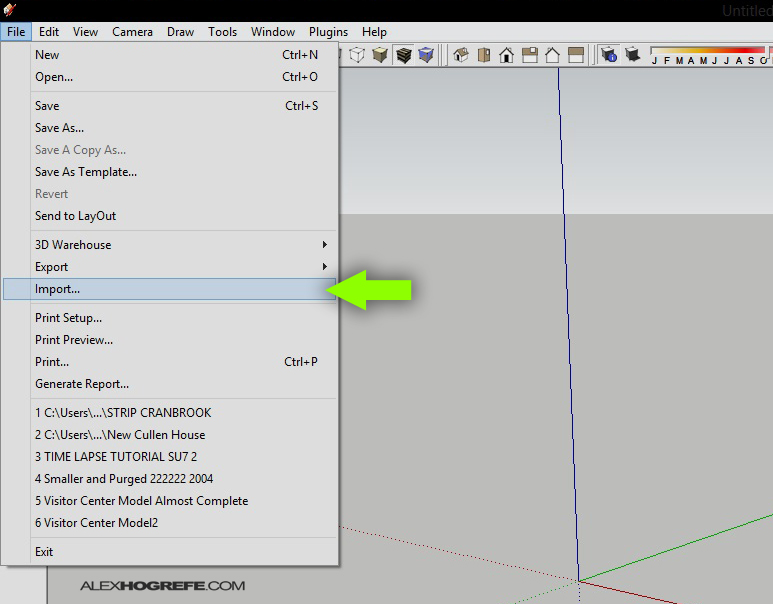
2. Next, start a new Sketchup model and import the AutoCAD file that was just exported in the previous step. Choose “File>Import”. In the Import dialogue box, browse to the location of the AutoCAD file making sure that the file type is set to “AutoCAD Files”. Then import the file.
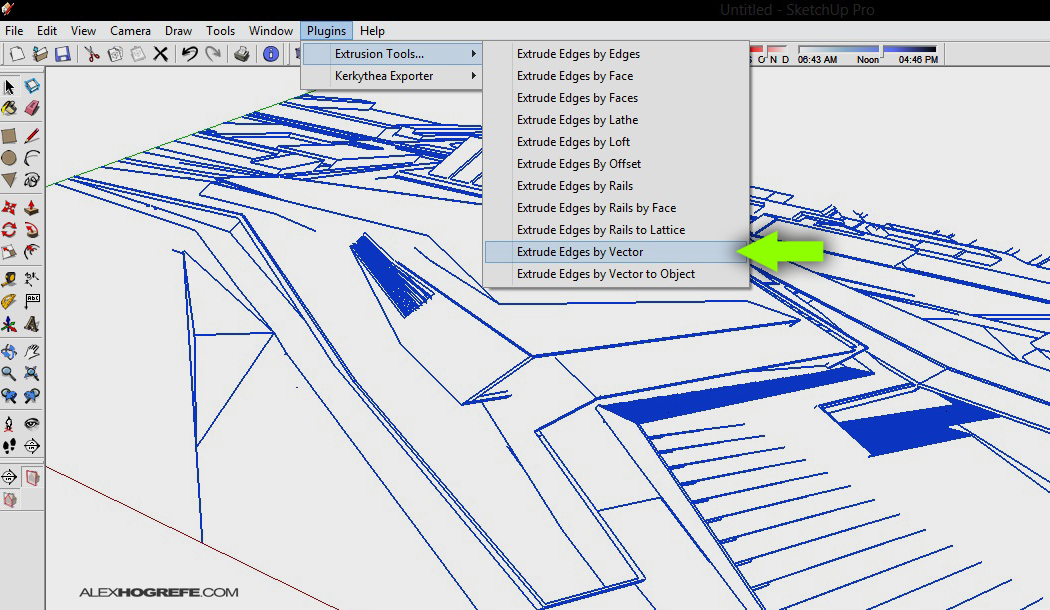
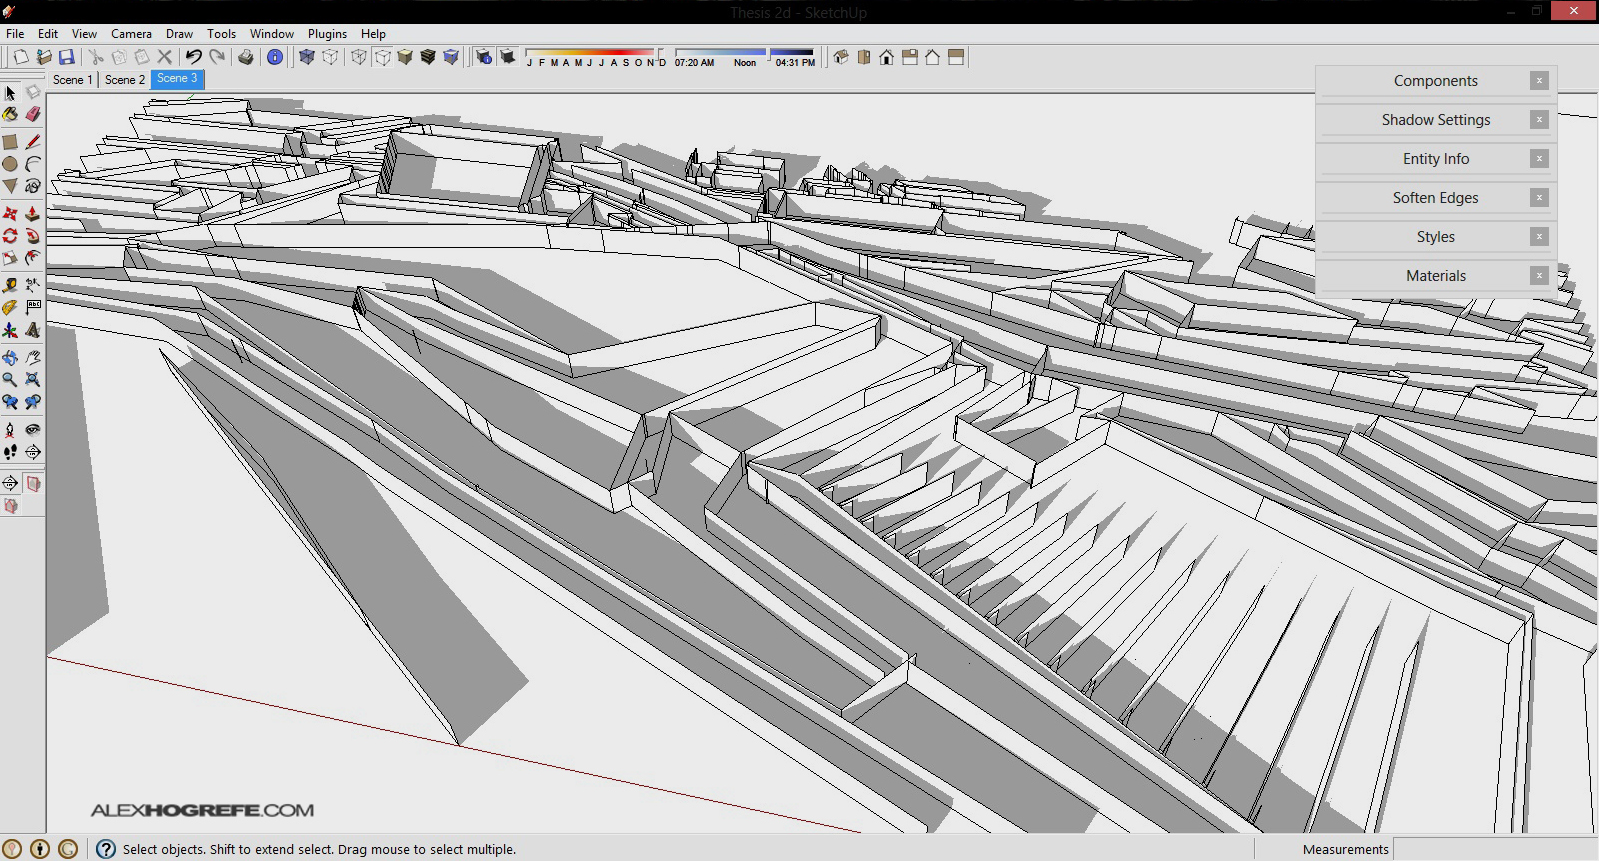
3. Once the geometry is imported, the next step is to extrude it vertically. Sketchup does not extrude lines, therefore a plugin is needed. There are many out there, but the TIG Extrude Edges by Vector seems to work really well. This plugin allows you to select many edges that are not connected and extrude them in any direction.
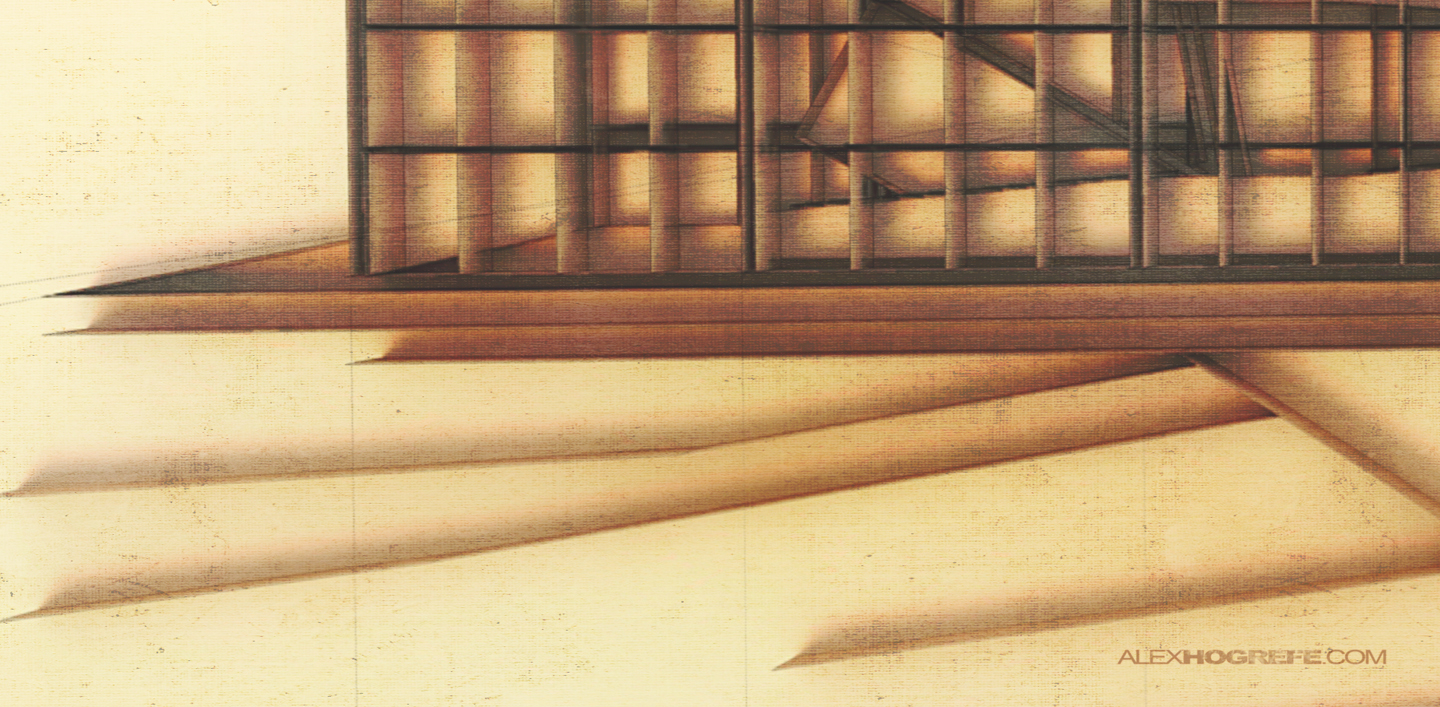
Once the plugin is applied, the result is a series of planes resembling strips of paper.
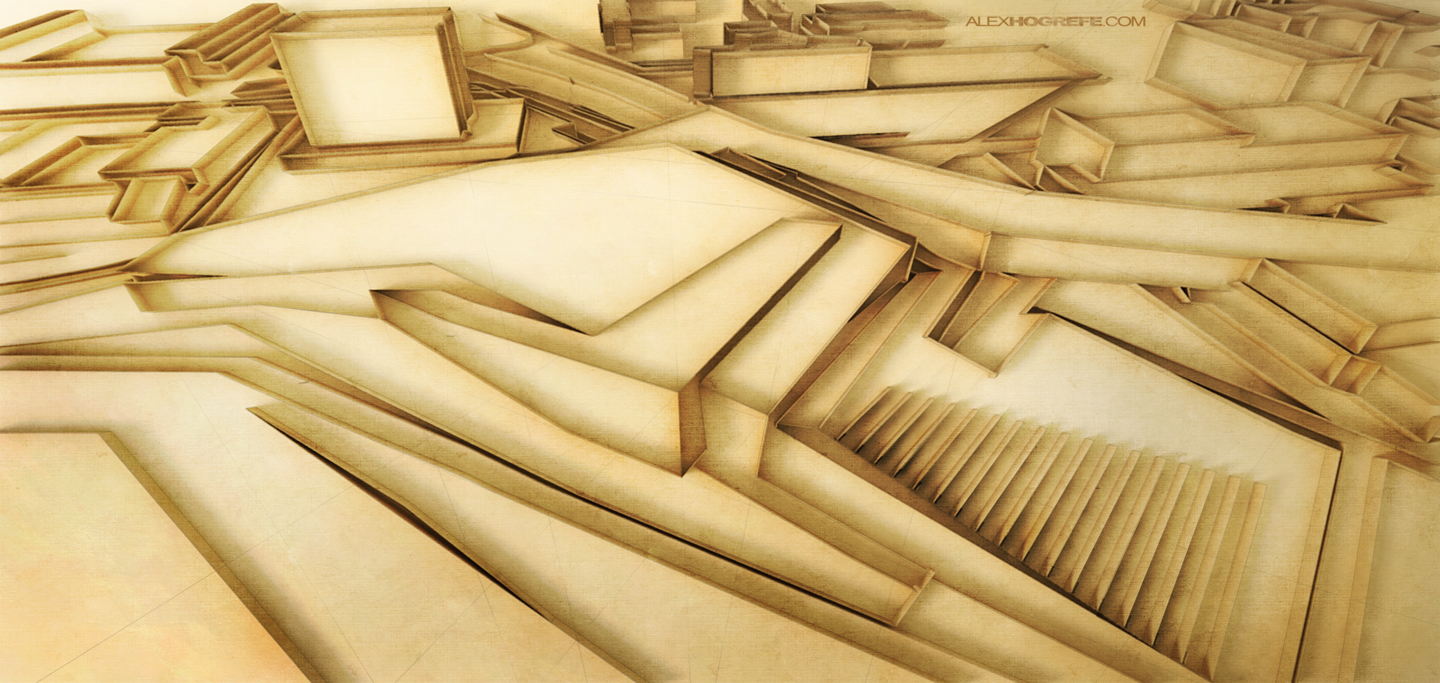
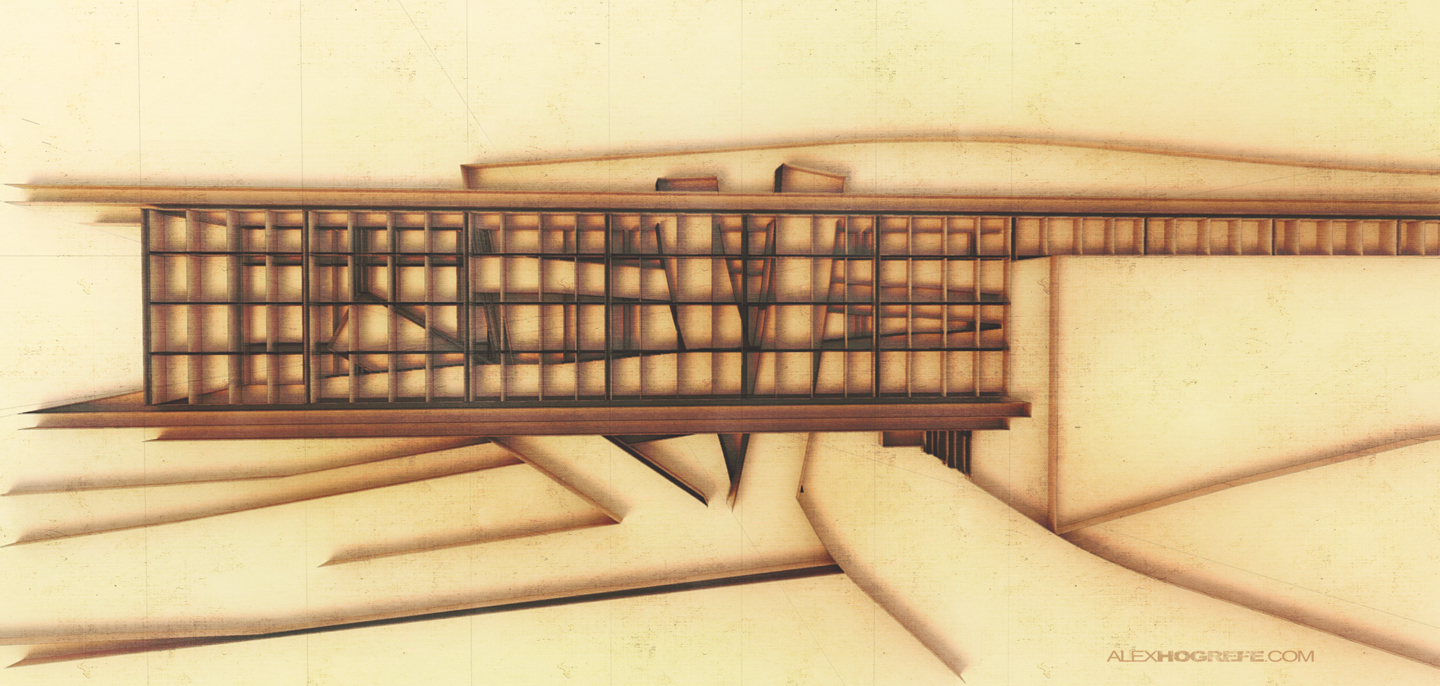
4. The last step is to set the view to “Top” and render the model. I then tweaked the colors in Photoshop and added some light textures to achieve the final look.


Wow, you continue to amaze with the various techniques you use and their results, nice work!
great work again! do you use Kerkythea for this rendering?
This is awesome! What texture is that overlayed?
can i know how did you do in photoshop to manipulate the color
@ JC,
Yes, it was rendered in Kerkythea
@Aron,
The texture was a paper texture that I have had in my personal library for a while. Not sure where I downloaded it from
@Wade,
I just tweaked the hue of the original rendering and added some yellowish color overlays. Nothing too complicated
More excellent work Alex. I refer all my students to your site for exemplary examples of visualisation technique. The key for me is your attention to detail. If any student comes to me asking why thier visualisation looks flat its always in the details. So thanks for that. The reason for the comment is to also thank you for the export 2d as a CAD file. I have been using SketchUp since the Atlast days and prided myself on a neat workaround via Layout, vectorising the image, exploding it and then exporting it. So that will no longer be required. I appreciate its a bit gushing, but you put lots of effort into your work and it deserves praise.
ps I am not getting you to do all my work for me, I teach SketchUp and CAD and REVIT plus some other stuff to engineers but do occassional sessions of SketchUp into PS and your tutorials are invaluable to the architectural students. Many thanks for the blog.
@ Paul,
Thanks for the kind words and its great to hear that you have been referring my work to your students. I couldn't agree with you more. It truly is in the details.
hey alex,
ur videos are too awesome! they hvhelped me a lot in my portfolio creation and even class drawings. may i know, how did you achieve the final look, i.e. what did u do in photoshop to get this quiling look
You are the best!!Congratulations =)
while exporting 2d graphic, it exports all the hidden lines also… what should i do to prevent those lines from including in?
Nice work. Bro. How did u do that gradient in that picture.?
I’m having difficulty achieving results that align with your tutorial’s. A few questions: is your extrusion distance constant and is it in the z-direction (ie, towards the camera in the “top view”? Do you extrude profiles and edges, or only one? Any other tips?
I think there is a lot of merit to this visualizing style in early design stages- not getting caught up in material, texture, etc. Very communicative of ideas and geometry. Big fan of your work and tutorials- have inspired me throughout all of grad school. Thanks!
Hello,
I m Really looking forward to read more. Your site is very helpful for us .. This is one of the awesome post i got the best information through your site and Visit also this site
Satta King
Really many thanks
. Your site is very helpful for us .. This is one of the awesome post i got the best information through your site and Visit also this site
Satta King
Really many thanks