As old school as they are, GIFs can still be a low tech, highly shareable solution to communicate an architectural idea. In this case, I was having trouble deciding how to illustrate the operable shade system of my research lab design. Enter the GIF. The obvious downside is that this solution only works for digital presentations (website, social media, email, etc). Therefore, I still rendered and Photoshopped each frame at a high resolution (5,500 pixels wide) to give me the option of using them in my portfolio later. If you don’t need high res images, GIFs are compressed so much at the end that it would save a lot of time to just render at the lower resolutions right at the start. Below is a quick breakdown of how I created the GIF.
1. Create Base Renderings of All Frames
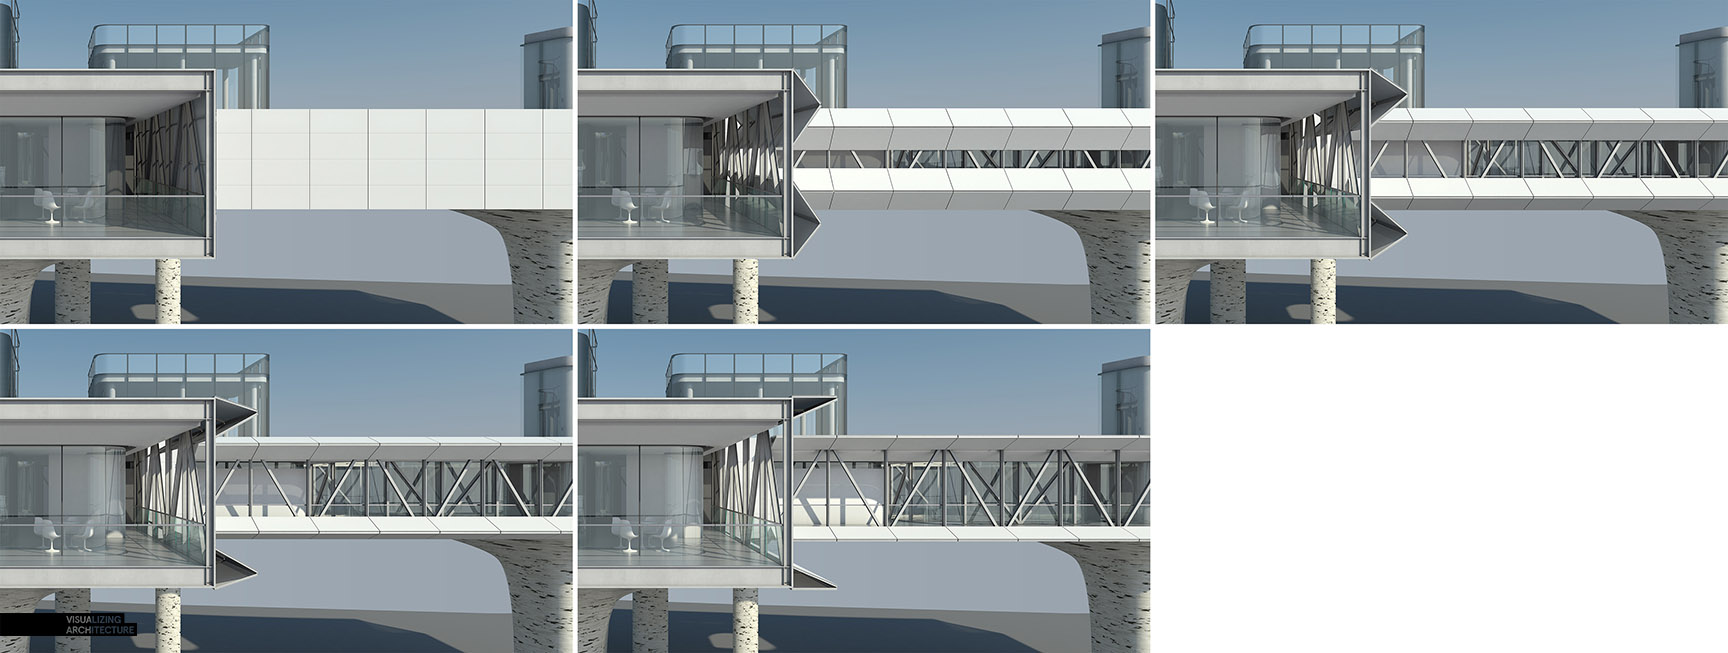
I setup my 3D Sketchup model to show the shade structure at different positions of operation. I then placed each shade position on a different layer, and rendered each option out using V-Ray.
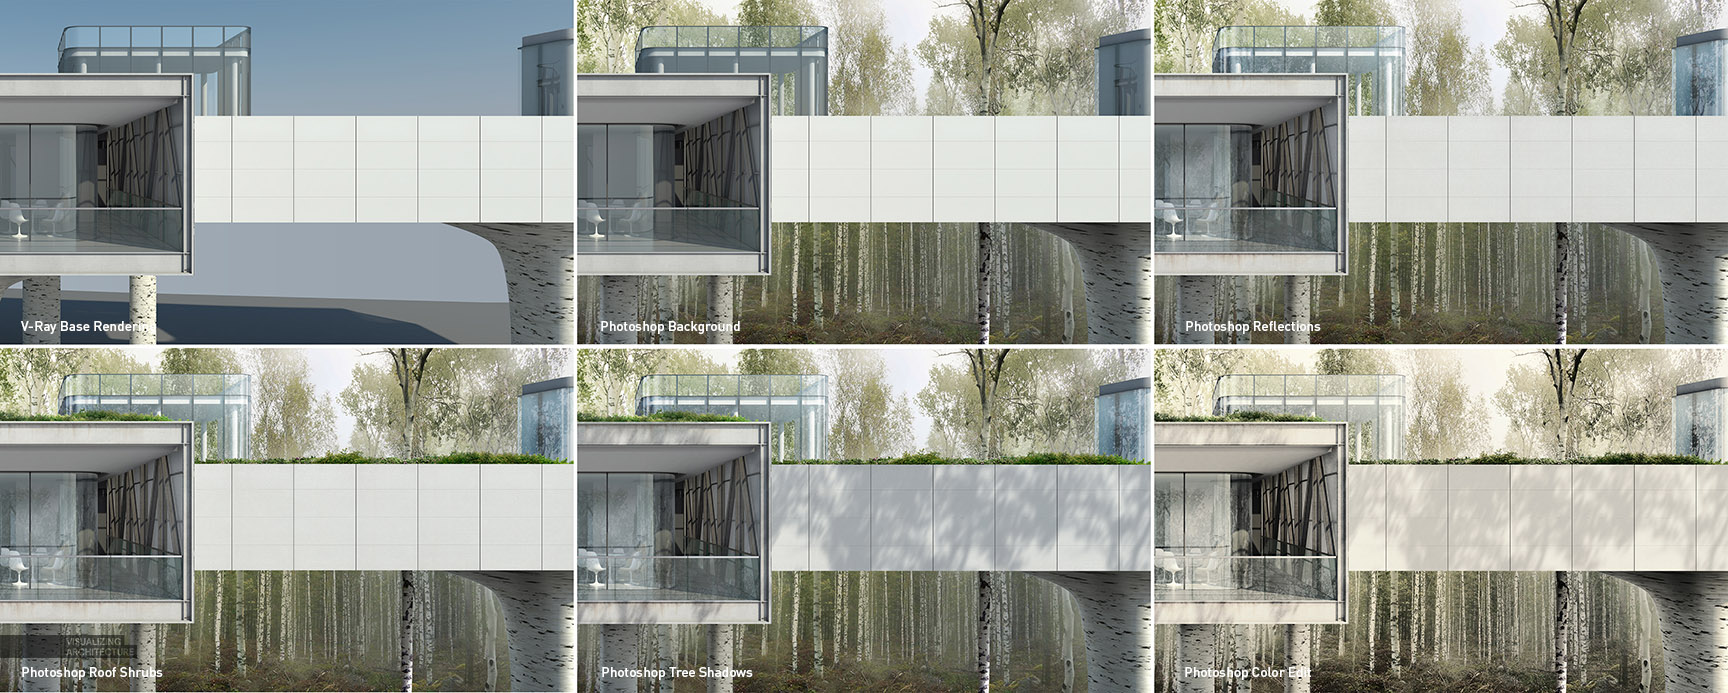
2. Photoshop Each Position
The image above shows some of the main moves that I made in Photoshop to get the final look. Each one of these moves had to be setup in a way so that I could easily carry them over from one shade position rendering to the other.
This meant organizing the layers as carefully and cleanly as possible. The background trees remained the same for all frames, so I placed that at the bottom of the layer stack. Above the background group, I setup groups 1 through 5 representing each shade structure position. In each one of the numbered folders, I placed the base renderings of the corresponding position and other elements that changed with the shade positions such as tree shadows, reflections, etc. I then placed final effects like haze and sun glare into the “Effects” group at the top since these remain unchanged no matter what shade position group was turned on.
3. Turn on the Timeline
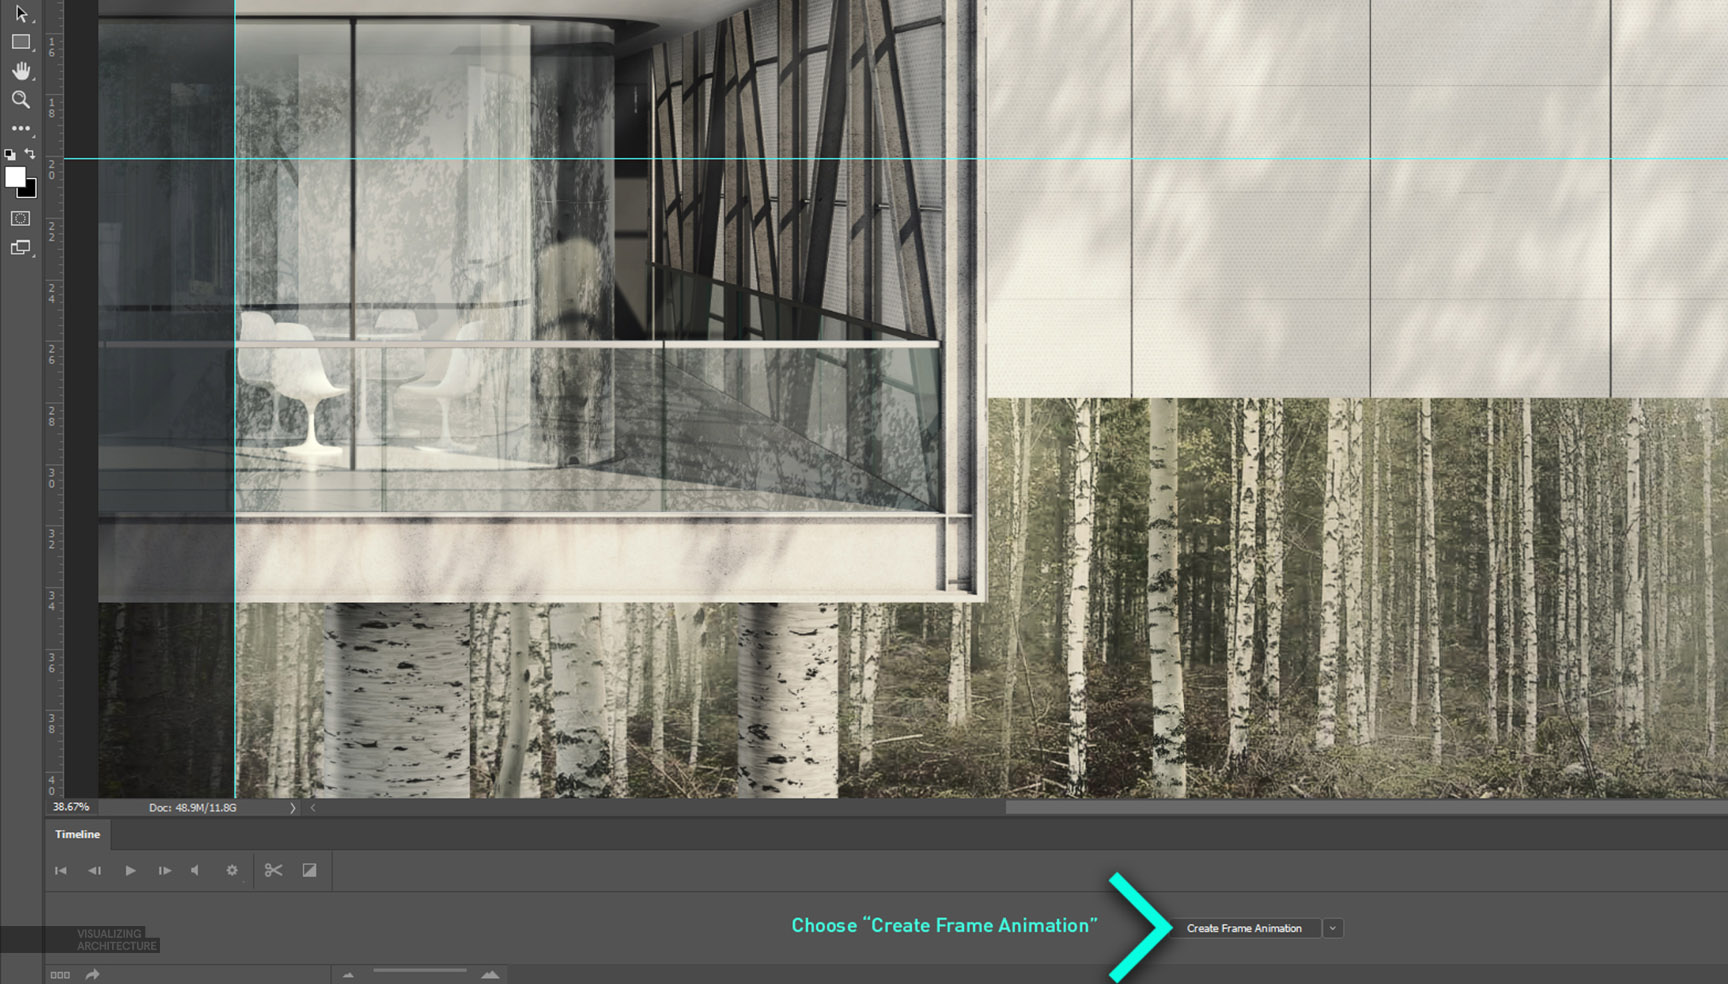
Once the layers are setup, it’s time to create the GIF. First, turn on the Timeline by going to “Window>Timeline”. This should bring up the Timeline interface at the bottom of the program window. Also in the Timeline interface, choose “Create Frame Animation” in the drop down menu.
4. Create the Timeline Frames
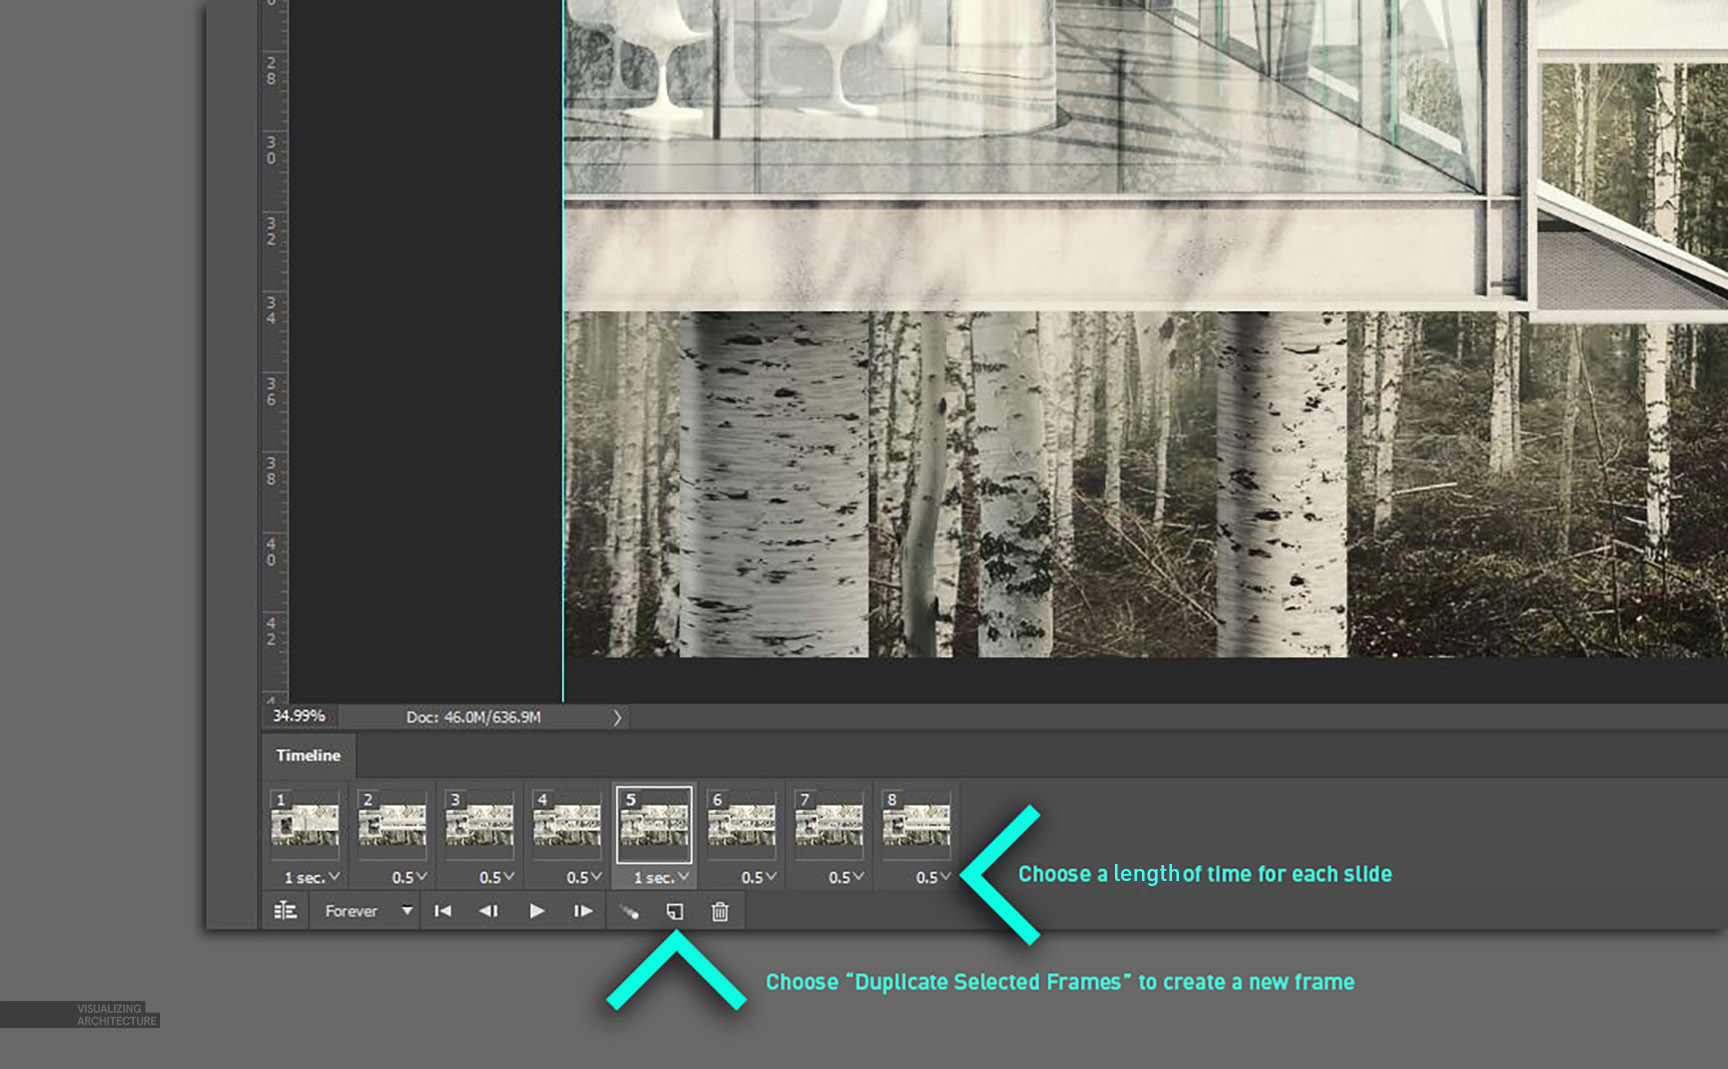
Assuming the layers were setup properly, this part goes pretty fast. To add new frames, simply turn off and on the layers you want, then choose “Duplicate Selected Frames” in the Timeline palette. Under each frame, you can also set a length of time by selecting it in the drop down menu.
5. Export the GIF
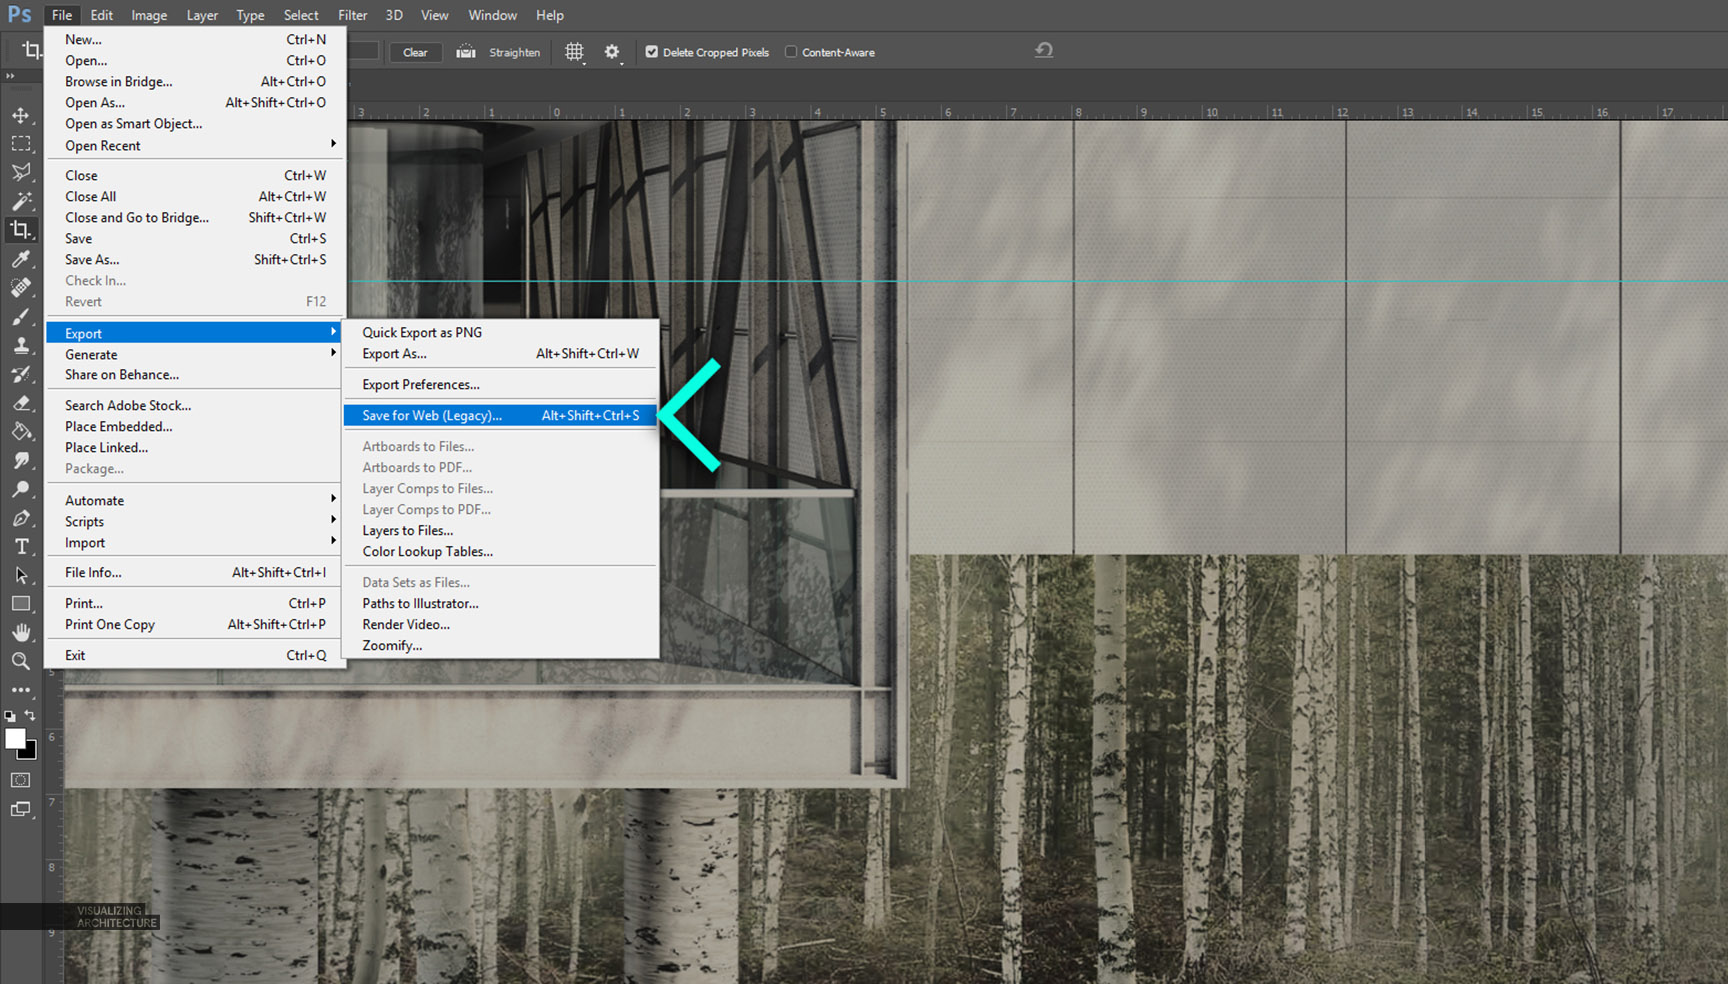
Once the frames are setup, its time to export. Go to “File>Export>Save for Web”. In the “Save for Web” dialogue box, there are quite a few options that influence the balance between quality and file size. Because my image has a lot of detail and gradients, I wanted to maintain better image quality which meant a larger and thus slower file to open and run . A) For the preset drop down, I chose “GIF 128 Dithered” which gives me the best color reproduction and smoothest gradients. B) To get the file size down, I changed the resolution from 5500px wide to 1200px which reduced my file size down to 2.5 MB. I should also note that I wanted my GIF to loop, so I chose “Forever” in the “Looping Options” dialogue box. Finally, I clicked “Save” to export the GIF.
The Final GIF
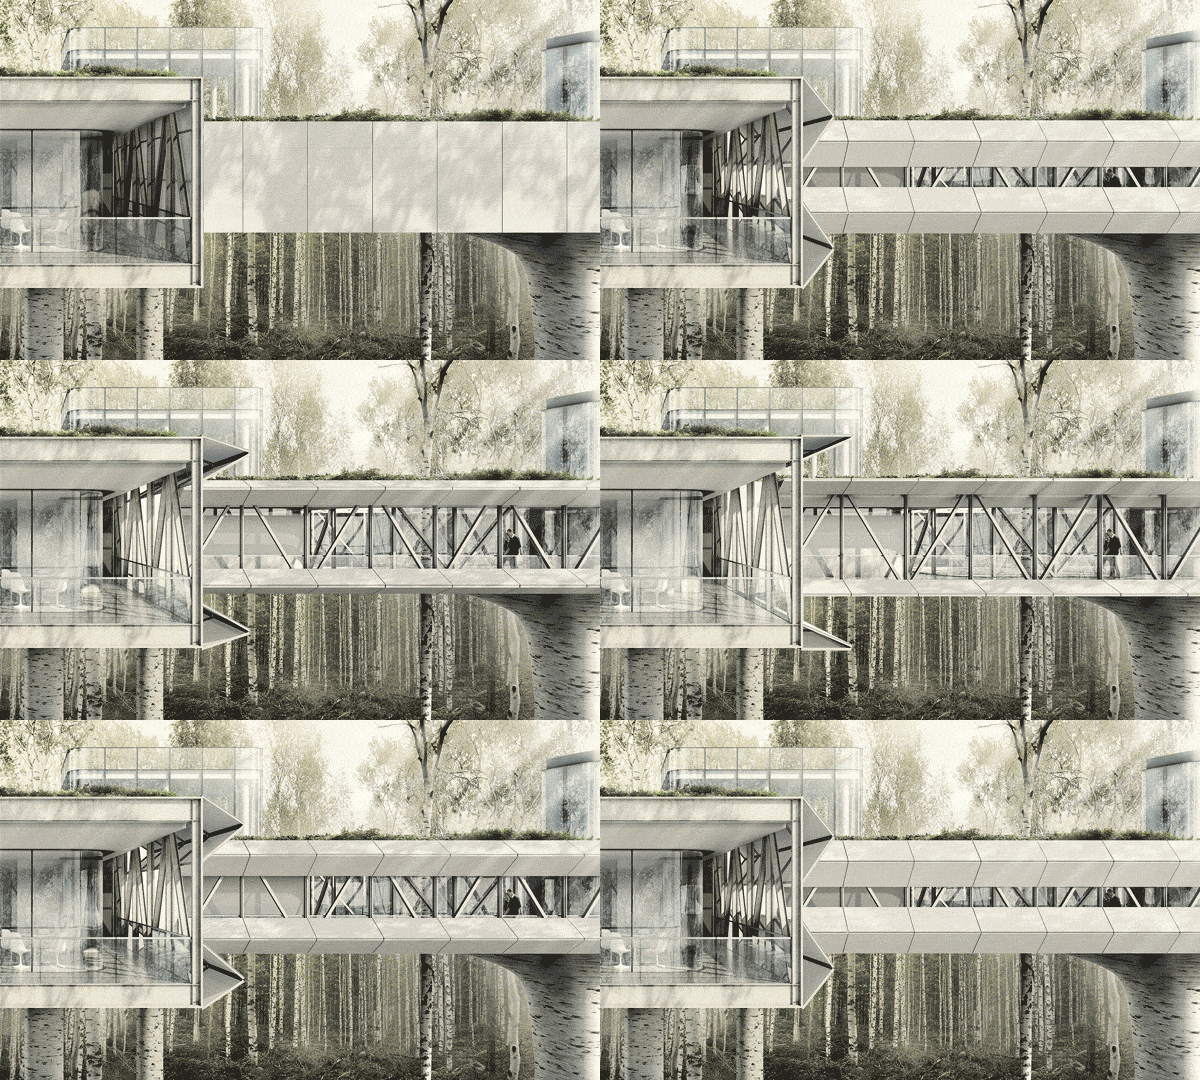



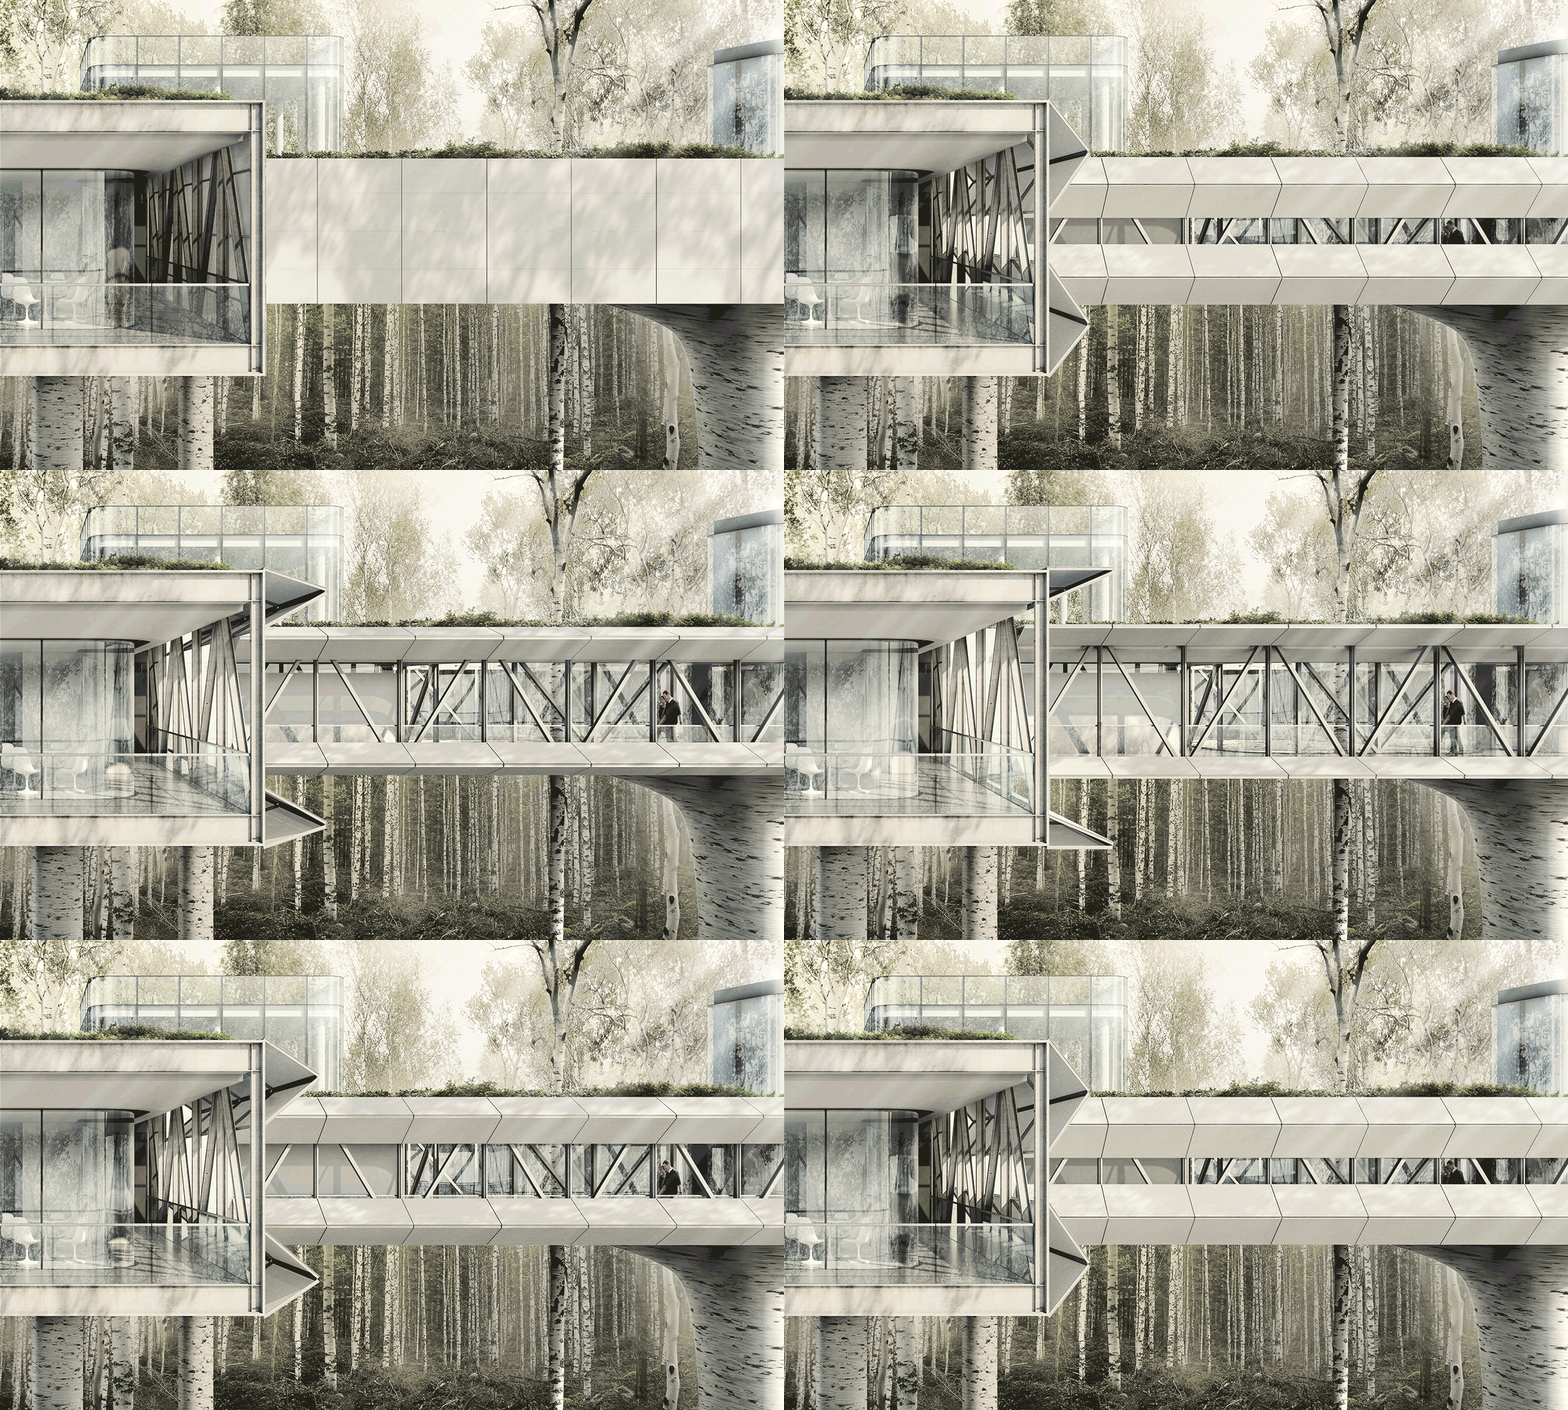
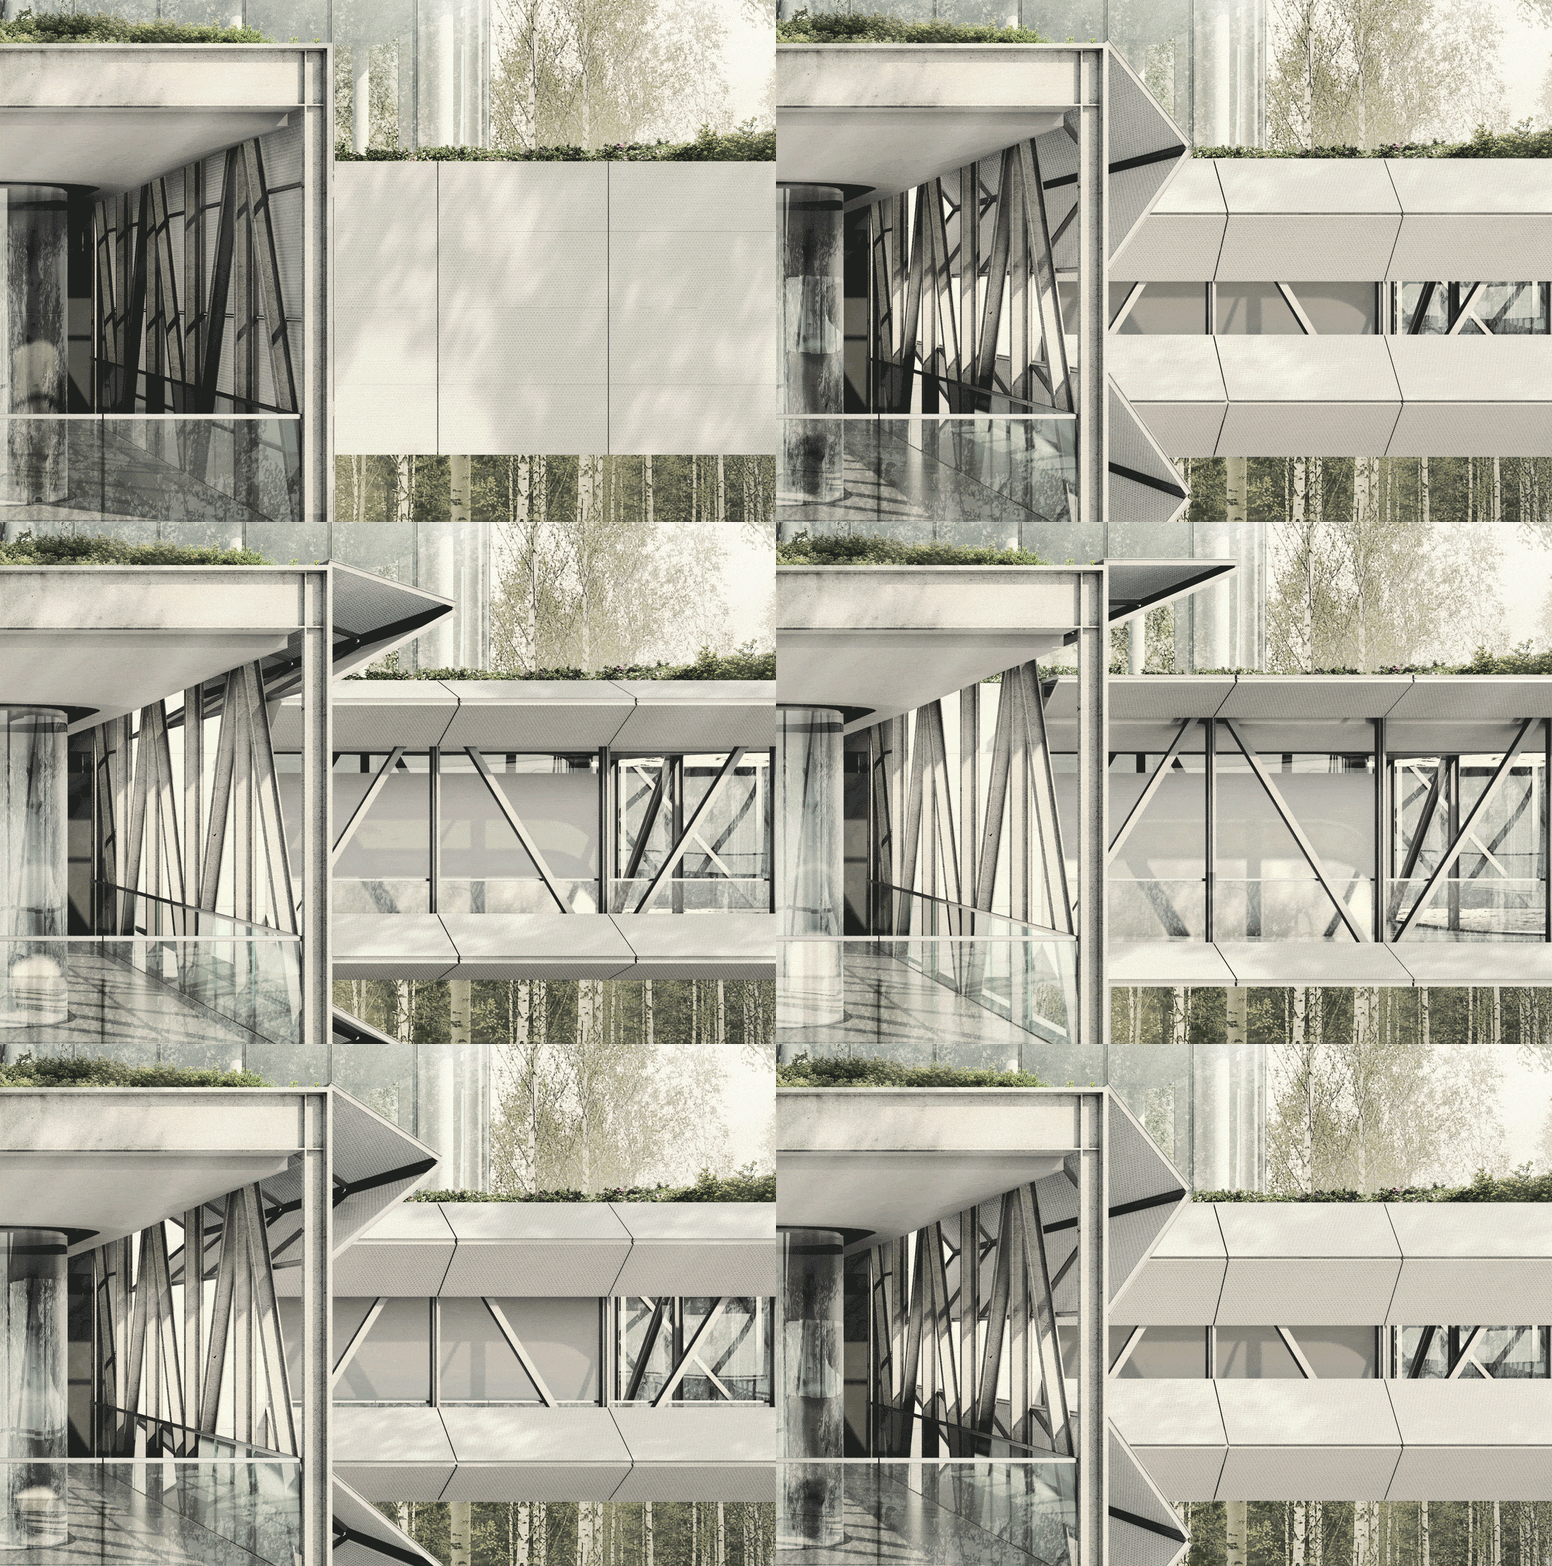


Amazing! Please, could you show the process you made to photoshop this particular image? Looks really great.
I have succumbed to the temptation to create a silly pun for a memory jog to help me find my most useful Tutorials such as this fantastic one by Alex Hogrefe…. forgive me Alex. I call it :
” Geeks bearing GIFs ”
You are no geek, for sure, you’re practically the Prince of Pixelated Architectural Visualization, if not the King. Appreciate your most excellent grasp of graphics, and your generosity and clear teaching methods.
Thomas Lanterman at LADD Scapes
P.S. I was adjusting shadow settings the other day and noticed the particular building I had modeled had such interesting articulation as I moved the slider for time of day that I knew it was a candidate for a simple animation. Voila… and here you are reminding me that I had intended to master the GIF procedure. Perfect timing.
Thank You.
Very, very good job Alex!
love you
Sigh… Very inspiring!
Awesome! I bet even in the printed version these images will be very useful to show how the shade system mecanism work.
I come here every month to see if there’s a new post, I wish you had more time to post often!
Anyways, keep up the good work!
Cheers from Brazil!
All of your tutorials are amazing! Thank you so much!
Cheers from Greece!
Education at it’s Best….
You are sick man…truly an inspiration for graphics and architecture….*tear*
omg…bless you
Amazing job!
I missed the “raw render” the first time I viewed this post.
Incredible PS skills!!!
Related:
https://sploid.gizmodo.com/see-modernist-architecture-dismantled-and-reconstructed-1585259151
gif is old style, 360 camera is today
I’m a recent visitor to your website and am totally blown away by the visualizations and humbled by your approach to putting together so many tutorials for us! Keep up the good work!