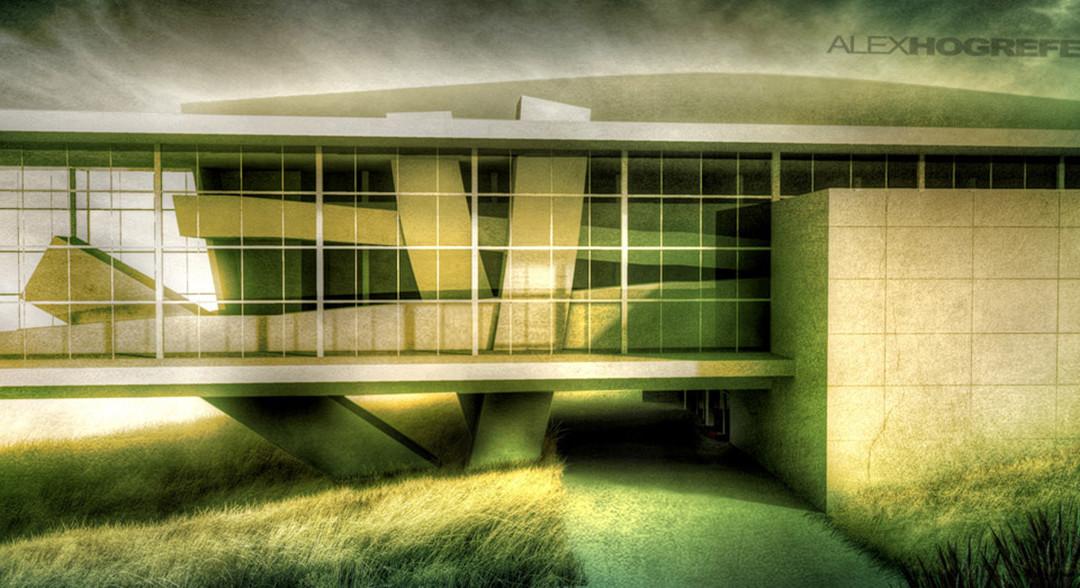
Ahhh, Finally decided to throw together a HDR tutorial. Its not as in-depth as some of my other tutes, but describes the overall process I use. I created a rendering just for this tutorial, one that I thought would work well for HDR processing with lots of textures, i.e. grasses, and a cloudy sky.
For those who aren’t familiar with HDR images, it is a process of combining multiple copies of the same image, each with a different exposure, to produce a final image with a higher dynamic range. It essentially gives the image more detail in both the dark and light areas. This process is commonly used in photography where you can set the camera to bracket the photos and automatically take 3 pictures with different exposures of the same shot. The issue with applying this technique to illustrations is that there is only one image to work with. I work around this by taking the image into Photoshop and manually adjusting the exposure.
To process and HDR image, I use software called Photomatix. It seems to be the software of choice by the professionals and does the best job in my experience. I believe Photoshop CS5 can process HDR images, but is much slower and offers less control.
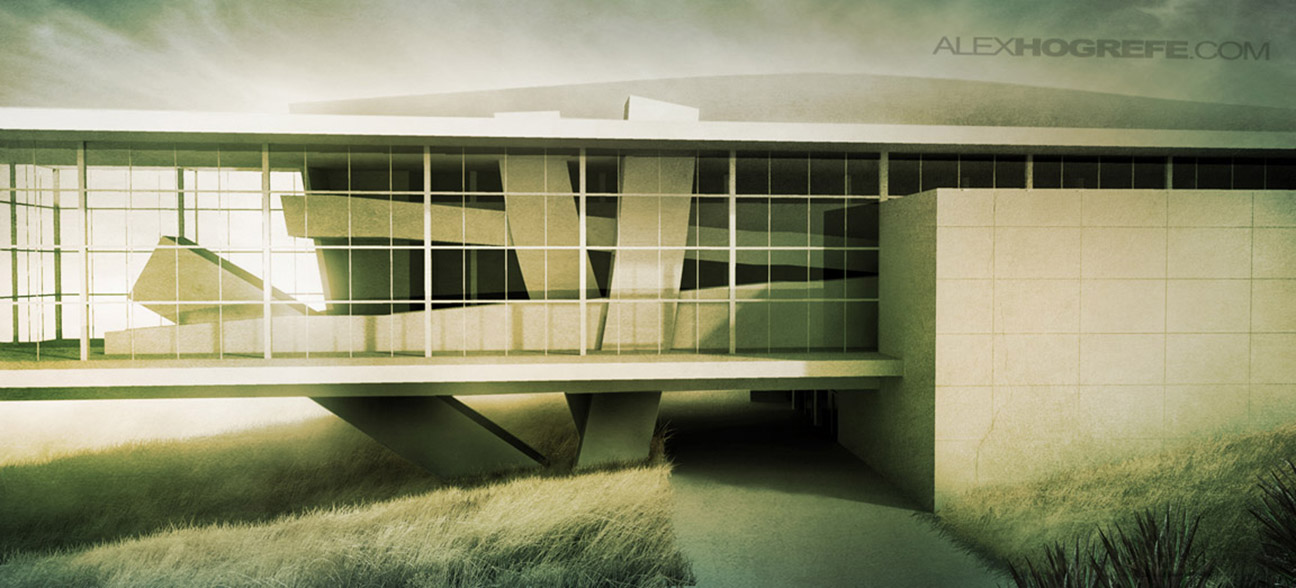
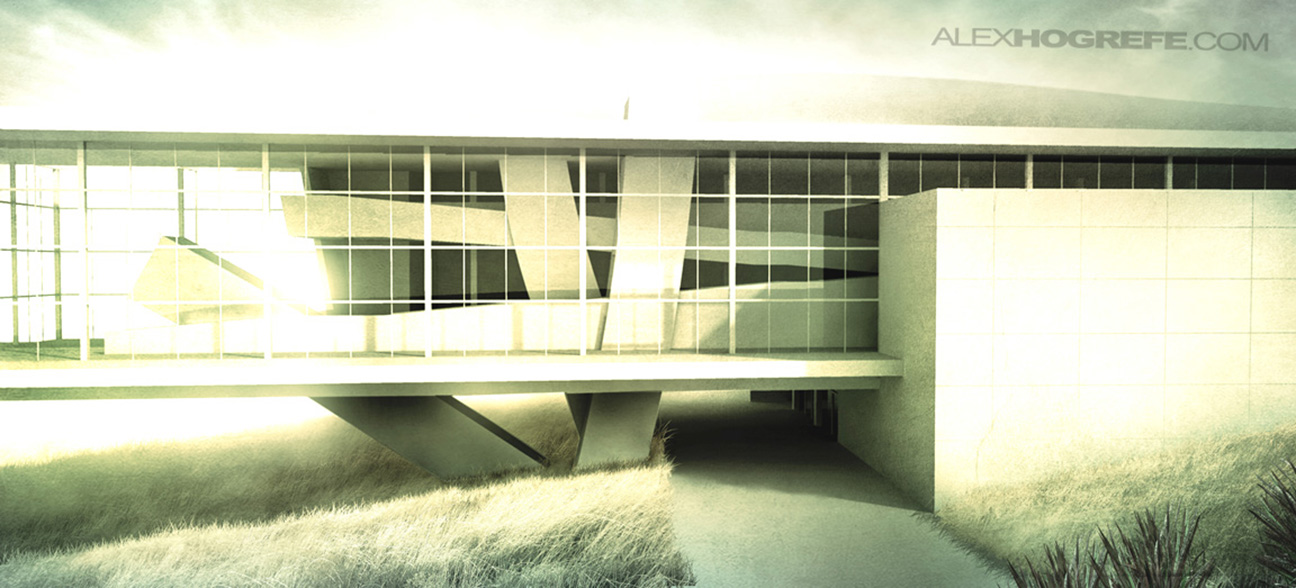
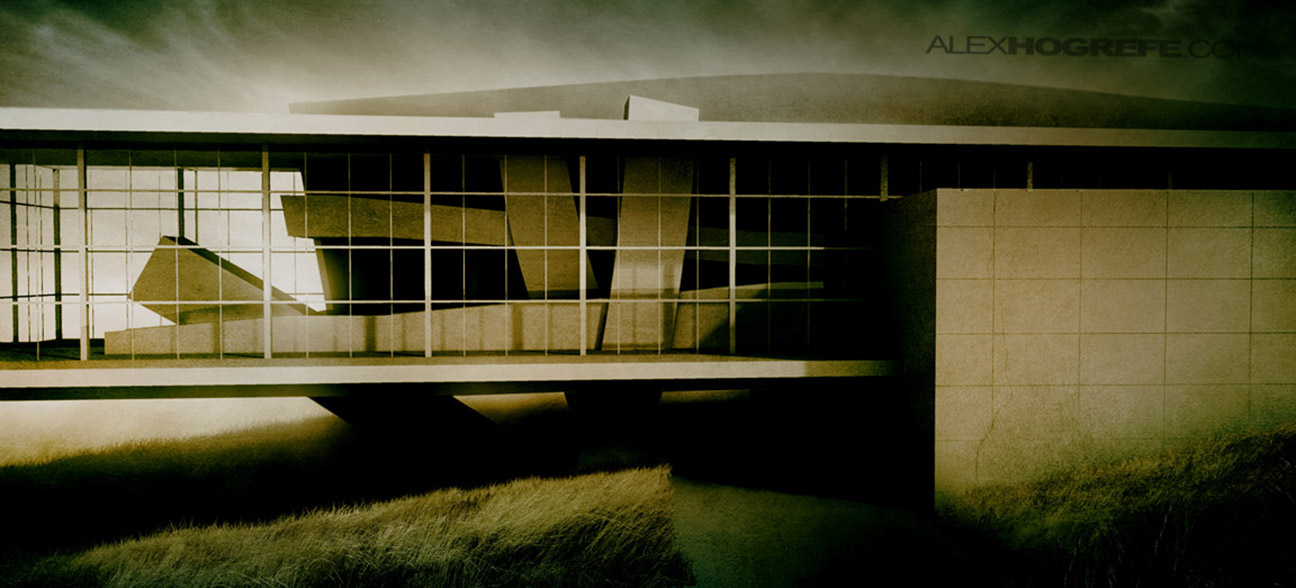
Below are the 3 renderings with different exposures that I used to create the HDR image.The first is the initial rendering, the second is with increased exposure and the the third with lowered exposure.
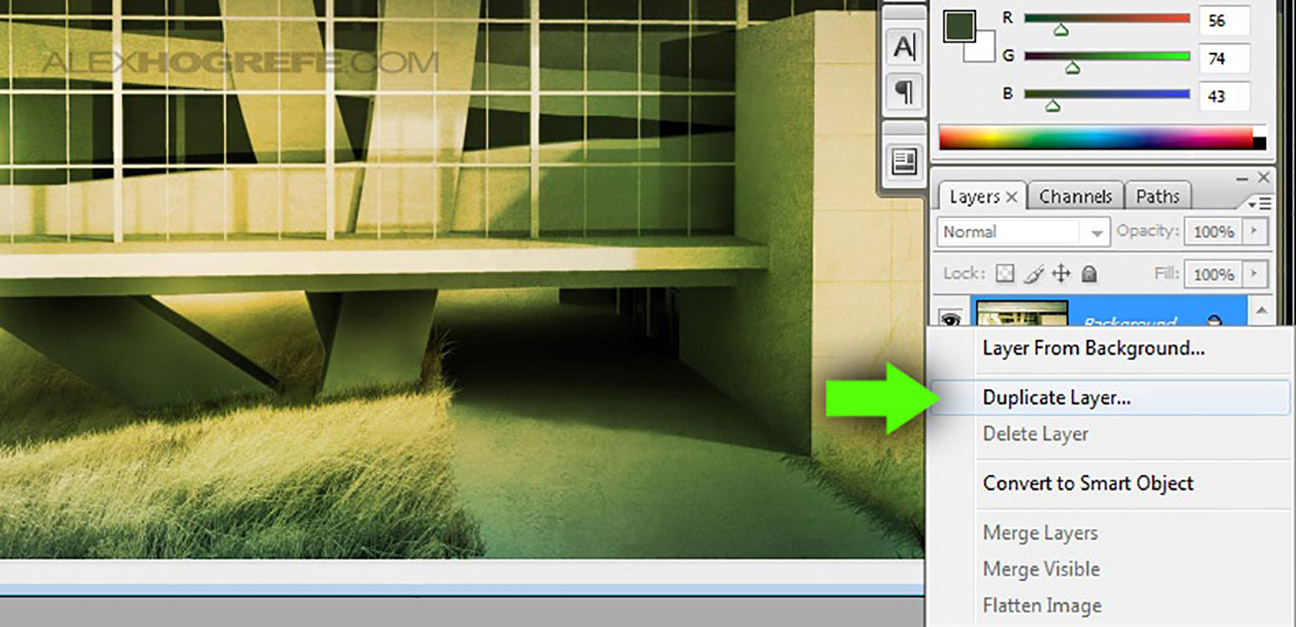
1. The first step in getting the different exposures is to open the image in Photoshop and duplicate the layer.
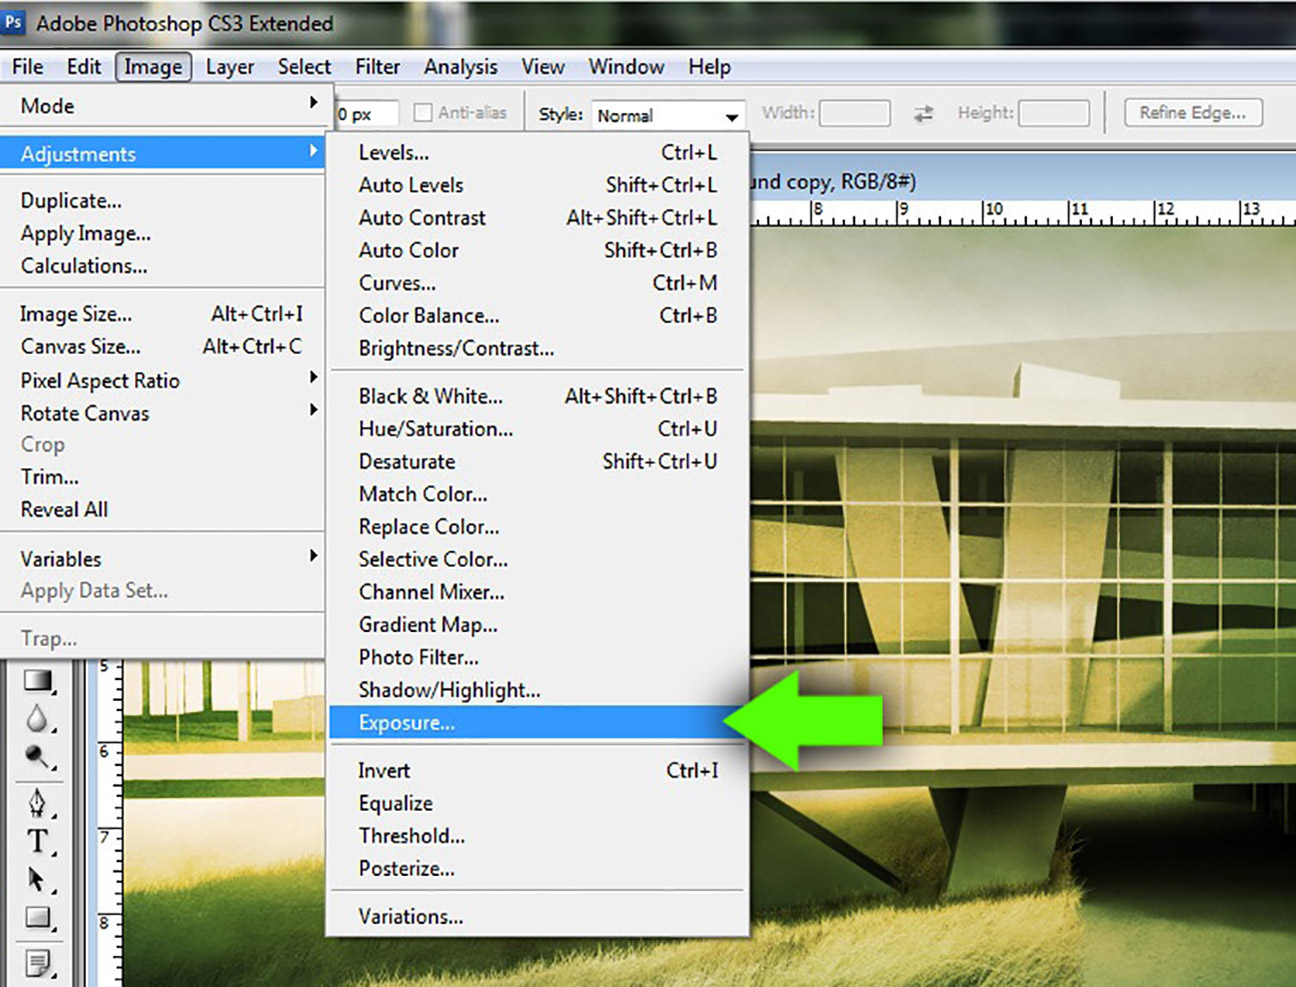
2. Go to “Image>Adjustments>Exposure” to bring up the exposure dialogue box.
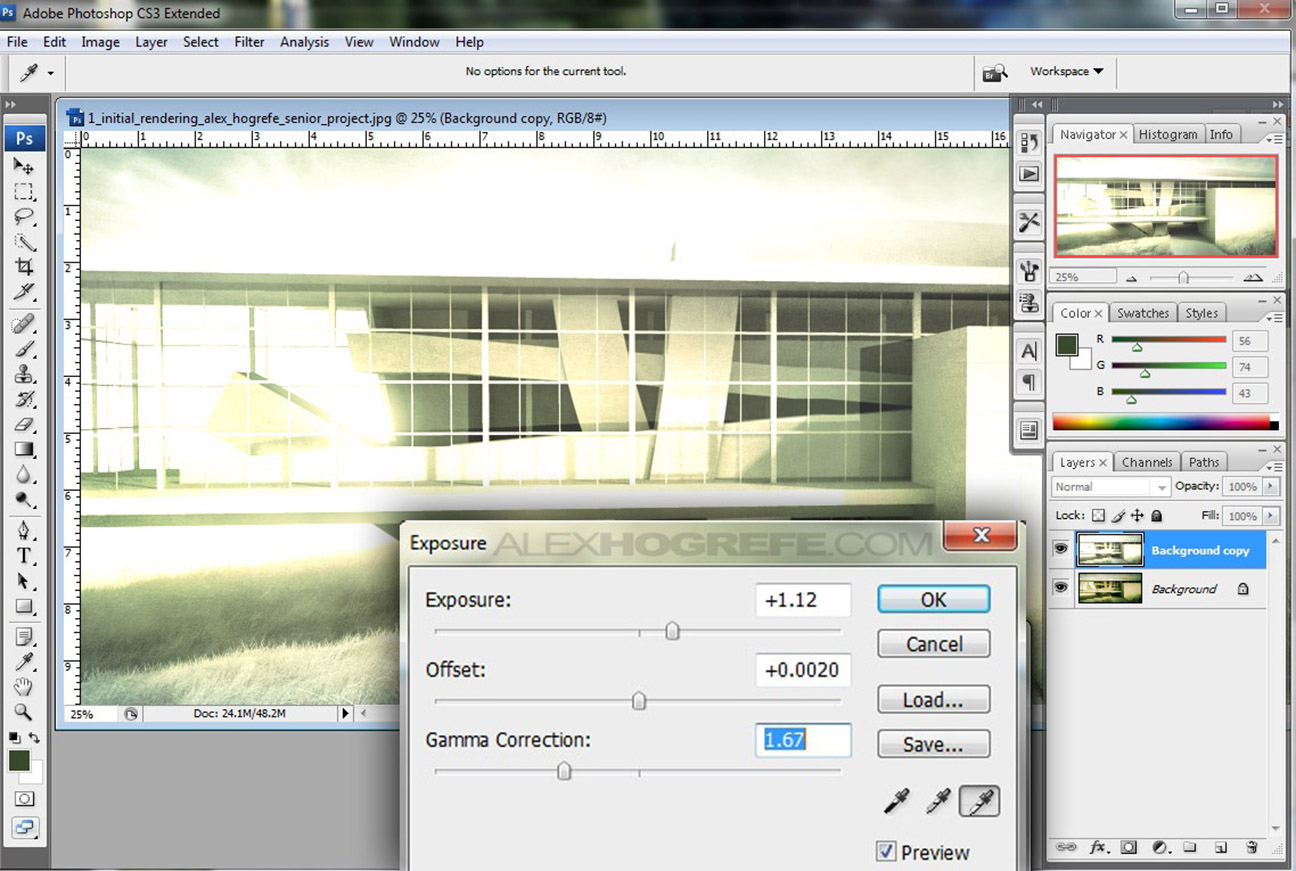
3. Increase the exposure so that you bring back a little detail in the shadows and dark areas of the illustration. Do not worry about bleaching out other areas of the image with too much light. This will be corrected in the HDR processing software.
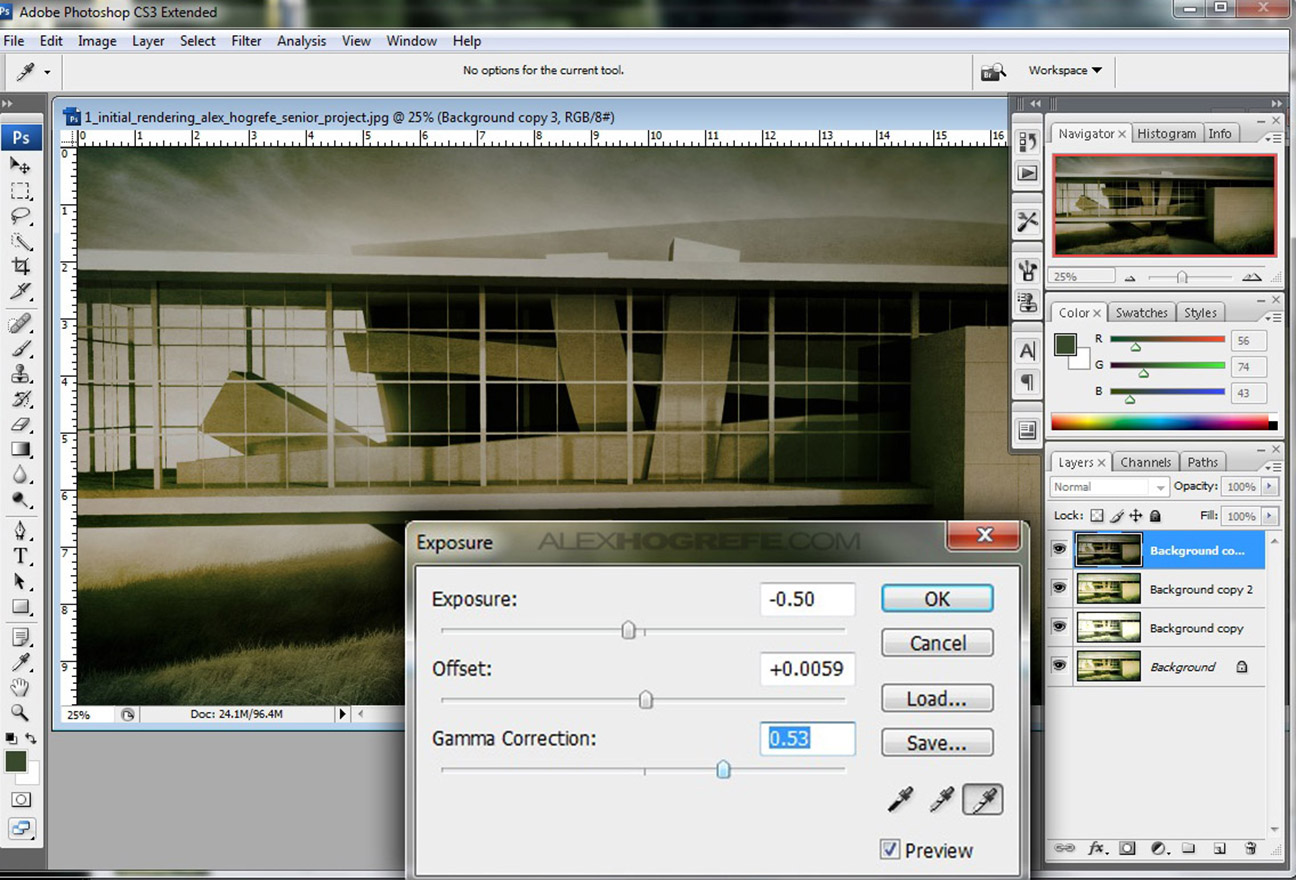
4. Repeat the process for the low exposure image focusing on bring back detail in the lighter areas of the image.
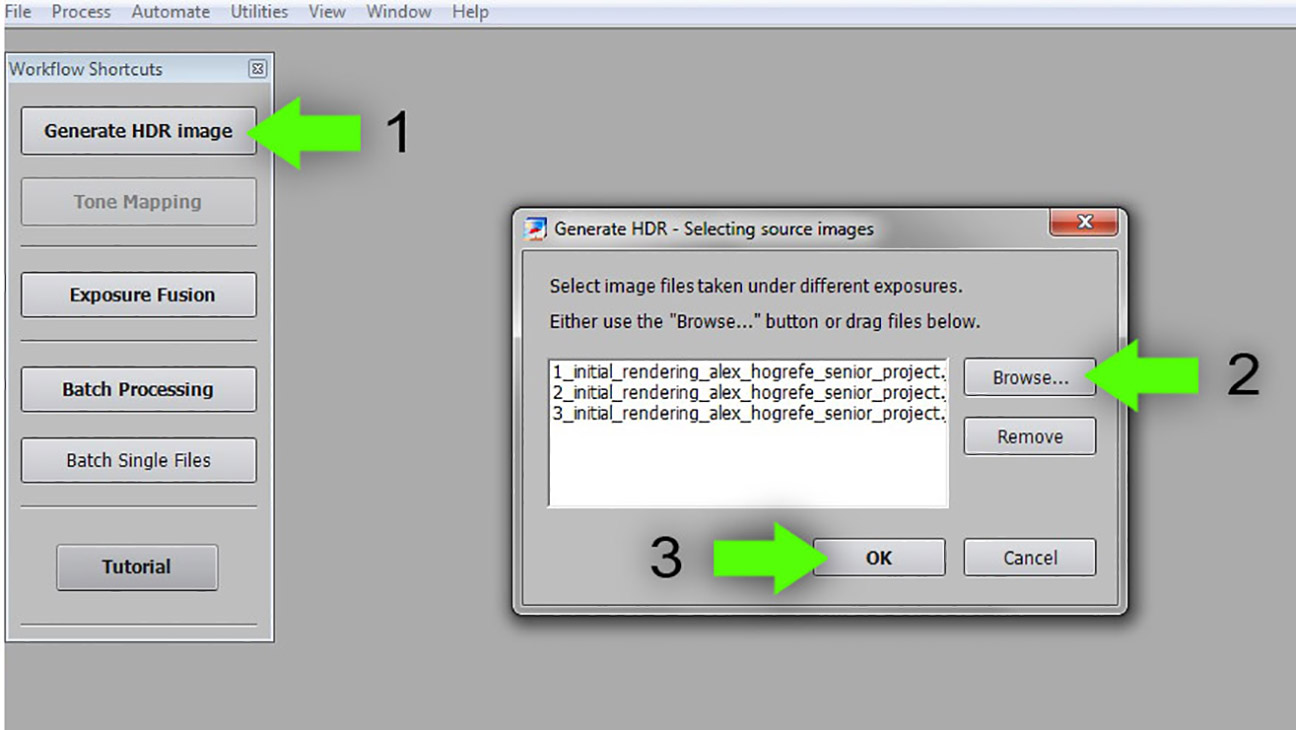
5. With the 3 images created, its time to go into Photomatix. Choose “Generate HDR” on the right, browse and load all 3 images, and then select “Ok”.
6. The next dialogue box that comes up will ask you what the E.V. spacing is. The software will guess what the spacing is and I usually just go with that and click OK. However, if your feeling dangerous, you could input the exact exposure value used in Photoshop when creating the different exposed images.
7. After clicking OK, another dialogue box will come up with even more options. These options have more to do with if you used a tripod or not when taking the picture, but since we are only working with one image, we don’t need to worry about these options and just click “OK”.
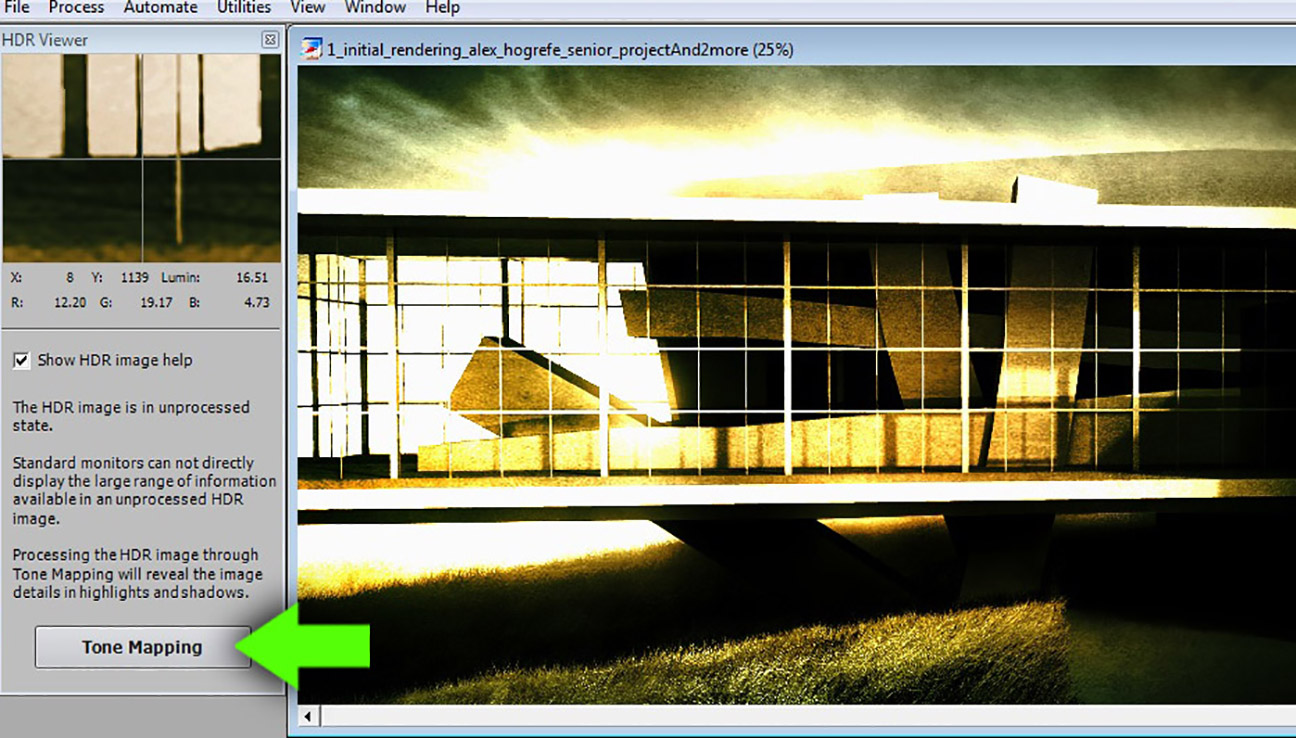
8. Finally, the image will appear in a compressed state. Choose “TONEMAPPING” to begin editing
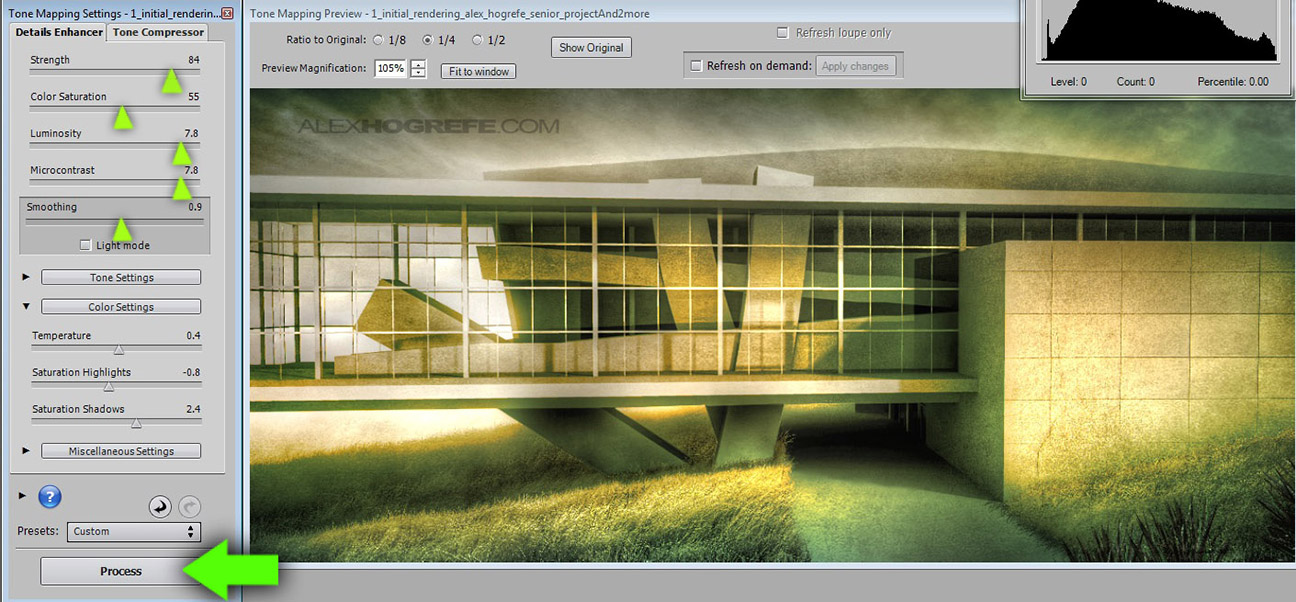
9. There are too many settings for me to cover in this tutorial, but the image below shows the settings I used for this illustration. The settings used will change dramatically from image to image. However, I usually leave “Strength” at a high number as well as “Luminosity”. “Smoothing will also play a big part in the producing that “HDR” look. Experiment with the different settings to see how they affect the look.
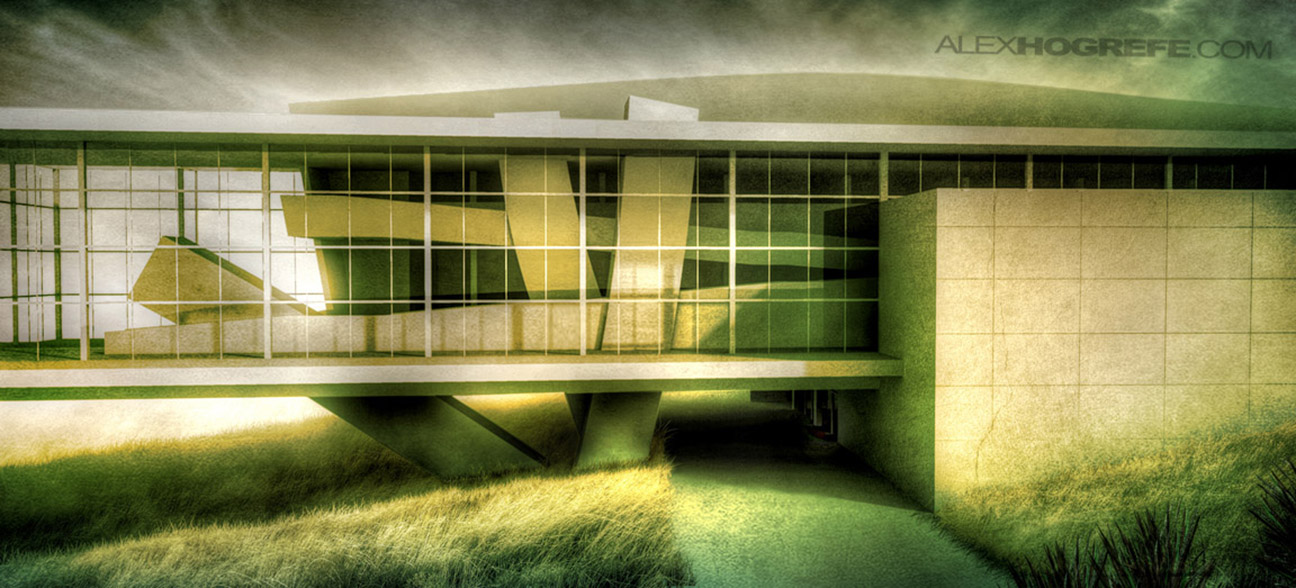
When the settings are where you want them, choose “Process” at the bottom. Once the image is processed, you can save it to your system.
A couple of notes:
This process will produce a ton of noise in the image. Its something that can be cleaned up with a lot of Photoshopping, but still should be something to be aware of.
I will typically do a little more Photoshopping on top of the processed HDR image. I didn’t edit this one because I wanted you to see the raw product right out of Photomatix.



@ Zebra,
Sorry I had to delete your comment. I won't allow that on this site
is Photomatix a free software?
@Joel,
Its not free. But if your serious about photography, I think it is an important investment to make. Maybe not so much for architecture illustrations.
Nice effect and simple procedures…
However, can u tell me how to remove the noise in a faster way using photoshop?
Any tips?
Thank you, Alex.
There isn't really an easy way to remove noise that I have found. I remove it by smudging and painting areas that I want to fix in PS. There is a setting in Photomatix that you can check in the beginning to reduce noise, but it doesn't do that great of a job.
Which version of Photomatix do you use? Once again, thanks for everything. Your tutorials are great!
Best,
Will C.
Hey Alex!
Great stuff! Just wondering what you used for the rendering of the actual image?
Hey Alex!
Great stuff! Just wondering what you used for the rendering of the actual image?
Hey Rom, Kerkythea and Photoshop
Hi Alex,
The initial image already processed in PS isn't it? With added grass,skies,ets..
I just wondering where did you get the grass and skies. It looks surreal and very artistic. Also can you also share where did you get most of your cutouts? Was it from Vyonyx?
Thanks a lot mate!
Came across this post while looking for something else in Google.
The idea that changing exposure in Photoshop will be beneficial in HDR is a popular myth, unfortunately. Nothing new is being created by changing the exposure of a single photo. All that's being done is the existing pixels are being pushed around. The reason Photomatix brings up the exposure settings dialogue is that it can't find different exposure data in the EXIF of the images. If true, in camera, bracketed images were used, this dialogue wouldn't come up.
The same results can be achieved by tonemapping a single image in Photomatix as by altering the exposure values and merging/tonemapping the 'faux bracket' set.
can I have the same output of HDR without using Photomatix? by only using Photoshop?
hey alex great stuff!
im sure many cs5 users would be very greatful if you put up a tutorial of how we can do the same hdr processing oon CS5 as u said it can be done in the beggining? it would probably be an easier way than photmatix?
thanking you so much!!! your work inspires!
Alex,
Are you still using Photomatix as your HDR software of choice? Have you found anything better?
Thanks