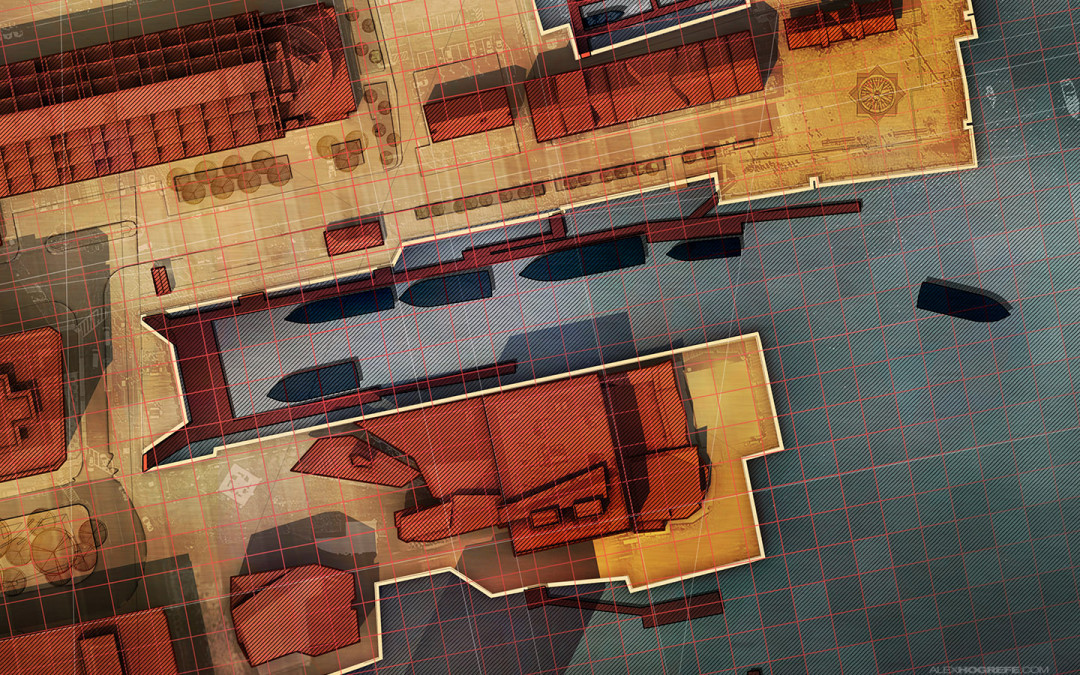
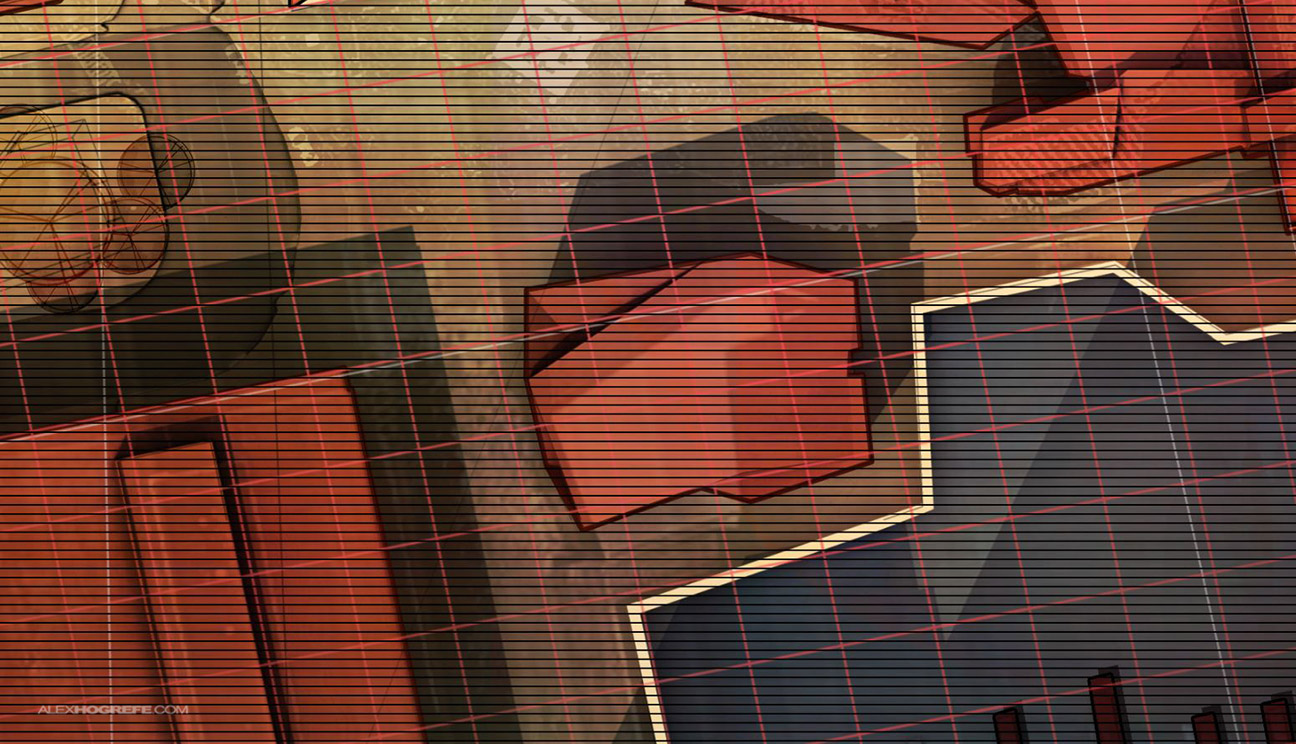
This post is also a follow up from many emails asking me to explain the diagonal line hatching used the site analysis diagrams. There are two methods in Photoshop that I know of that can create the diagonal line hatch seen in the image above. Both options use a relatively fast workflow and are easy to execute.
OPTION A: Google Image Overlay
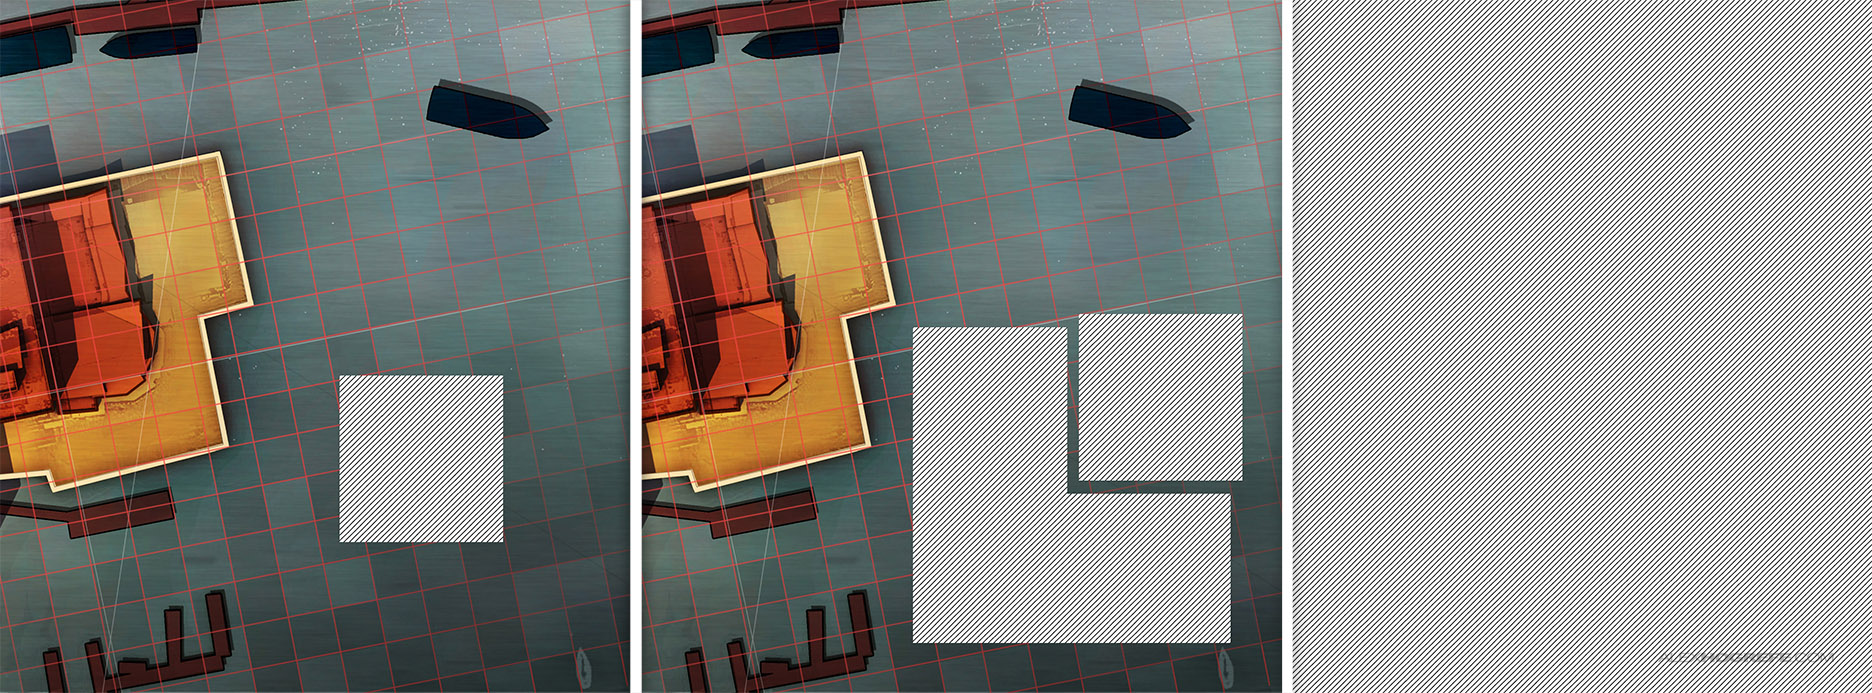
A1. This option involves simply going online and finding a hatch pattern. In this case, I Google searched “diagonal lines” and found several images that would work. The images do not need to be large because I can copy the texture many times to create a much larger texture for what I need.
If you do need to copy a small image many times, hold down the “Alt” key (“Option” on Mac) and drag the image using the “Move” tool. This quickly duplicates the layer. Once you have all of the layers aligned forming a larger image, they can be merged into one layer by selecting all of the individual layers in the layers palette, right click on one of the layers, and choose “Merge Layers”.
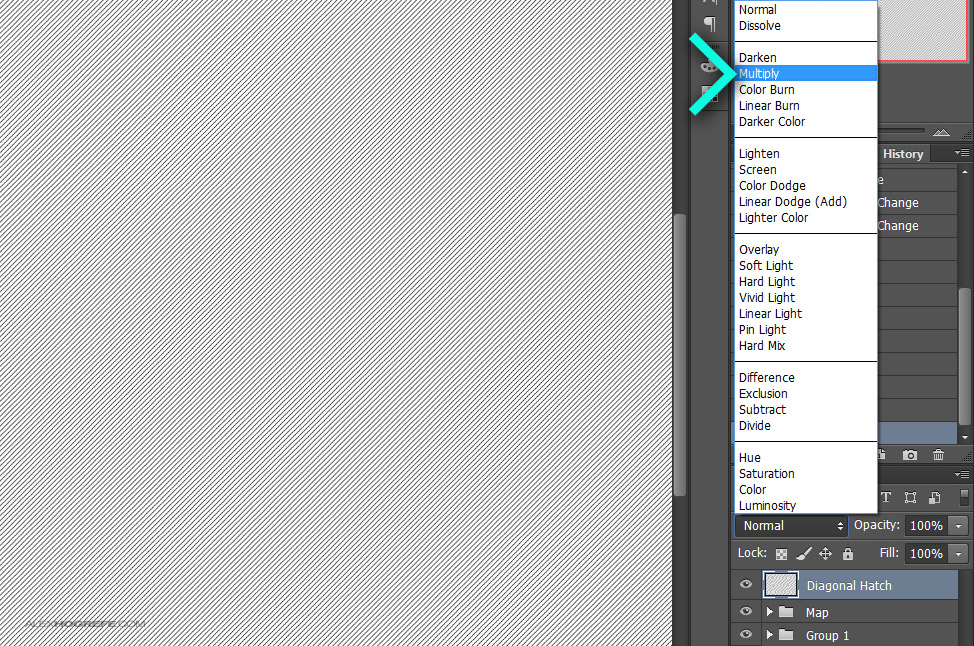
A2. Next, the white background needs to be removed. This is easily done by selecting the new hatch layer, then choosing “Multiply” in the layer blend mode drop down in the layers palette.
OPTION B: Create a Custom Pattern
A second option to create a hatch is to define a custom pattern which can offer much more flexibility. This method will often generate cleaner line work than what can be found on the web. One other thing to note is that many PS patterns can be found online through websites like Brusheezy which can be imported into Photoshop.
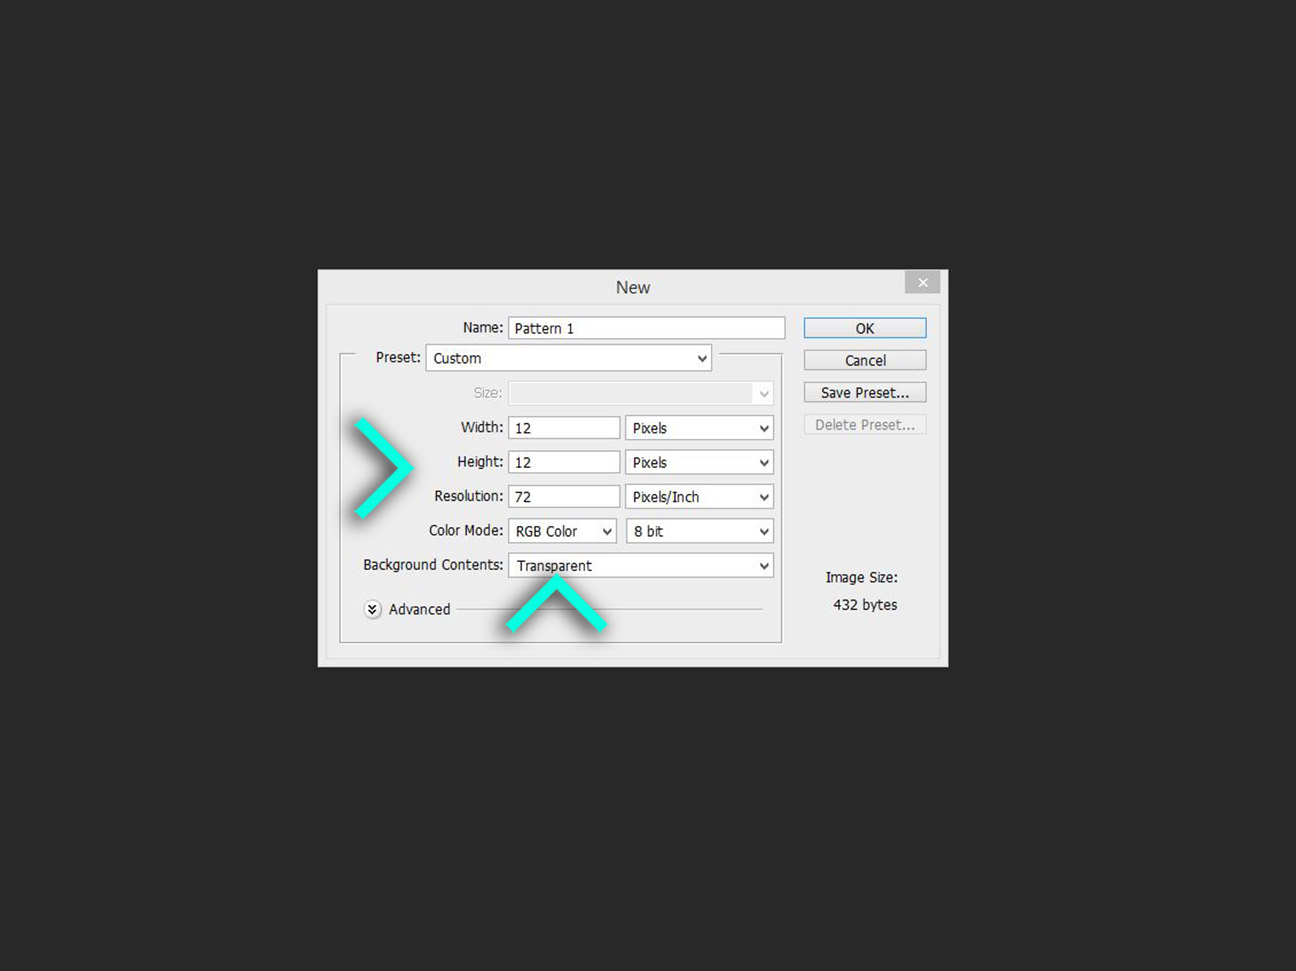
B1. I want to create my own custom pattern. To do this, I first need to create a new document in Photoshop by going to “File>New”. I set up the new document to be 12×12 pixels, however this size can change depending on your needs. Also, double check to make sure the background contents is set to “Transparent”.
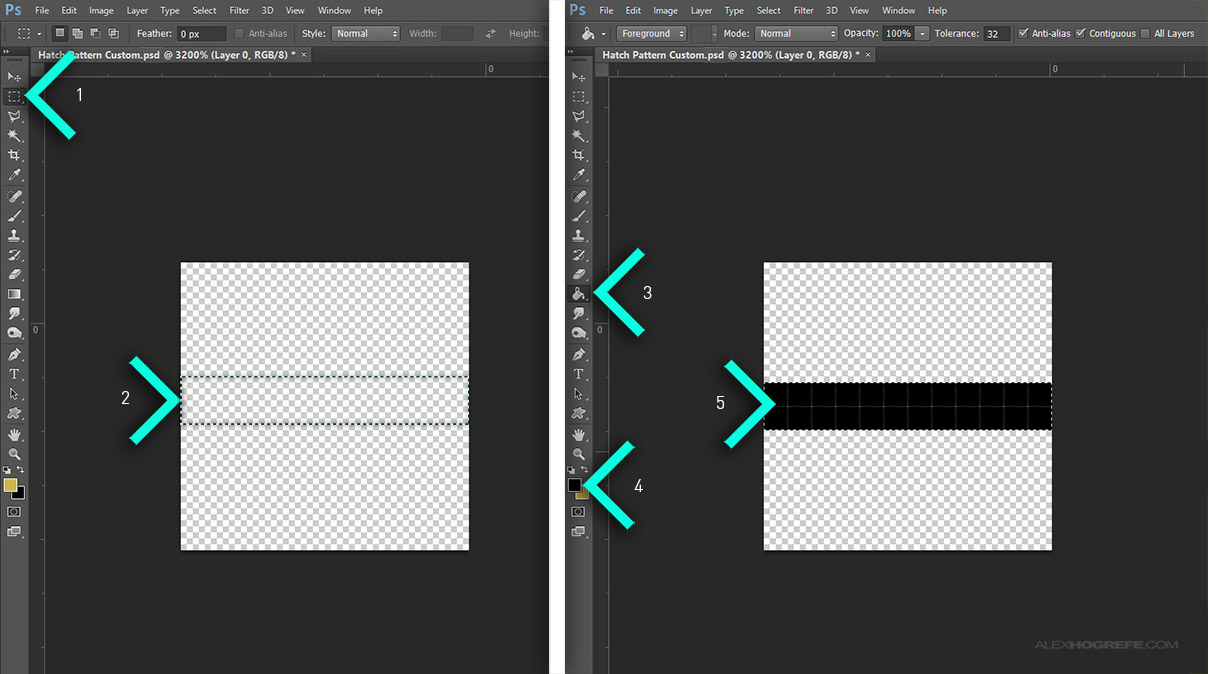
B2. Next, select the “Rectangular Marquee Tool” and make a selection crossing the entire document. I made my selection 2 pixels high. The Rectangular Marquee Tool should snap to each pixel making it easy to determine how many pixels are being selected.
Choose the “Paint Bucket Tool” on the left and also select a black paint color. Then, fill the selection.
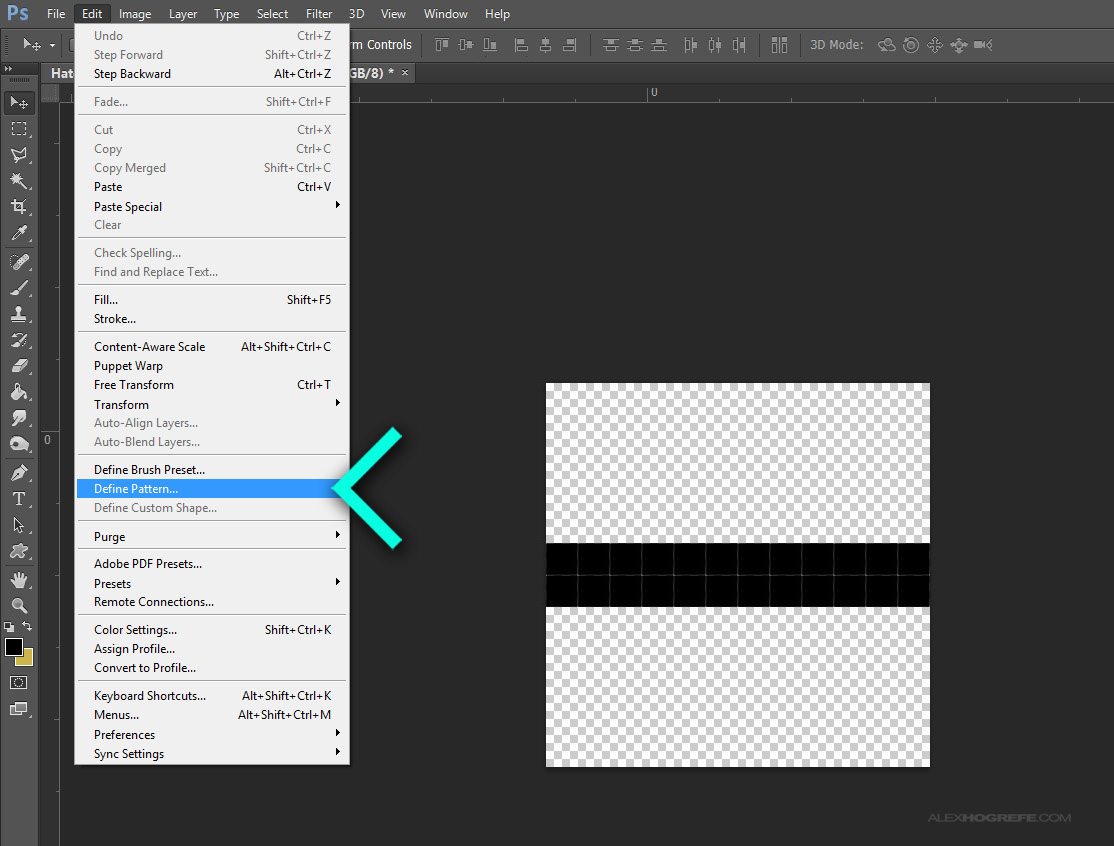
B3. The pattern is ready, so now it needs to be saved into Photoshop as a pattern. Choose “Edit>Define Pattern”. In the dialogue box, give the pattern a descriptive name and choose “OK”.
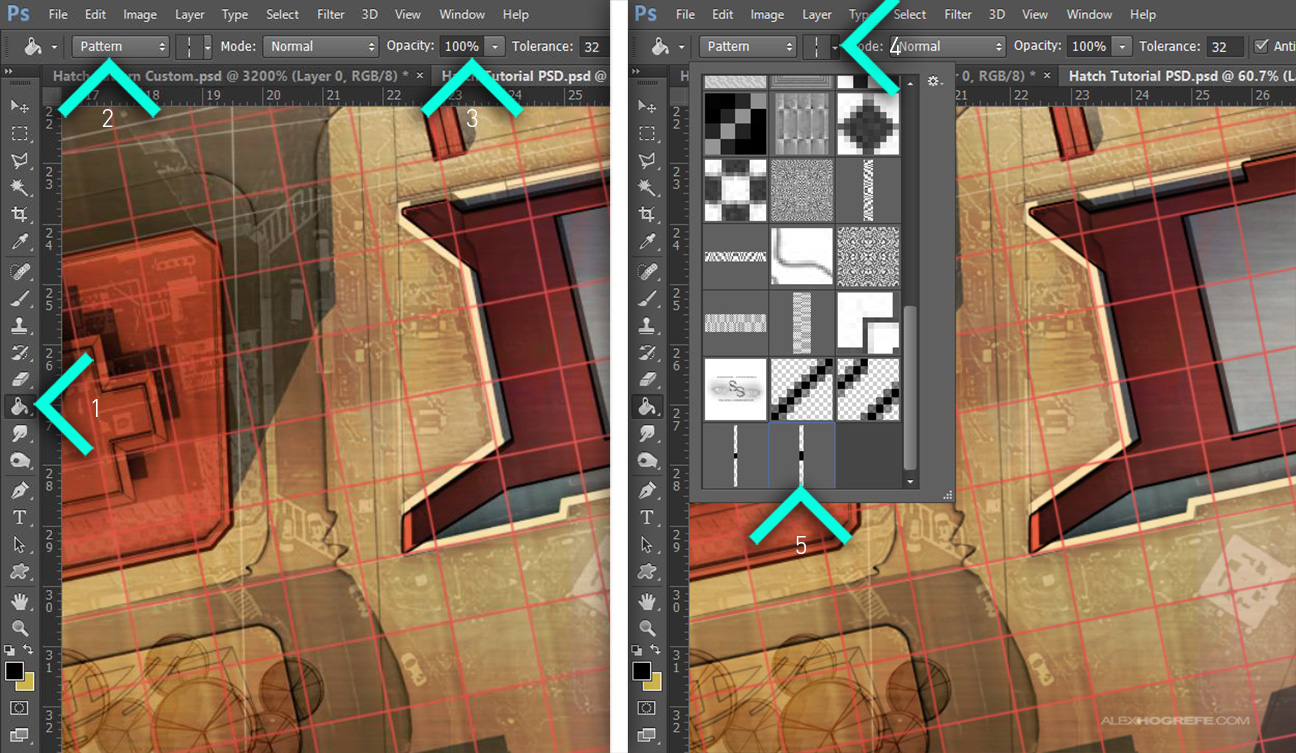
B4. To apply the pattern to the illustration, first create a new layer and move it to the top of the layers palette. Then, select the “Paint Bucket Tool”. In the paint bucket options at the top, be sure to select “Pattern” in the drop down and set the Opacity to 100%.
To the right of the pattern drop down, there is another drop down which will show a thumbnail of all of the saved patterns. Choose the pattern created in the steps above.
With these options set, use the paint bucket to fill the page making sure it is on the new layer.
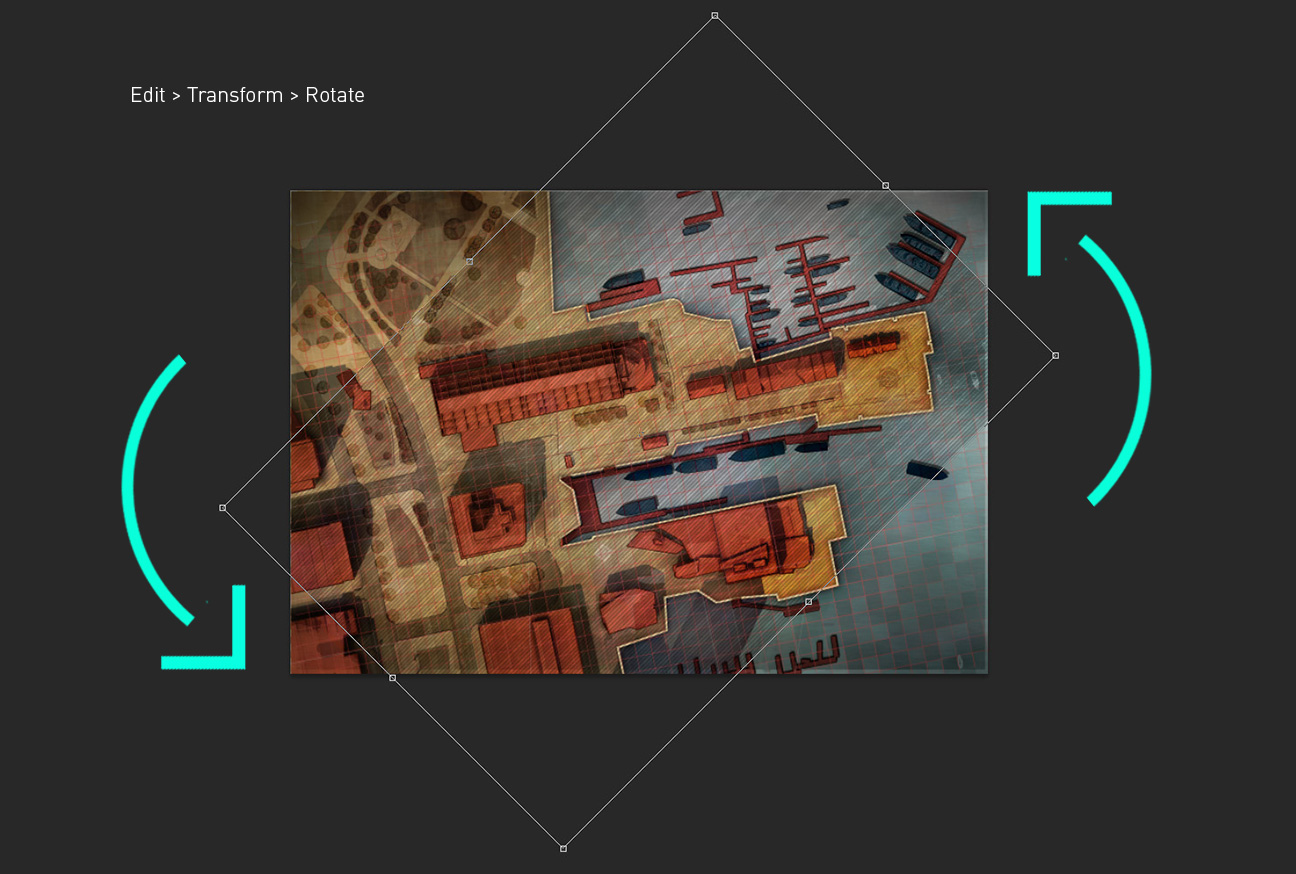
B5. Since this pattern was applied on its own layer, it can be rotated 45 degrees to create diagonal lines. Choose “Edit>Transform>Rotate” and hold down “Shift” when rotating to snap to 45 degrees.
Use Masks to Hatch Specific Elements
The hatch patterns are rasterized on their own layer meaning the hatch can simply be erased using the eraser tool. However, applying a mask will allow for editing later on down the road if changes need to be made.
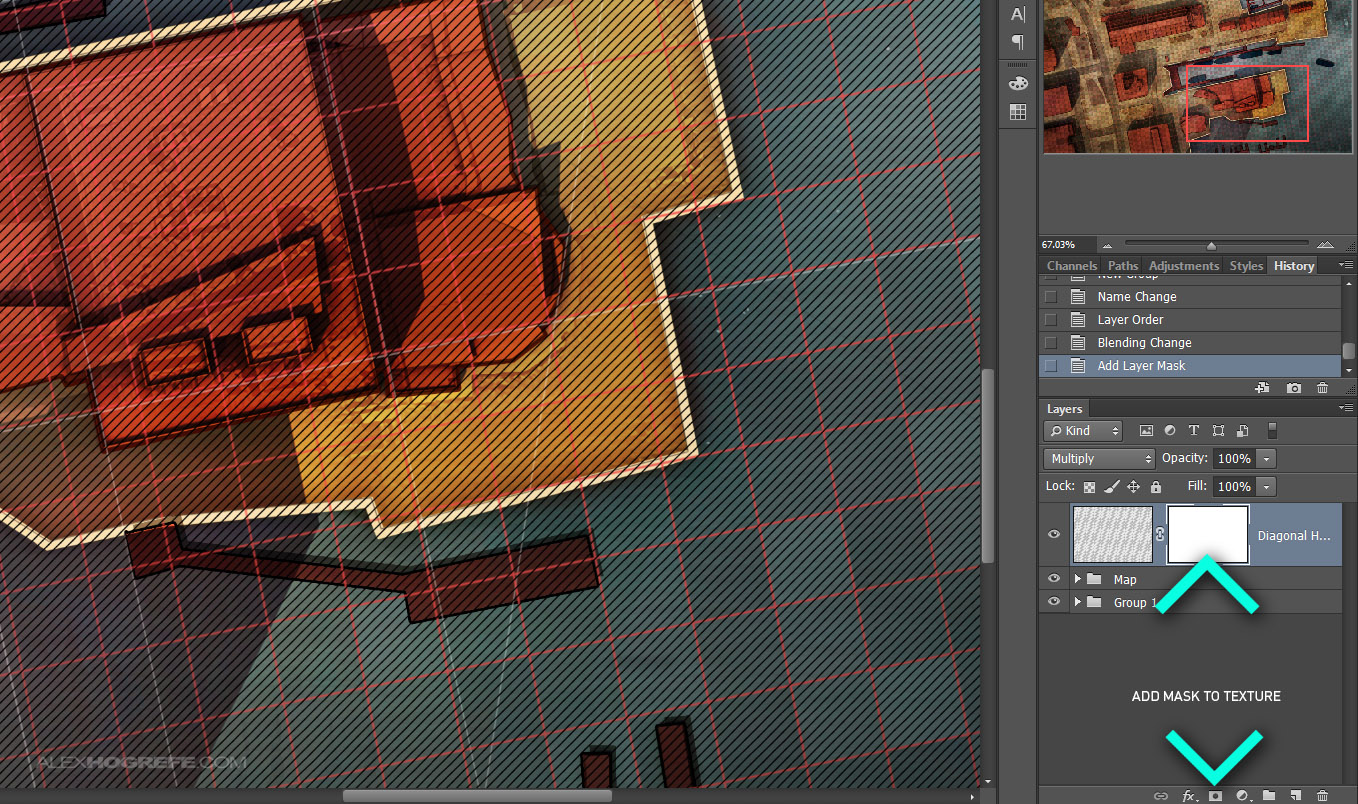
1. Apply Mask
To apply a mask, select the hatch layer and choose the “Add a Mask” icon at the bottom of the layers palette.
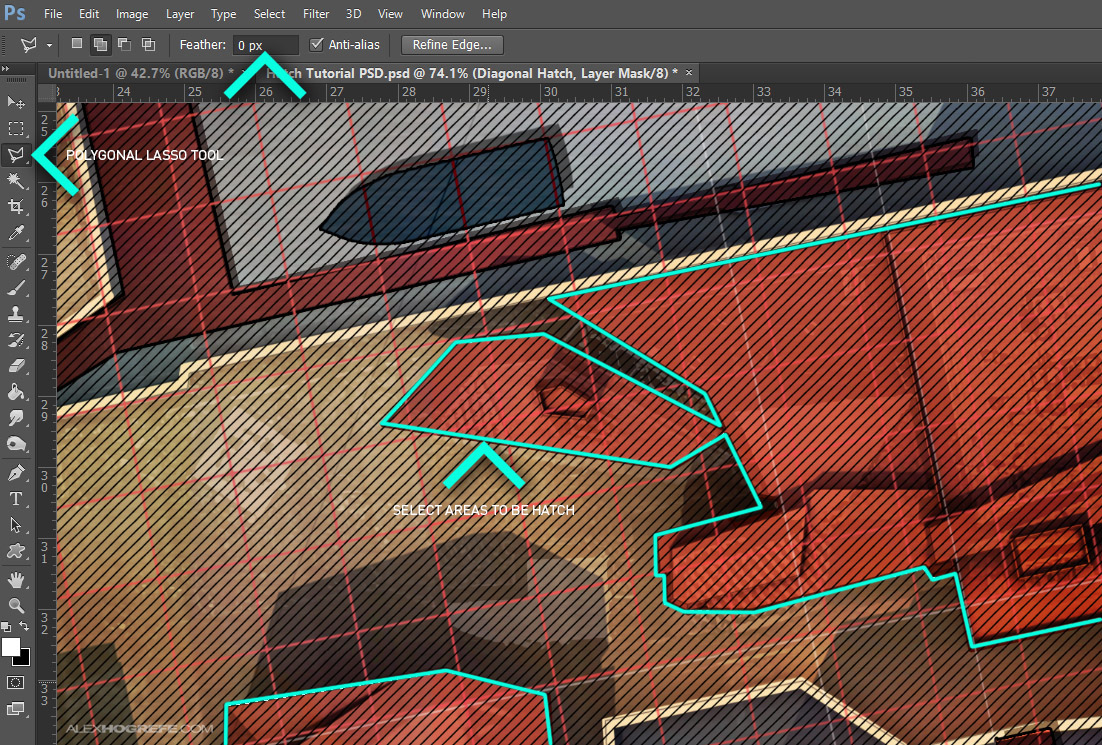
2. Make Selections
Next, use the “Polygonal Lasso Tool” to select the areas of the illustration that will be filled with the hatch pattern.
3. Inverse the Selection
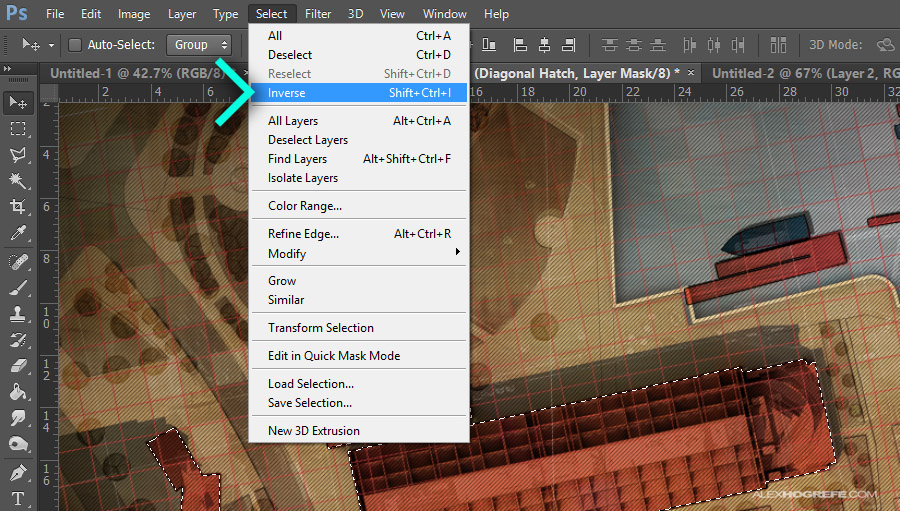
I want the selection to be what I want erased, therefore I am going to inverse the selection. Choose “Select>Inverse” at the top.
4. Fill the Mask
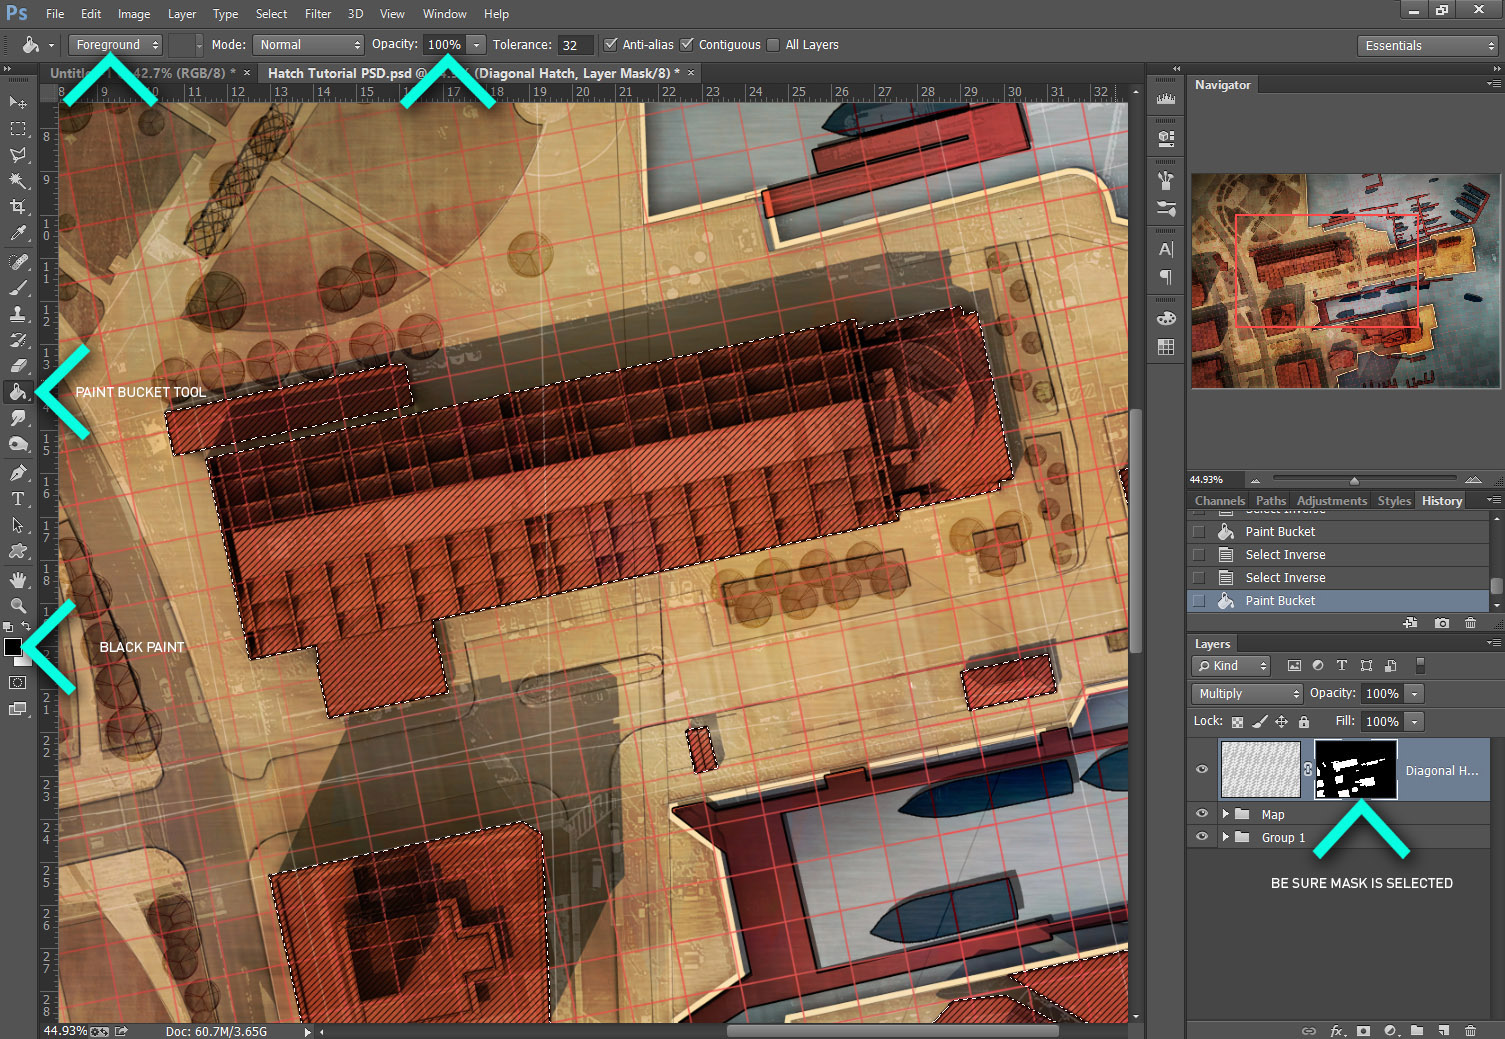
Finally, choose the “Paint Bucket Tool”, check that the opacity is set to 100%, and also that the drop down is set to “Foreground”.
The mask works by using gray tones to determine what parts of the image will appear or not appear. Black paint erases the image. White paint will reveal the image. I don’t want the hatch to appear in the part of the image that is selected, therefore I want to choose black paint.
Double check that the layer mask is selected which is the white box next to the layer image in the layers palette. Using the paint bucket tool, fill the selection with black paint. This will “erase” away the hatch pattern where the selection was made. White paint can be used to bring back the hatch pattern later if changes are needed.
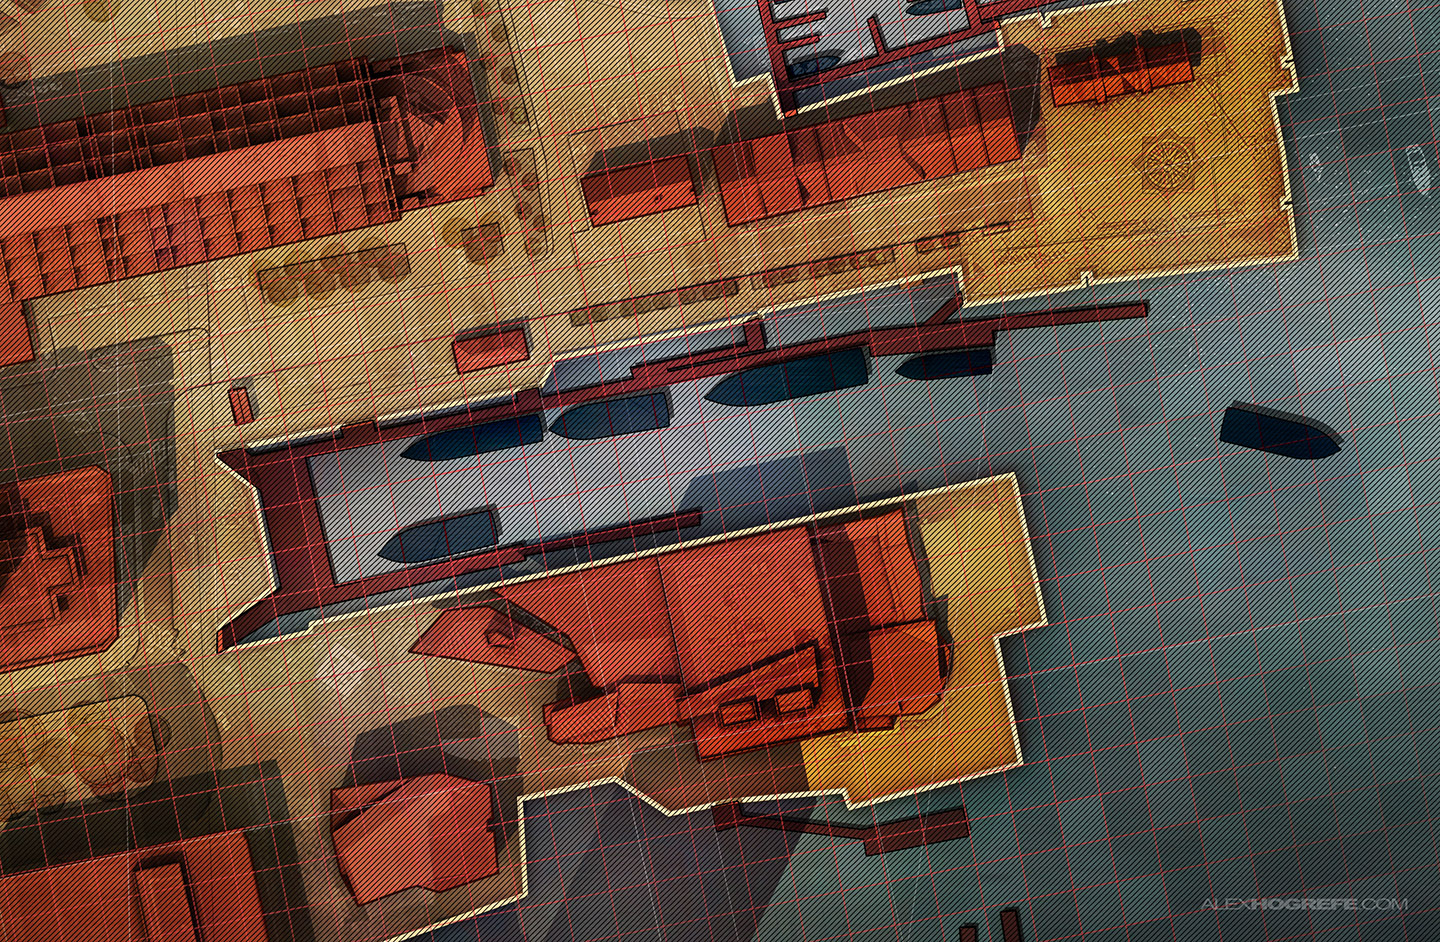
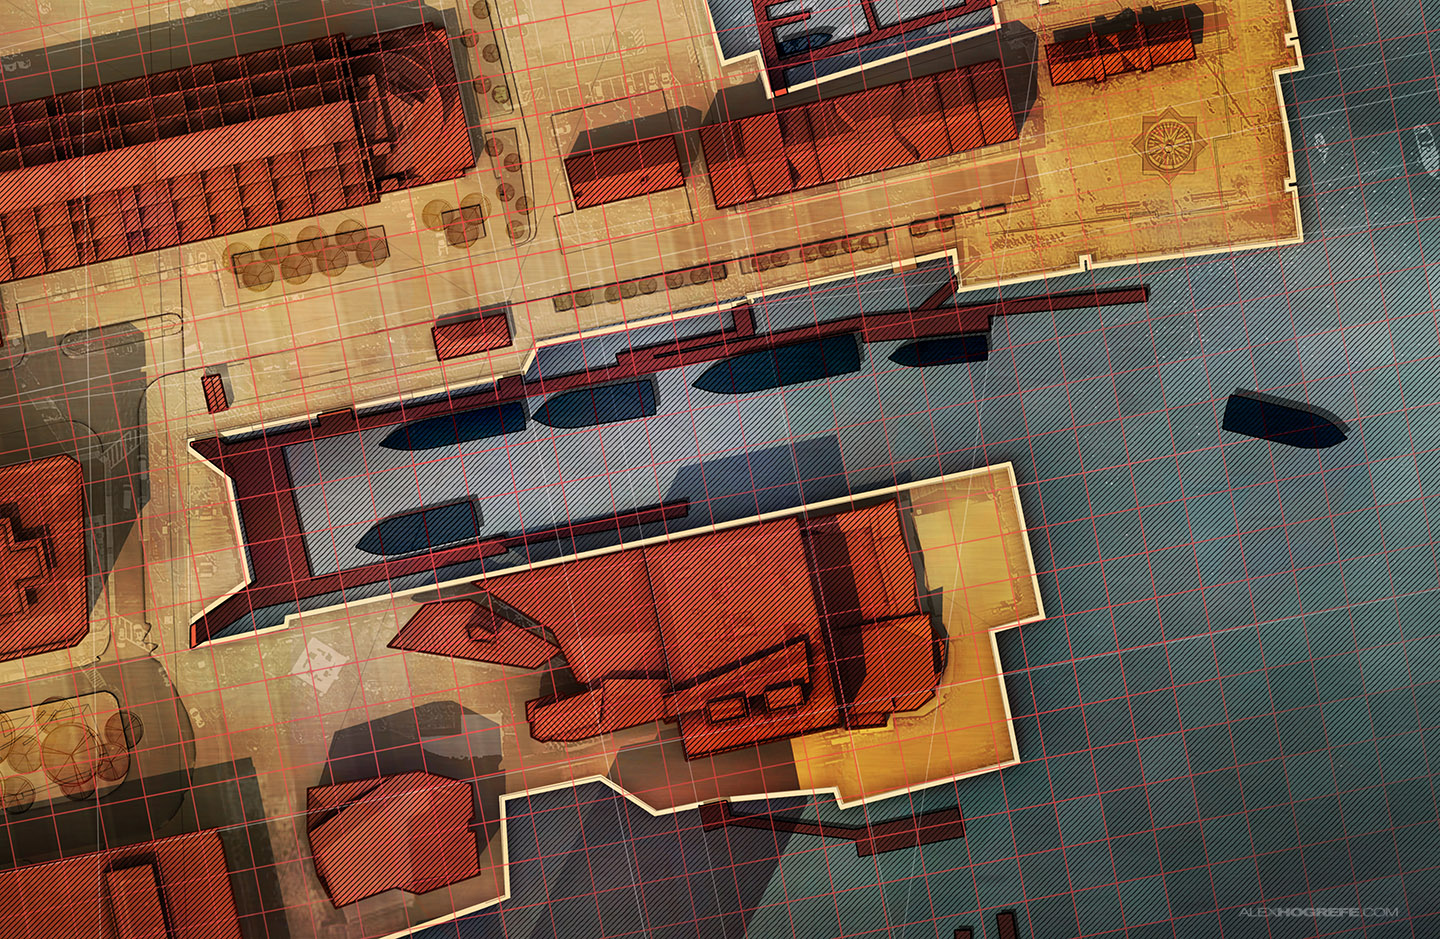
Below, the final result using patterns and masks to give a little more texture to the image and help define important areas of the diagram.


hey alex..
what pixels should i select to make a crossline pattern for an A 2 sheet size… the 12 pixel pattrn is too small for my sheet … the pattern is merely a point on the sheet… please help…
Hello
The easiest way that I know on this subject is this:
Create a grid in Illustrator
These create a line and create an offset copy with the transform command.
Repeat … until the desired number is reached. Now, select all and apply the Rotate command, also as a copy.
Then select all and copy.
Paste into Photoshop. The grid is based on vectors and can be freely rotated, compressed and otherwise deformed.
Sincerely yours
@Karan,
The size will depend a lot on the dpi (resolution) of your Photoshop document. I would probably approach it using the trail and error method. Double the size from 12 to 24 pixels. Save as a pattern and apply to your document and see if the size works. If not, double the size again. It only takes a few seconds to save the pattern and test on your documents. Not knowing the resolution of your document, I cant help you more than that.
Okay… Now i wanna know how you did the furnitures!! The overall effect is so good! Thanks Alex its lovely
Hey Alex,
I really like your blog and all tutorials you do, really learned a lot.
One thing that maybe annoys me a bit is that you don't put "Read More" buttons on your posts. So when I'm looking for something in particular got to scroll down to the very end of every page. I usually forget how tutorials are called, so I can't use Search. A simple feature like this would keep your blog easier to follow 🙂
Besides that, this blog is just perfect. I am an architect student and I find this so helpful.
@ Martin,
Its funny you mention this. It has been thought about in depth several times. Just know that this among many other things are being addressed as we speak. Its just a matter of finding time in the next several months to fine tune things and go live. Thanks for the comment
Hey Alex.
Awesome blog! Keep it coming. I learned a lot from your posts and even if I don’t I find it to be a fascinating read.
Thank you so much!
Wooh..u guy ur just such amazed,i have real improved in my studio presentation folowing up your tutorials and advice.God bless u alot
Ardhi university.Tanzania, East Africa
Thanks for all the tips. I’m new to everything here and I have found your site to be a great place to get some pointers!
hi alex ,
i trying to make hatch pattern by creating single black color by defining pattern ….when I applying paint bucket…it is not creating
Thanks a lot for sharing with us