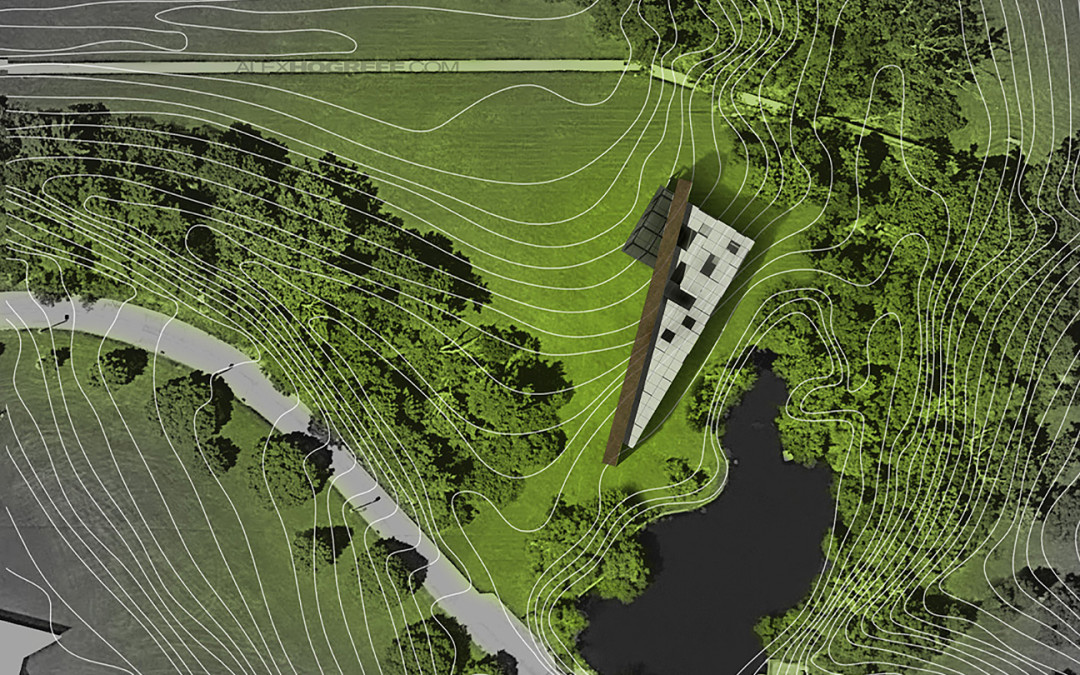
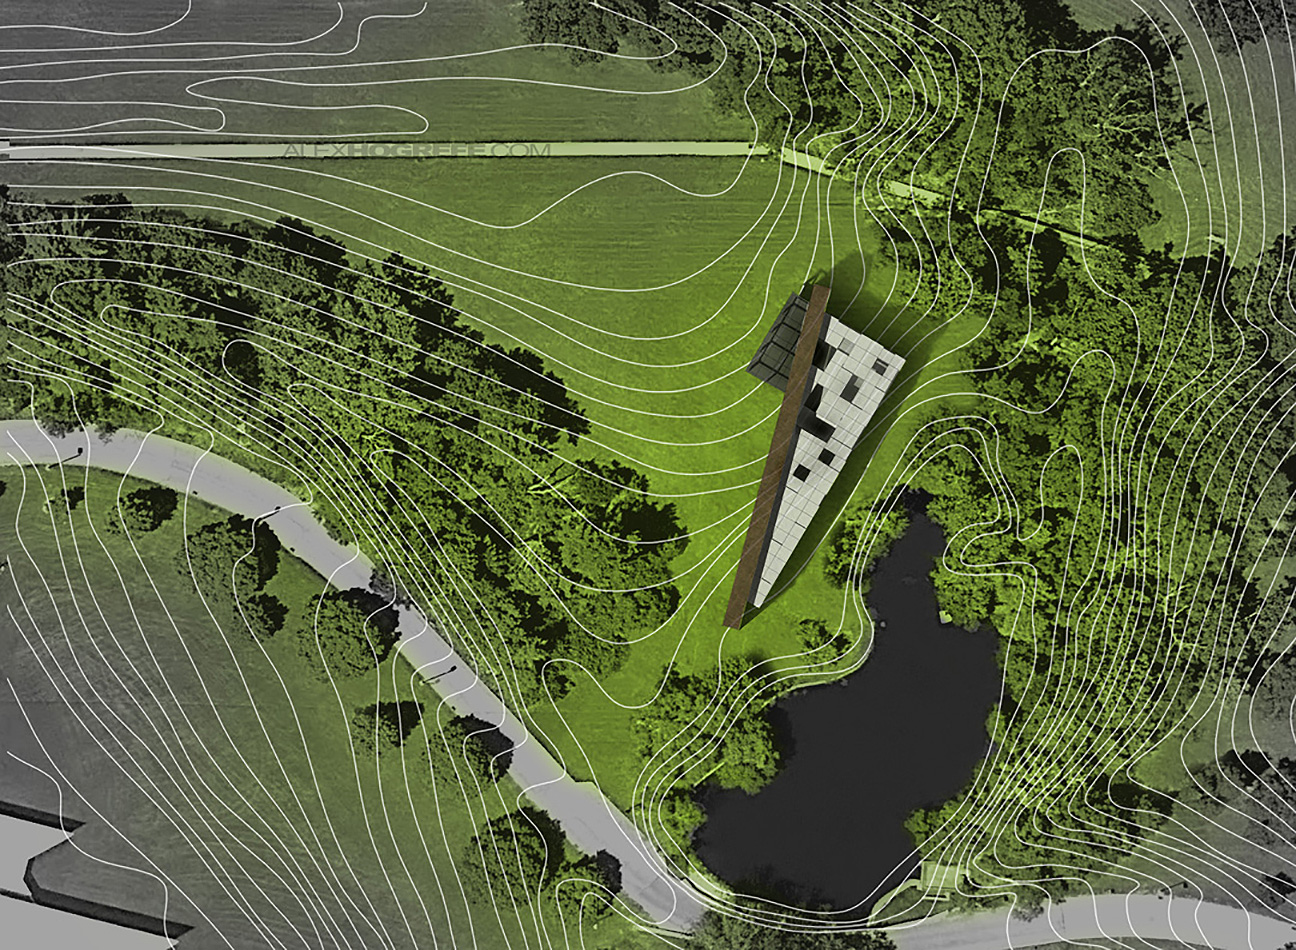
With this tutorial, I wanted to show the workflow that I use to develop a clean looking architectural site plan. This tutorial, like many of my tutorials, doesn’t use a rendering engine, only Sketchup image exports and Photoshop. Although I don’t use a rendering engine, a rendered roof plan of a building could easily replace the Sketchup images used in this explanation.
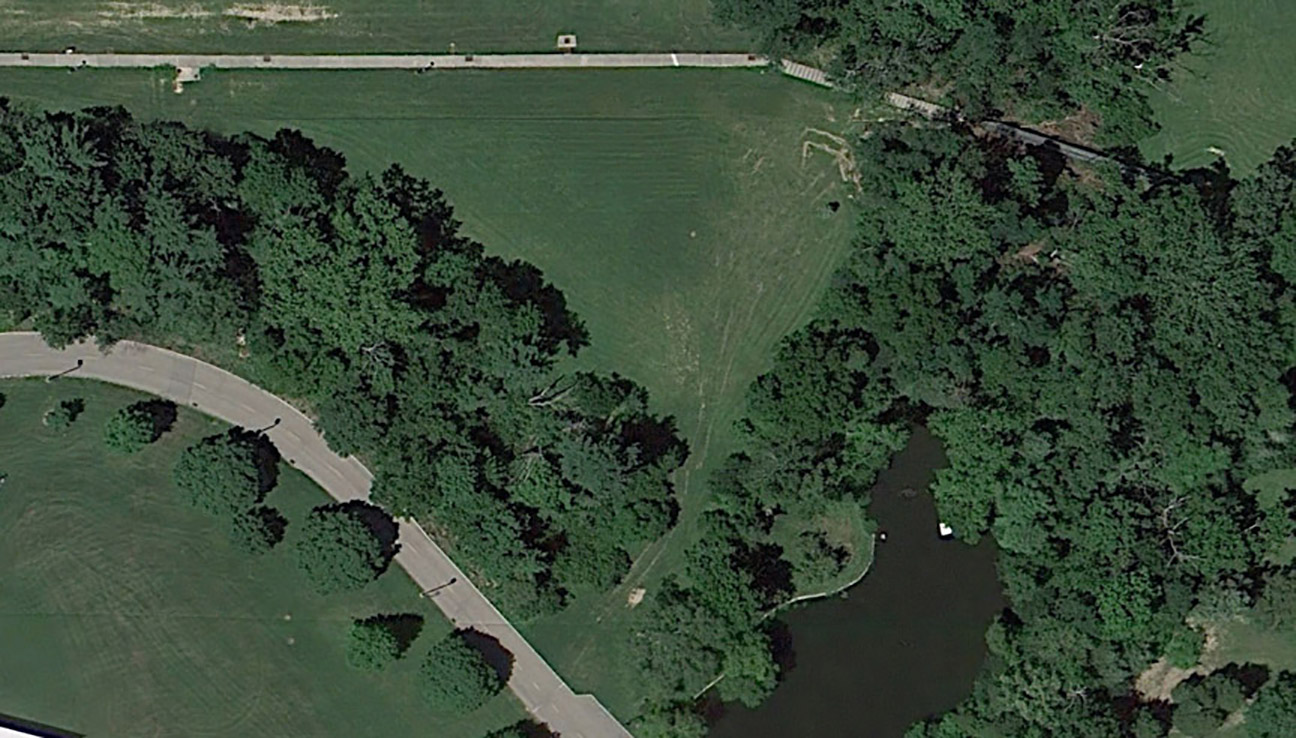
1) Start with an aerial image of the site at as high of a resolution as you can get it. I prefer to use aerial satellite images for site plans because it adds detail and texture that is hard to get with a 3d model.
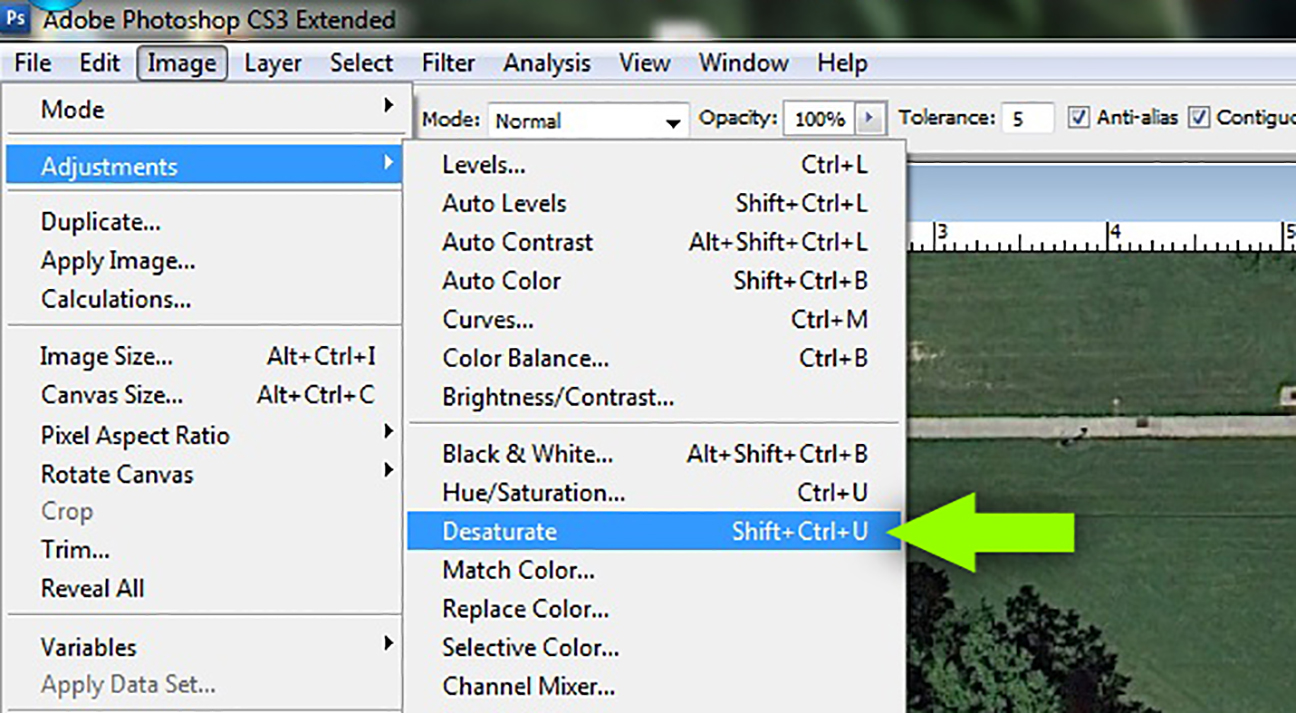
2) Once the site plan is opened in Photoshop, go to “Image>Adjustments>Desaturate”.
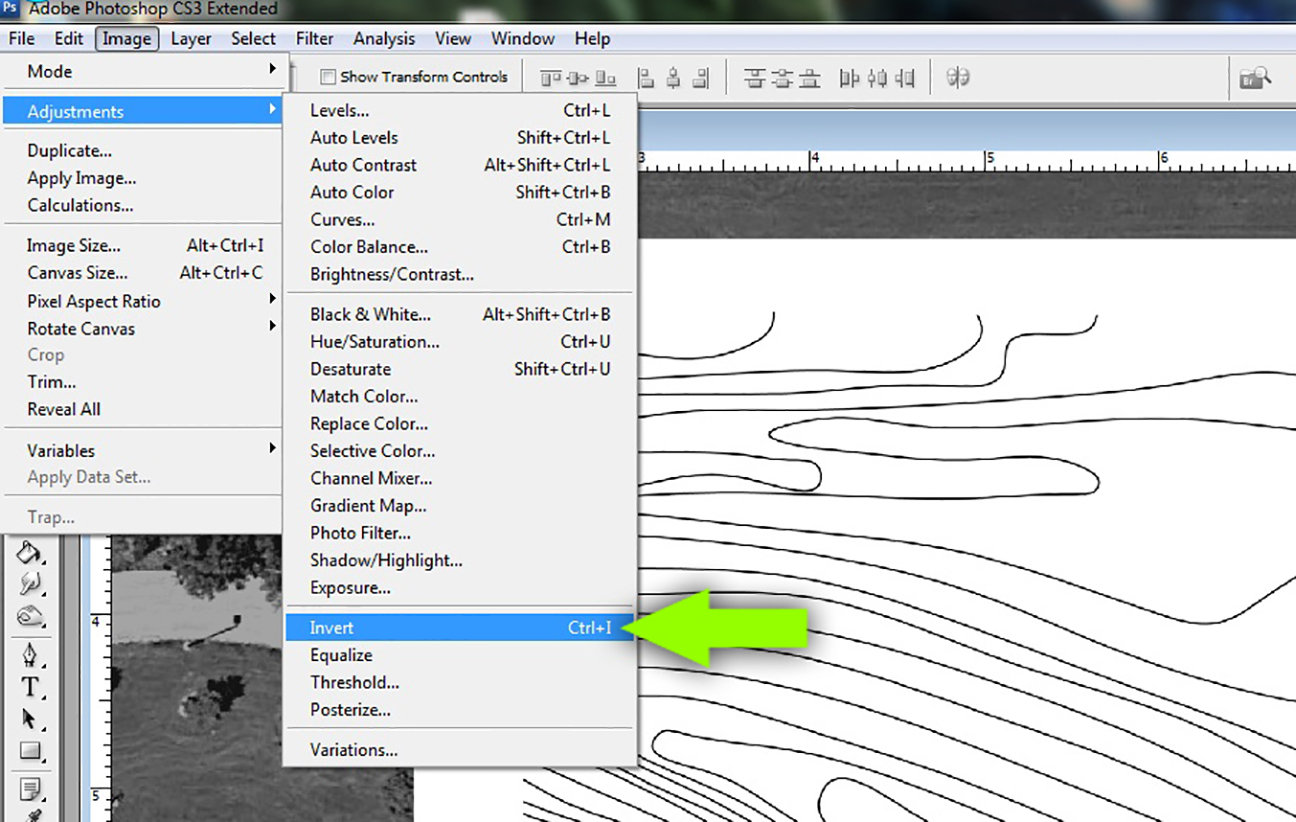
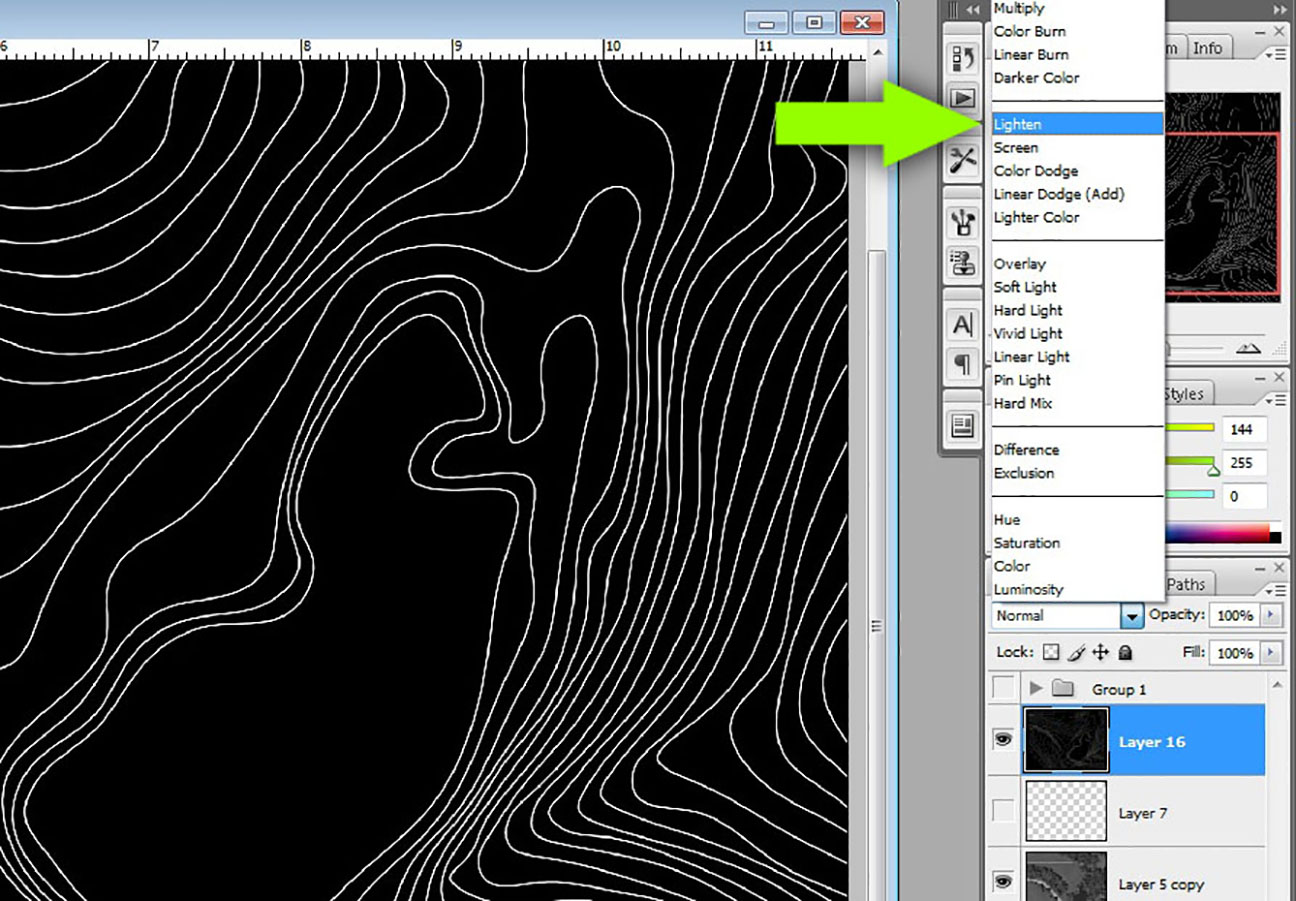
3) I have topography line work but I want to remove the white background and I also want the line work to be white, not black. To do this, first invert the topography image. Go to “Image>Adjustments>Invert”.
4) Now that the image is inverted, go to the layer blend mode drop down menu in the layers pallet and choose “Lighten”.
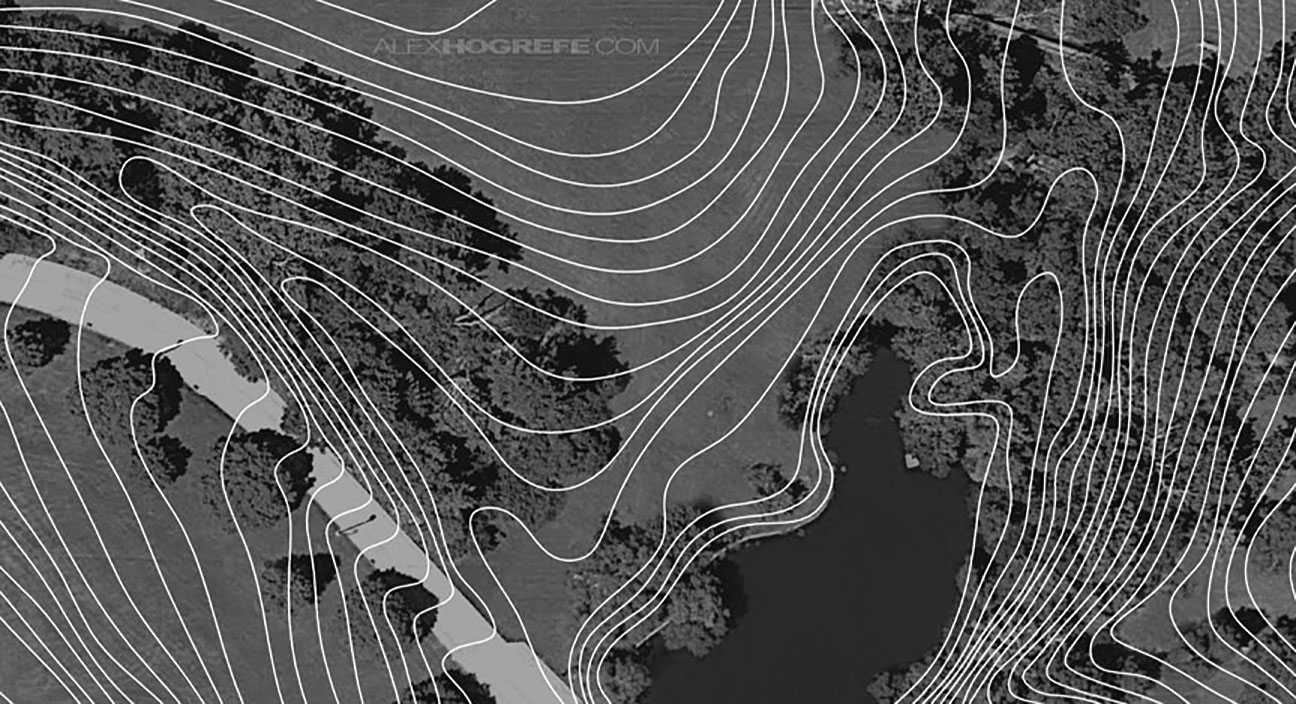
The site plan should look something like this….
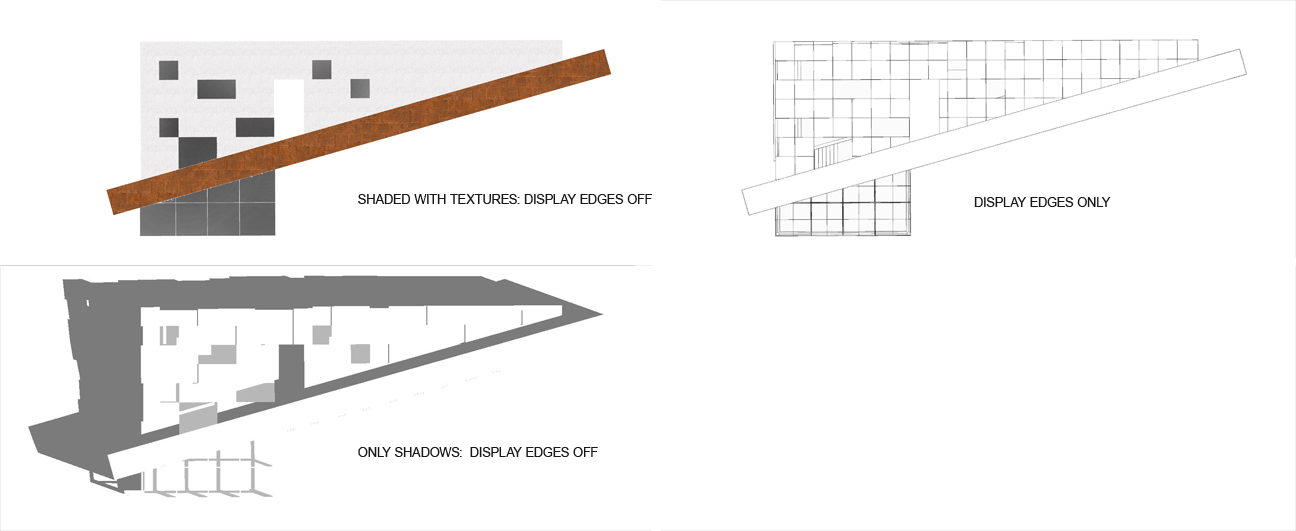
5) Next, 3 images of the building design need to be exported from Sketchup. Basically, one image will be the color, one will be the line work, and one will be the shadows. It’s important to export each image individually so that each can be edited separately. Also double check that the shadows in the Sketchup model are going in the same direction as the shadows in the aerial photo.
6) Open the “Shaded with textures” SU export in Photoshop and scale it to the correct site. Some time will need to be spent editing out the background so that just the building is visible.
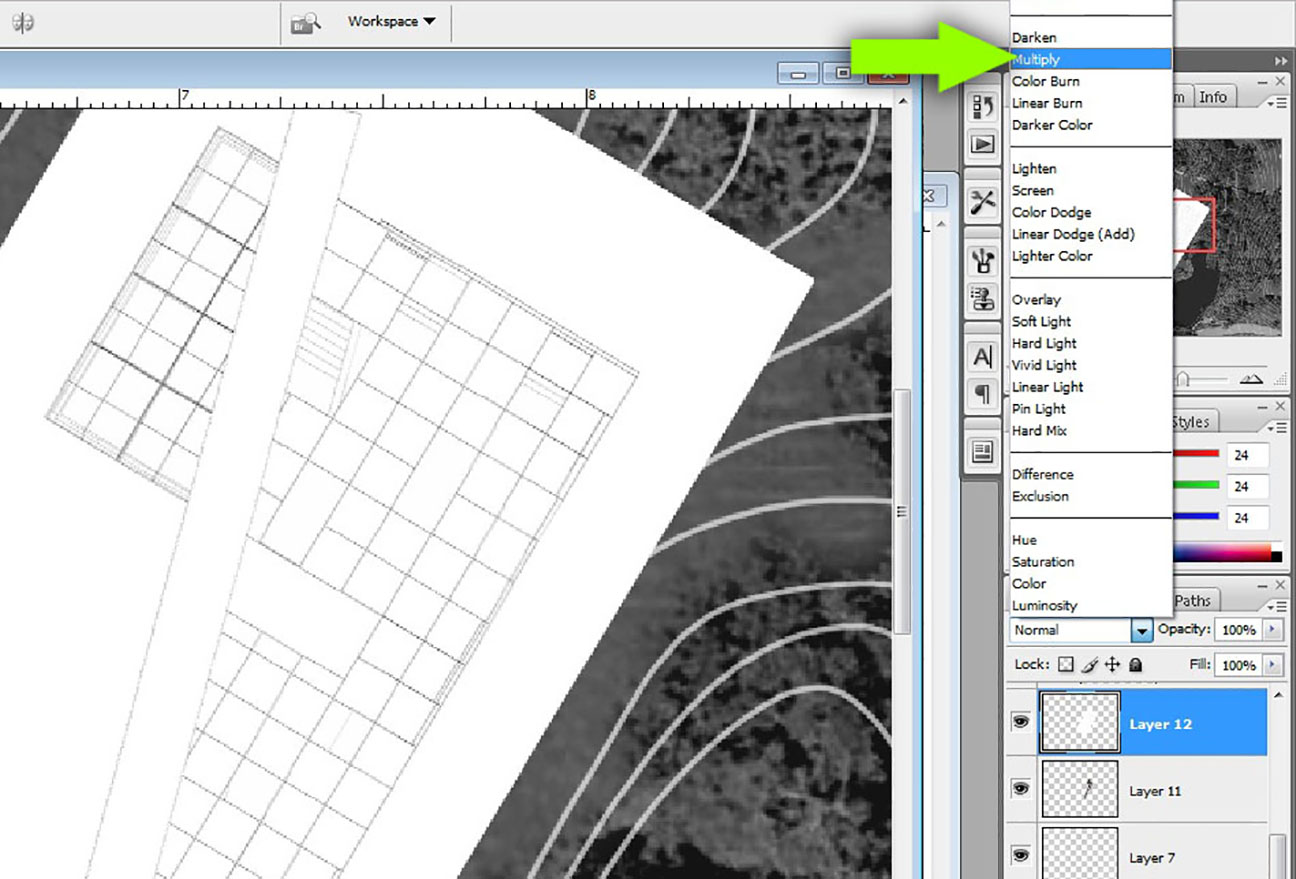
7) Open the “Line work” SU export in Photoshop. Set the layer blend mode to “Multiply” to remove the white background. Lower the opacity so that the line work isn’t too strong. The only reason I am using the line work is to add a little detail to the roof plan.
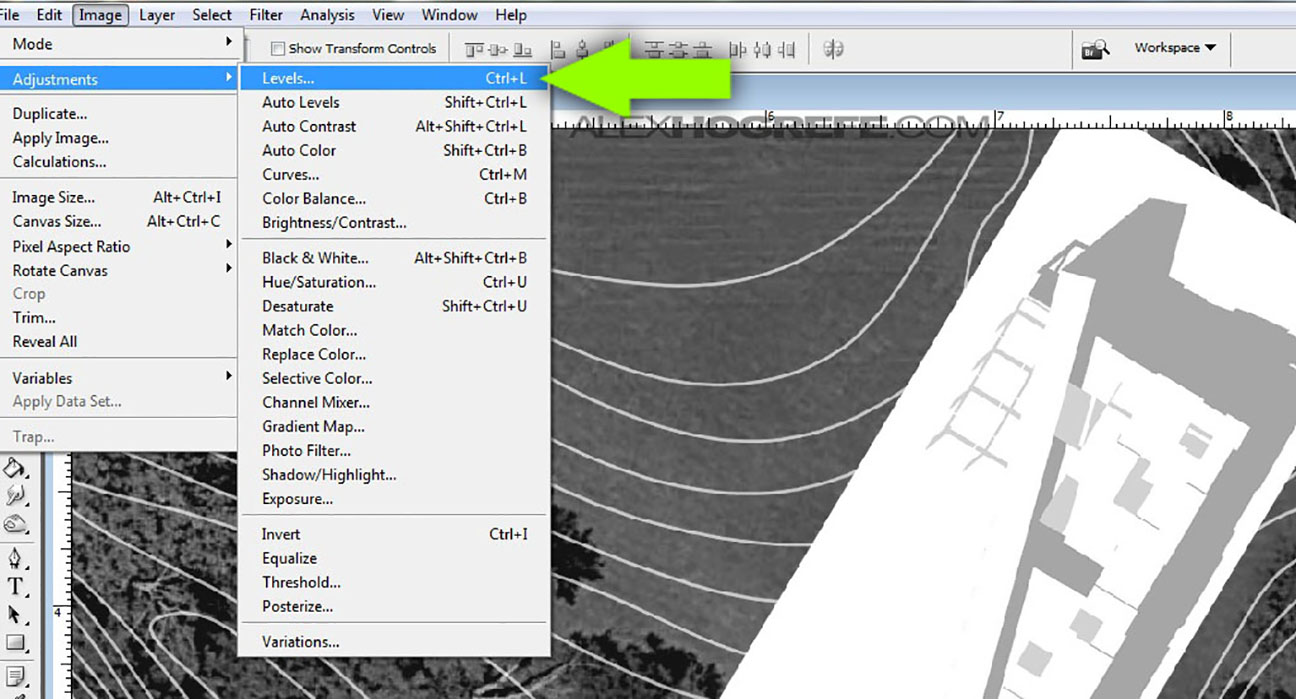
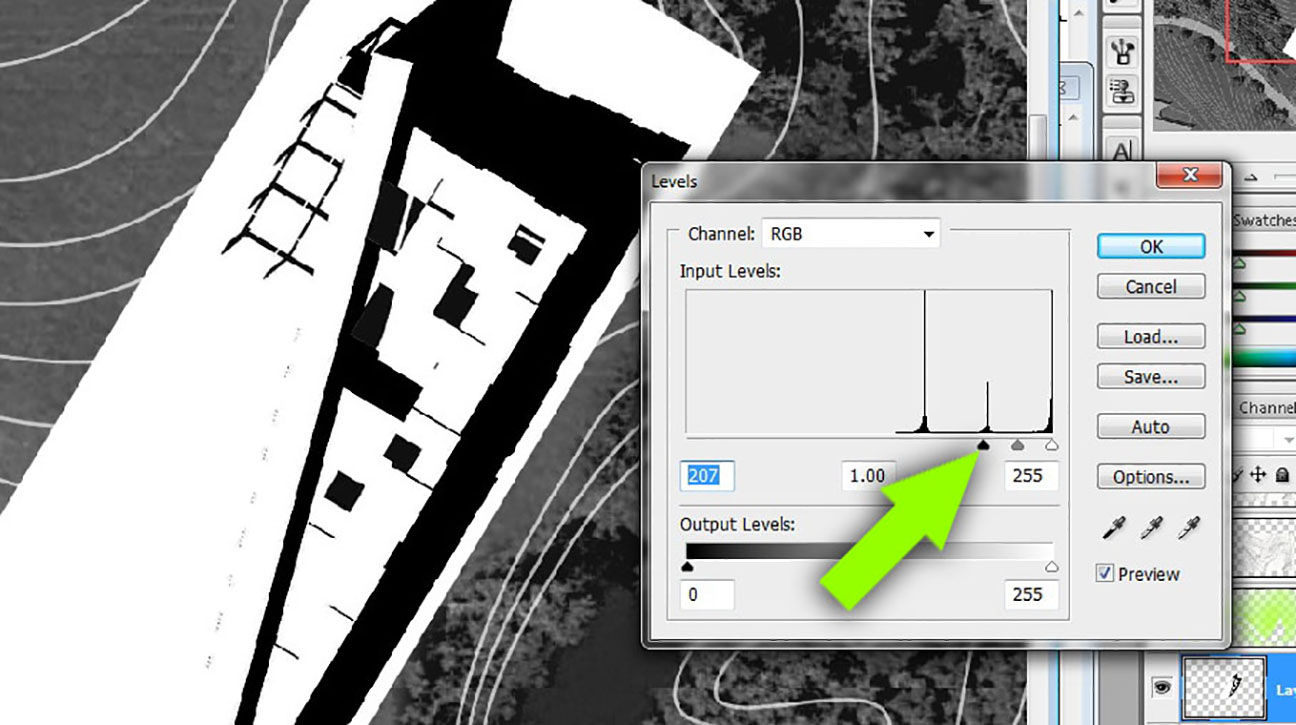
8) Open the “Shadows” SU export in Photoshop. Choose “Image>Adjustments>Levels”.
9) Move the left slider to the right until the shadows are completely black.
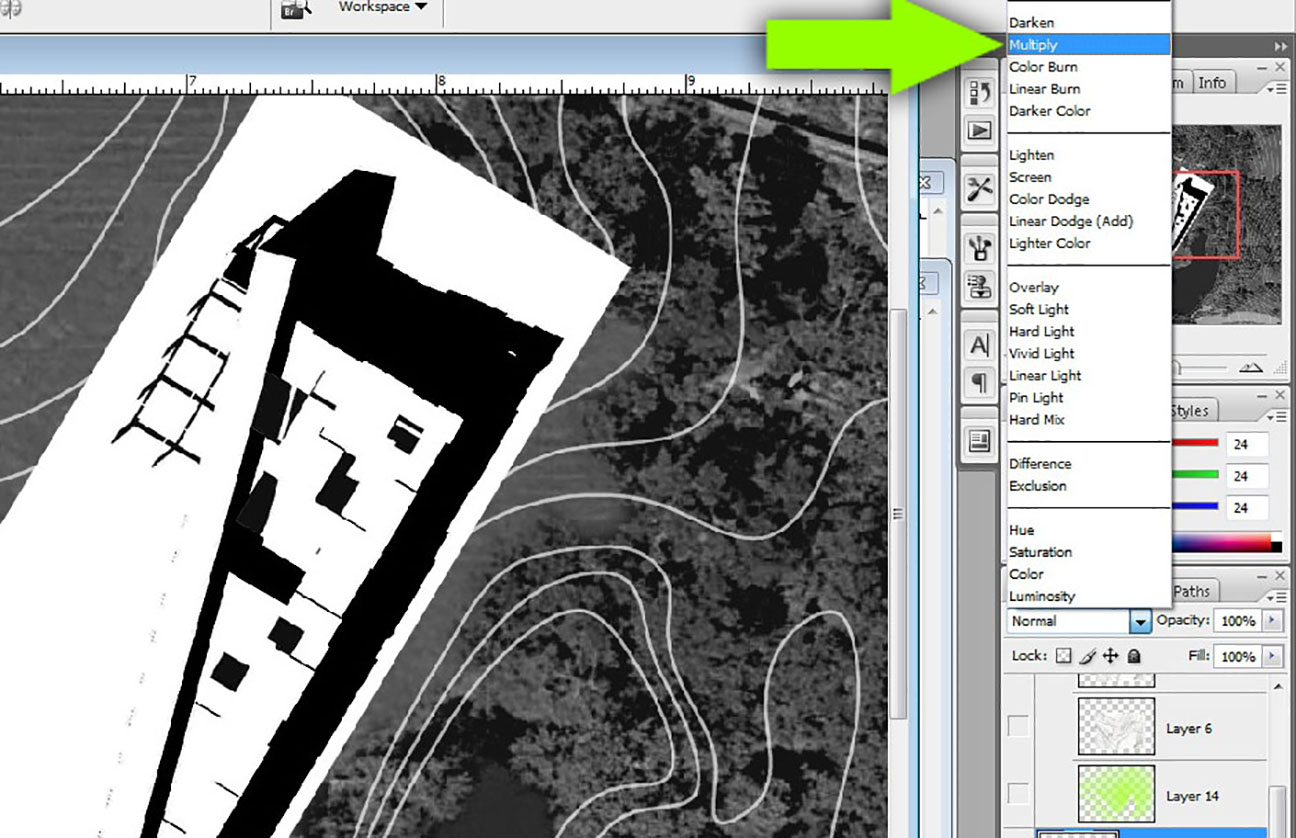
10) Set the layer blend mode of the shadows layer to “Multiply” to remove the white background.
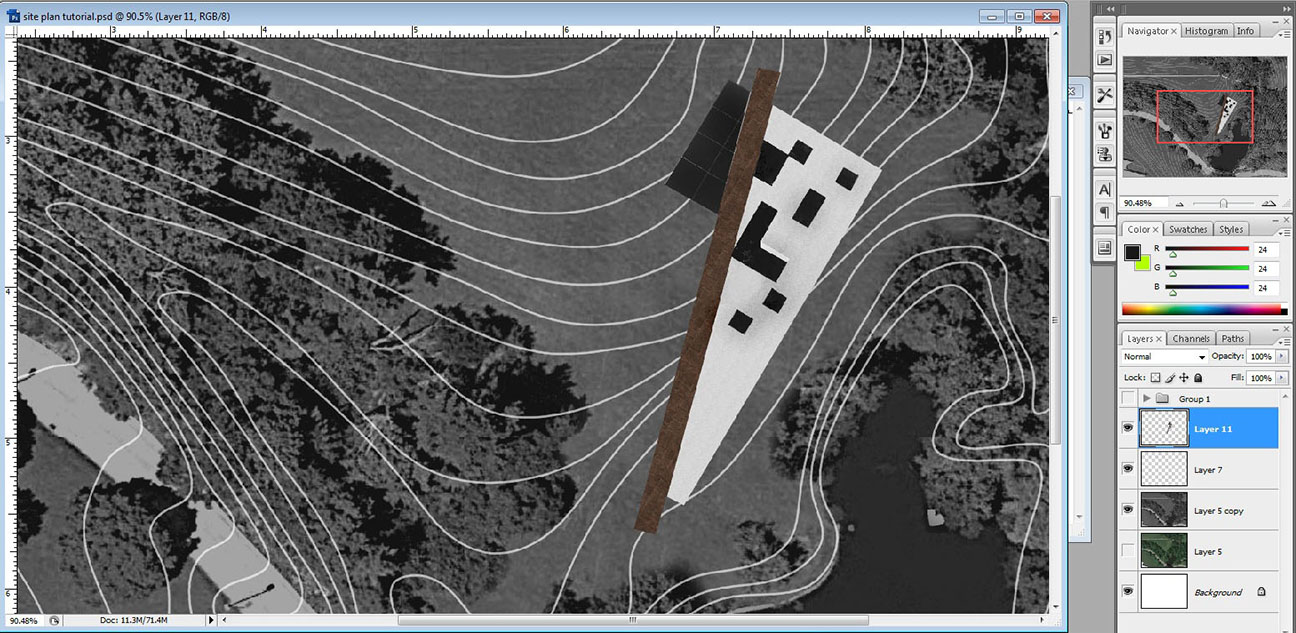
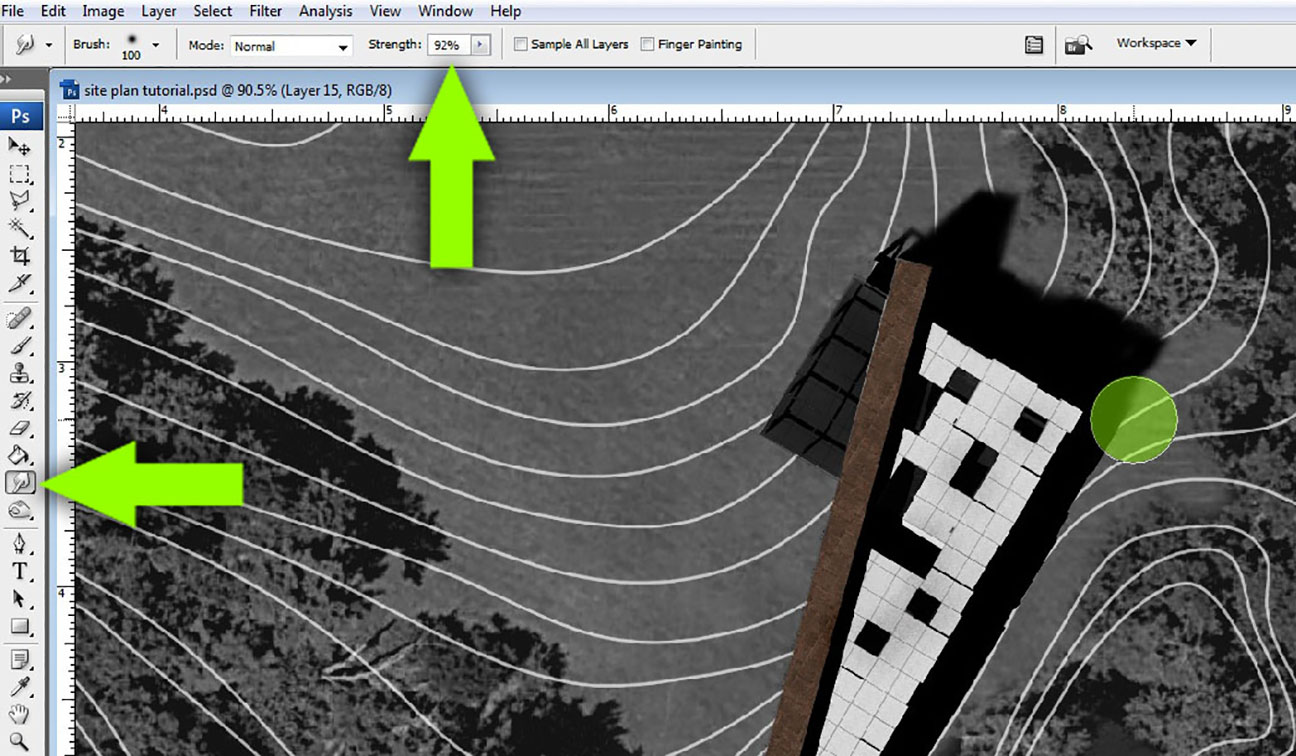
11) Select the “Smudge” tool and set the strength to 92%. Slightly smudge the edge of the shadows not touching the building.
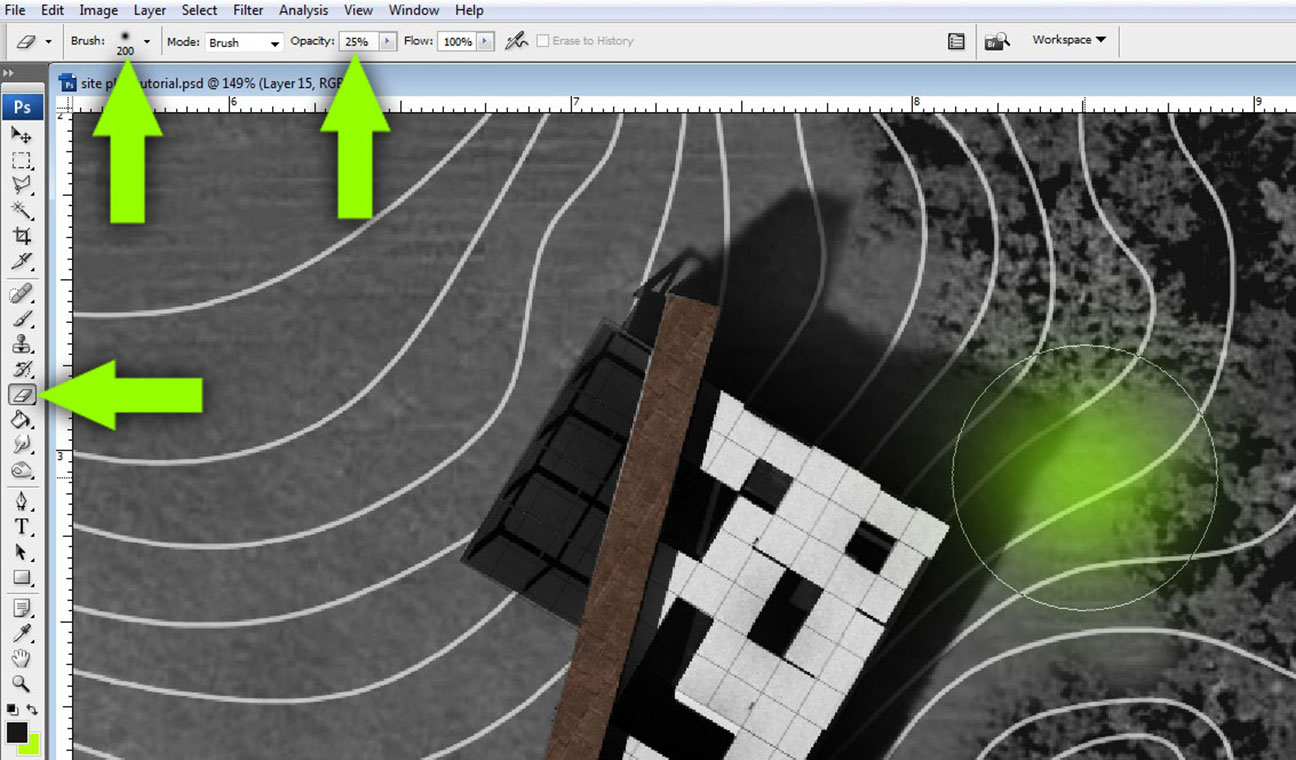
12) Select the “Eraser” tool and give the eraser a soft brush with 25% opacity. Begin slowly erasing the edge of the shadow not touching the building. The corner where the shadow meets the building should be the darkest.
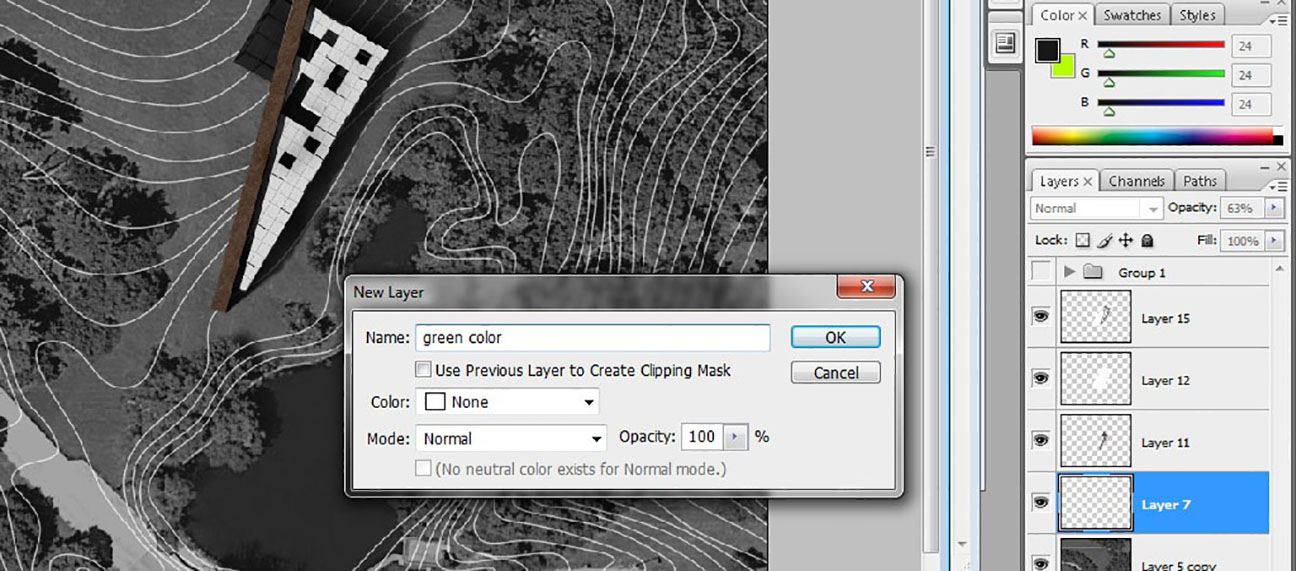
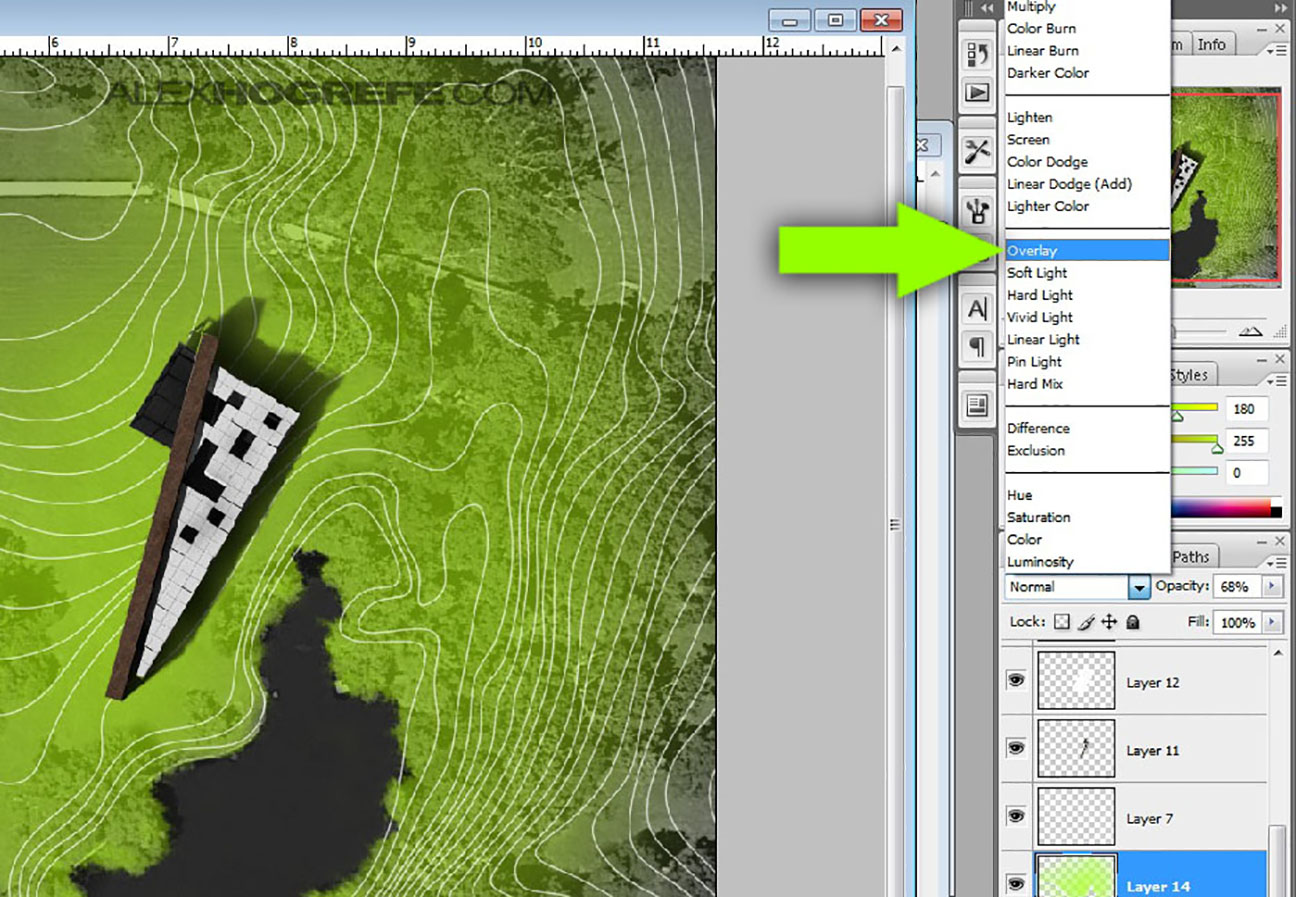
13) Create a new layer and move it below the building layers. A little color will be added to the background.
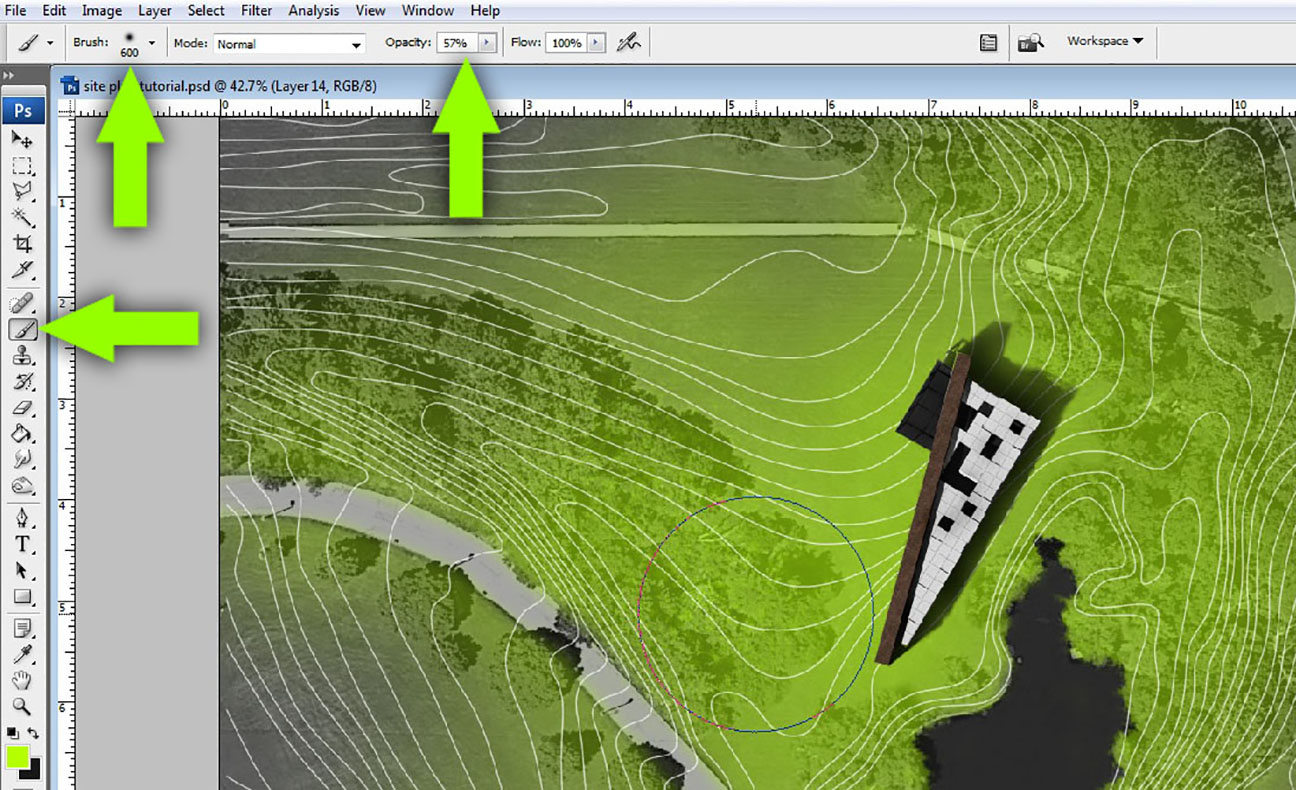
14) Select the “Paint” brush and give it a soft brush with 50% opacity. Paint in the color radiating from the building. I do this so that the design becomes the focal point and the color stays somewhat consistent.
15) Set the layer blend mode to “Overlay” to set the color into the image.
I have used this technique to create many of my site plans in school. It’s quick and looks like it took more time than it really did which is always a good thing.


Thank you so much for this amazing tutorial! Indeed it looks like it took thousands of hours to make it, gotta have to try it myself!
I have been following your blog for a while now. All of you work and tutorials are awesome! Thanks a lot for sharing.
Love it! Love it! This is going to help me a lot.
Thanks Alex
thank you so much this is really helpful.
Thank You
Again Alex you are the men…! 😉 Many thank's
Thanks everyone
i really appreciate you sharing your blog and tutorials! This one rocks! THANKS!
it's so easy to understand the way to draw the plan.I think it will be helpful on my project.
thanks a lot again!
Thank you so much for all the tutorials. They really helped me a lot. Check out this image i did after seeing one of your tutotrials: http://www.nd20.org/?p=873
Thanks Again!
hi alex, thx for the awesome tutorial! just wondering if you could tell us what program u used for the topography linework? cheers!
I had an old topography map that I traced in CAD. I then exported as a pdf to be dropped into Photoshop.
Hi alex,
Trying to follow your tutorial for my site rendering… really helpful.. Thanks!
Could you elaborate on the highlighting of trees after step '15' is done.
@Chetna,
Sorry, Im a little confused by your question. Steps 14 and 15 involve creating a new layer, and painting a simple color, in this case green, over the black and white site plan. Then the layer with green paint is set to "Overlay" which essentially blends the color into the back and white images. The idea is to add color, but not have it overpower the site plan.
tnx a lot…. this is really helpful.
Hi Alex,
Sorry about the delayed reply. I followed these steps and got an amazing site render… However, the Google Earth image of my site doesn't show trees as clear as in yours. So i'd a li'l trouble with it.
Eventually its come out relaly nice. thank you so much 🙂
hi ALEX it was really cool and thanks for sharing this
but there is a question for me how can i get the smooth contour lines as the same in the tutorial
i get my topographic lines in sketchup by the train and geo location :
http://www.youtube.com/watch?v=y4J9sWEZR6E
but those are not smooth curve
can you tell me what to do please?
thanks in advance
Hey Alex, was just admiring all the great work you have been doing in the past couple of tutorials and i wanted to ask you what program/website would you recommend for getting clean aerial shots of different sites. Google maps seems to only have the crowded view with the text that cant seemed to be turned off. Thank you.
Interesting. In the UK we would not call these site plans. Site Plans to us are more this this http://www.buyaplan.co.uk/site_plans
Alex,
I was wondering what your approach would be if a project is in an urban setting. I just wondering how you would color it in terms of the satellite imagery.
Very impressive post
Hi Alex, absolutely love the tutorials! really informative and I have to say have put me at ease before returning to uni haha. I was just wondering with the contours- There seems to be many of them very close together, when I do my plans and use contours the only ones I can get are very widely spaced apart. Your contours really lift the site plan and I was really just wondering how to go about getting such informative contours?
Thanks, look forward to more posts
Fraser:)
Hi Alex, Really like this view where do you get your satellite imagery from? Struggling to get high enough quality/zoom anywhere. thanks!
Merci bcp:) good job
I regret didn't find out this tutorial in my university years…..you are very awesome!!!!
Thanks a lot for teaching me
BEST TUTORIAL EVER! looks awesome and so quick!
Thank you so much for the tutorials! You're the best.
Thank you alex 😉
Thanks! This is awesome. I used your tutorial for my homework at design class.
Do you have any good resources for aerial maps without any road labels or other writing?
Thanks
Great renders as usual.
Just one question, Alex, where did you get these high res. aerial images? The google earth aerial images are not so good as yours.
Quite good.
please can someone tell me where can i find the videos of the tutorials? thank you very much
Alex, how can I export the google maps with scale?
Alex, is the aerial image a google map?
Hola Alex!!!! Thank you so much for your teaching , u are really my inspiration! Love u!! 😉
i like the tutorial, its easily understad, thx Alex.
#AlexHogrefe For president !
love you, thanks for the tutorial.
Fantastic tutorial. This is very much helpful.Thanks for this
This is a very nice article. I have read your full article, and I have got a lot of very important tips. That was known urgent to me. Thanks for sharing your nice article with us. You know what in this dynamic world, We are the best photo editing service provider company around the world. We provide high-quality all kinds of photo editing services at a competitive price from Clipping Expert Asia that ensures to make the product images appealing and eye-catching. It’s only for the convenience of our global customers. If you want to get a high-quality photo editing service, then as soon as possible you communicate with us. We have ready any time to take the order from you.