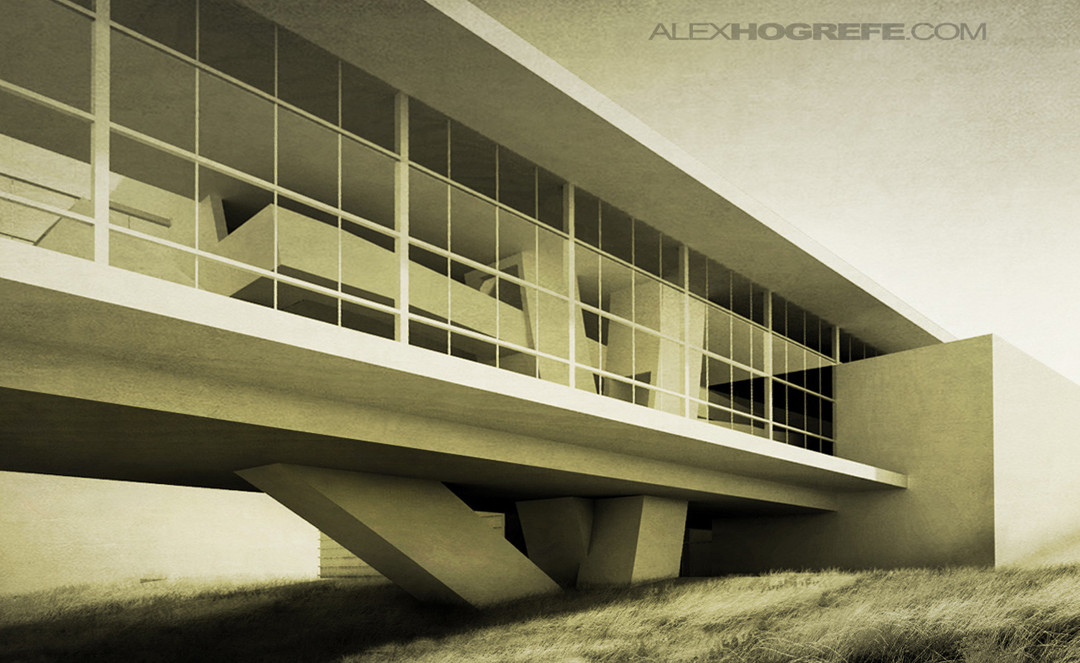
As I get more into photography, I find more and more things that overlap into architecture illustrations. One thing that I never thought about in school when creating illustrations was the idea of avoiding converging vertical lines. Obviously, this isn’t the case for all views and illustrations, but there are times when making this adjustment can add a bit of realism and clarity to the composition. It’s a common tweak used in architectural photography and I find myself applying it to my illustrations more often.
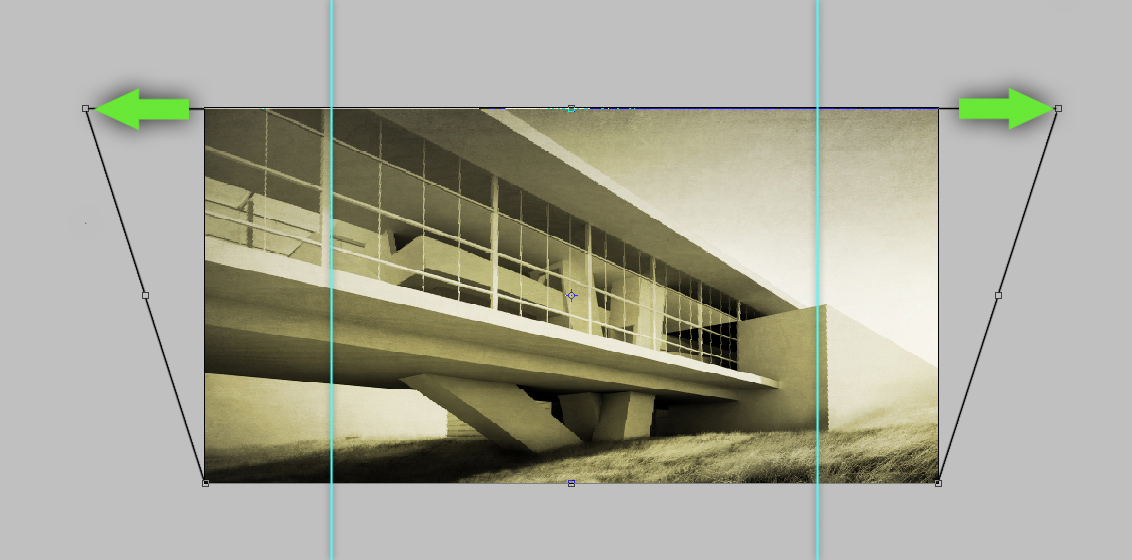
Below, I have shown the original illustration with guides showing how the vertical lines angle inward and would eventually converge if they were to be extended.

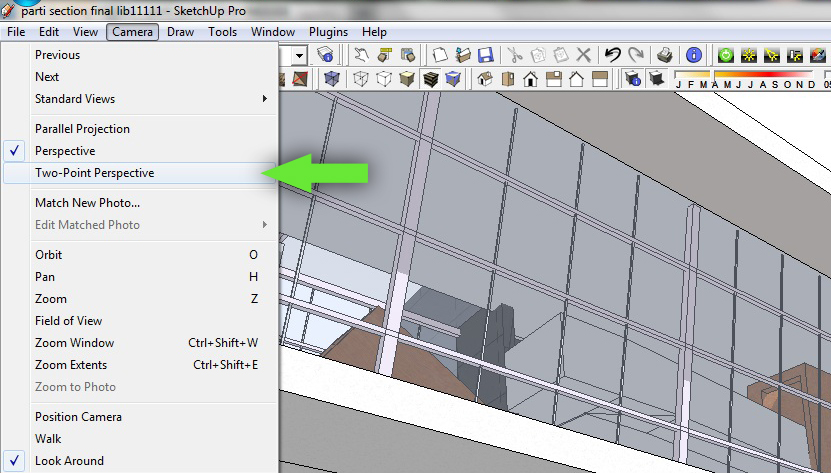
If your using Sketchup, there is a setting that can be change to get the vertical elements straight up and down. Just choose “Camera” at the top of the UI and select “two-point perspective”.
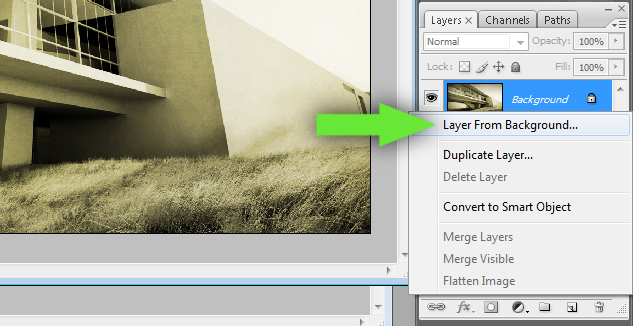
Sometimes, the adjustment needs to be made after things have been rendered and post processed. The easiest way I have found to do this in Photoshop is as follows:
1. To unlock the background layer, right click on the layer and choose “Layer from Background”. You could also duplicate the layer that way you keep the original.
2. If your rulers are not turned on, go to “view” and select “Rulers”. Click on the rulers with the move tool and Drag to the right to create guides. These will act as a reference to align the image verticals to.
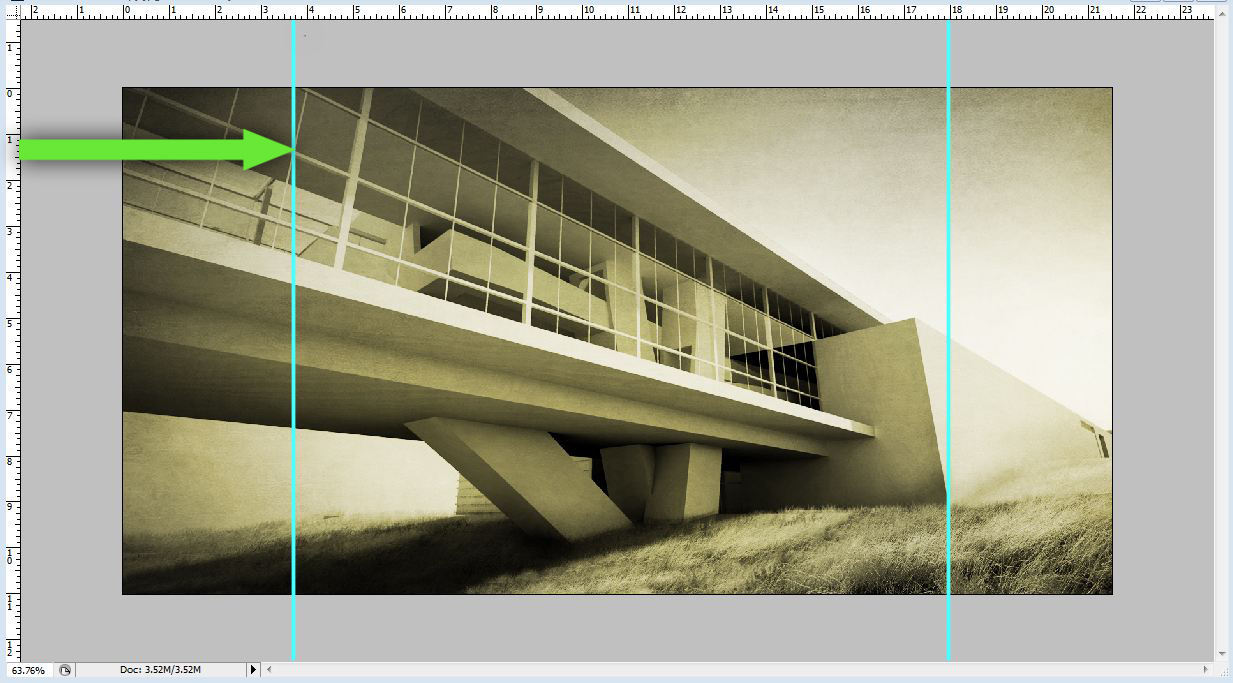
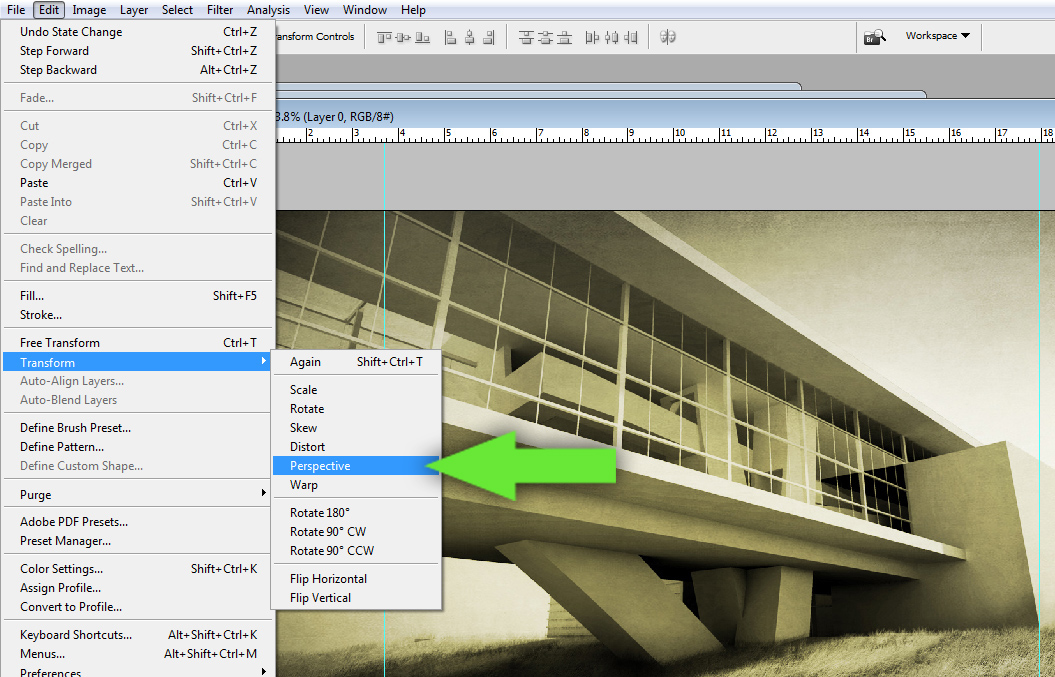
3. Choose “Edit” at the top and select “Transform> Perspective”.
4. Click the grips in the corners and drag until the vertical elements in the image are parallel with the guides.
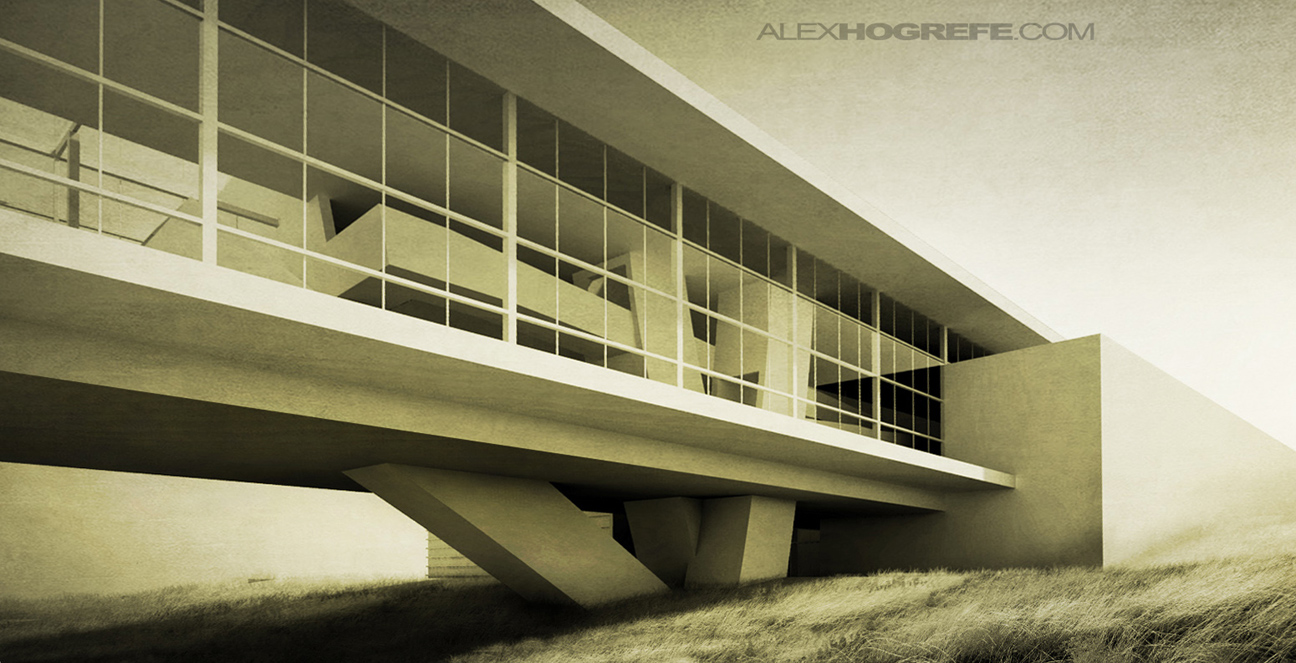
Pretty simple. Now the image is less distorted and probably more accurate to what it would look like if you where looking at the real thing.
If your wondering how this illustration was constructed,
The “CLAY MODEL TUTORIAL” was used for the base image
The “PHOTOSHOP GRASS TUTORIAL” was used for the grass
I also used the “GRUNGE TUTORIAL” and the ” COLOR OVERLAY TUTORIAL”.


Great tutorial! Another tool in Photoshop to do this edit with more precision is Lens Correction. (Filter>Distort>Lens Correction). The tool gives you precise correction, plus separated horizontal and vertical edits with guidelines (among many other tweaks).
@Chelsea,
Wow, did not know that. Thanks for the comment. I will check that out
Great tip as always!, thanks for sharing.
Also consider that this convergence can make a building appear more “squat” than it actually is so once you have corrected your verticals in photoshop it also can help to adjust image height to around 110%.
I find that just pulling the sides makes the image too wide. After I perspective or skew (or warp sometimes with wide angle photos), i have to scale horizontally.
But really great blog! I just stumbled into it by googling “photoshop architectural rendering.”
Good article, but it would be better if in future you can share more about this subject. Keep posting.
Although you are the best in explaining
you done a great work. i am your fan.