I have had a ton of people asking me to create a more thorough breakdown of one of my images and it seems the desert house dusk shot would be a good candidate. I like this image because not a ton of Photoshop is needed for the illustration, but the little Photoshop that was needed had to be spot on. The process for this illustration is not complicated and I am going to try to break this image down into the most simplified way I can.
Some quick notes: I am using a slightly older version of Sketchup (2015) and V-Ray 2 for this tutorial. The settings I am describing are somewhat universal and translate similarly in newer and older versions of both Sketchup and V-Ray. For example, we are using the latest versions of both Sketchup and V-Ray (3) in our office at Design Distill and these settings remain largely the same though the interface is different. The important thing to take away from this tutorial is not the specific settings but the larger ideas of workflow and where to spend and not spend your time. Like I said, I am providing what I think are the most critical ideas that led to the creation of the this image and am not trying to get lost in the weeds of render settings.
1. Sketchup Grouping

Since this project scale is small, the way that I organized the 3D Sketchup model is a little different than some of my other models. I grouped it by system so that the ground and terracing was one group, the glass and interior walls was another, then the wood screen, the steel structure, and finally the roof system. Within these groups are another several levels of groups and components. However, the five main groups allow me to get to each system quickly and really helps me to keep everything neat and clean and also very editable. I created a time lapse a while ago showing me constructing one of my models here.
2. Textures
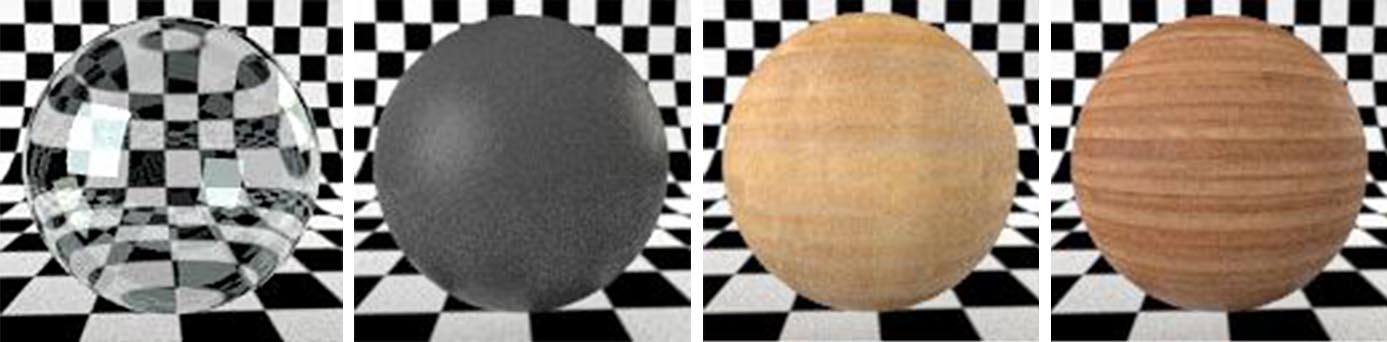
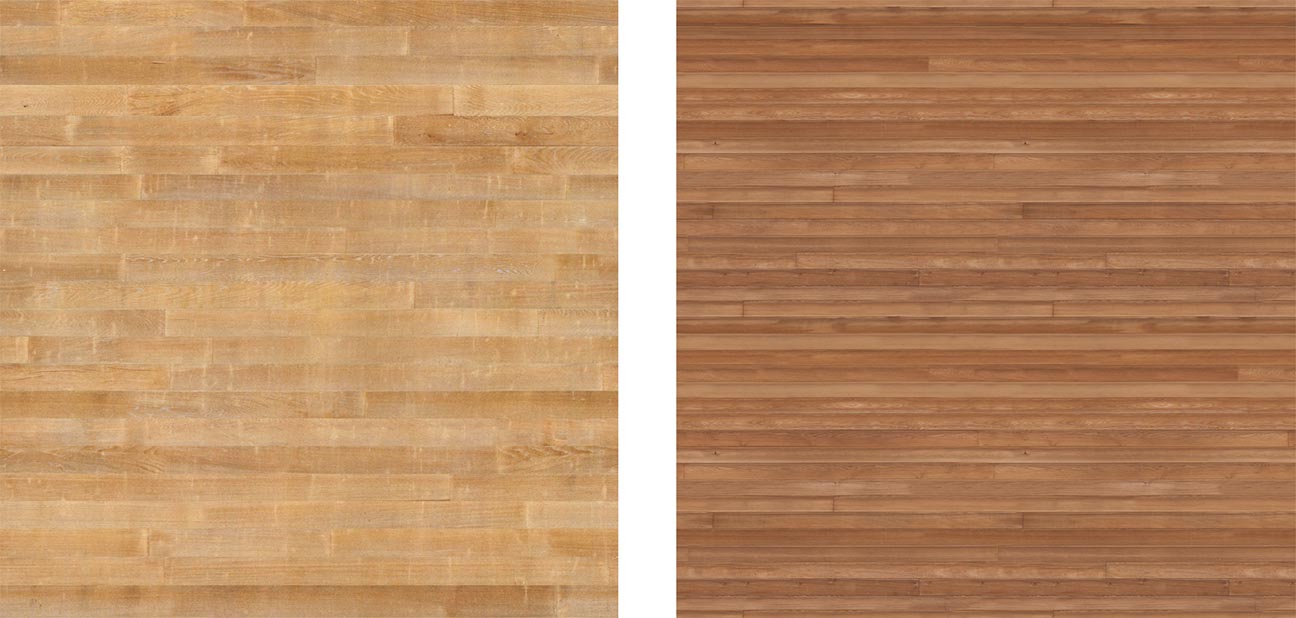
Since the view is so far out, the textures are not as important as say a view from inside or really close up. I really only have about four textures that I am using; two woods, a metal, and a glass. I built the wood textures by editing some textures that I found on textures.com. I don’t like textures that show tiling, so I tend to build larger textures from smaller ones that don’t repeat as often. I also toned them and removed the harsh dark joints. The wood tones were important because these would read from far away and would significantly affect the “warmth” of the image as I drop in lights.
3. Night Settings
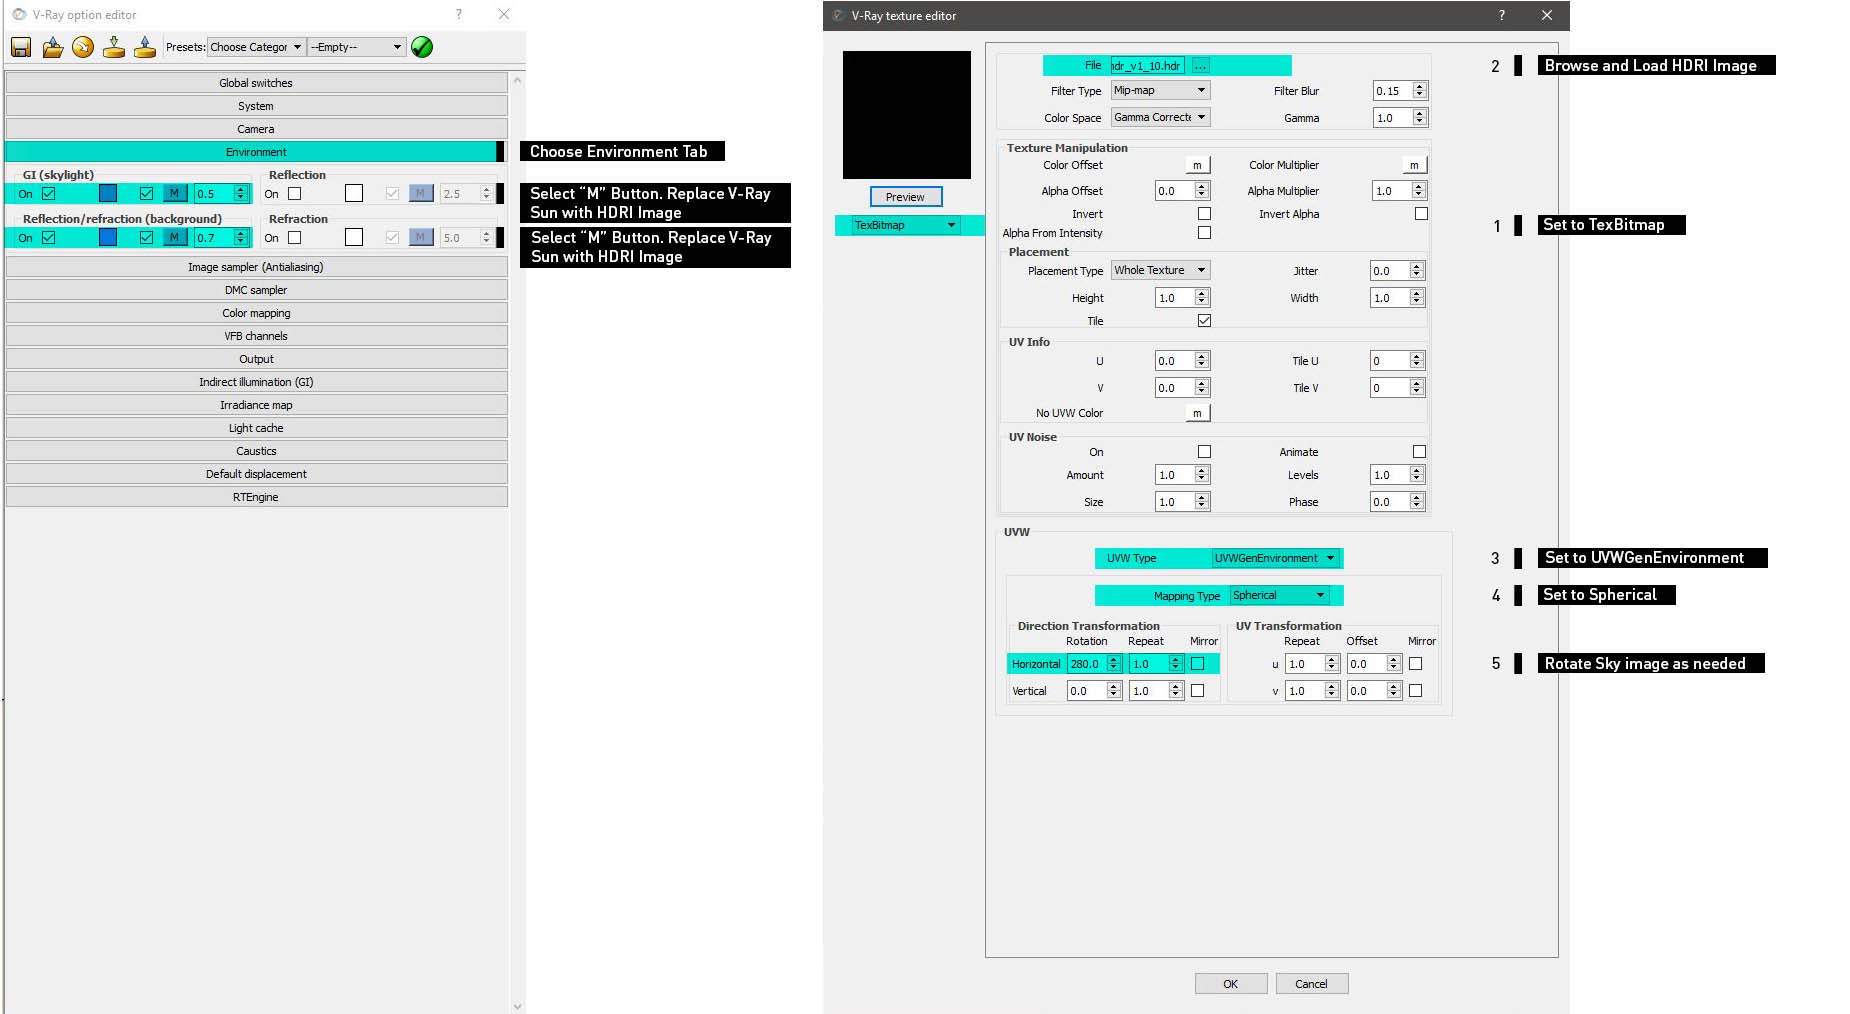

Now that the modeling and texturing is complete, I need to start setting up the lighting of the scene. Typically, I really push the coloring and lighting of the illustration in Photoshop, therefore, I am just trying to get something close in 3D without spending too much time. I am more focused on setting up things that are difficult to adjust in Photoshop such as shadow direction and softness as well as artificial lighting. This scene is lit by an HDRI sky which means I use the image to generate the light instead of using the V-Ray sun and sky. This can give the scene softer shadows and provide more control over specific lighting scenarios. In this case, the scene is close to night with the sun below the horizon and lots of blues throughout. To do this, I turned off V-Ray sun and instead uploaded the HDRI image. The sky was downloaded from Vizpeople and is at a high resolution.
To set all of this up, I opened my V-Ray option editor and expanded the “Environment” tab. Under GI (Skylight), I chose the icon with the letter “M” on it. In the V-Ray Texture Editor dialogue box, I set the left dropdown to “TexBitmap” and then uploaded the HDRI sky next to “File”. Finally, I set the UVW Type to “UVWGenEnvironment”, and set the Mapping Type to “Spherical”. To rotate the sky thus rotating the direction of the light, I edited the Horizontal rotation to “280”. Repeat this for the letter “M” next to Reflection/refraction (background) in the “Environment” tab.
4. Lights

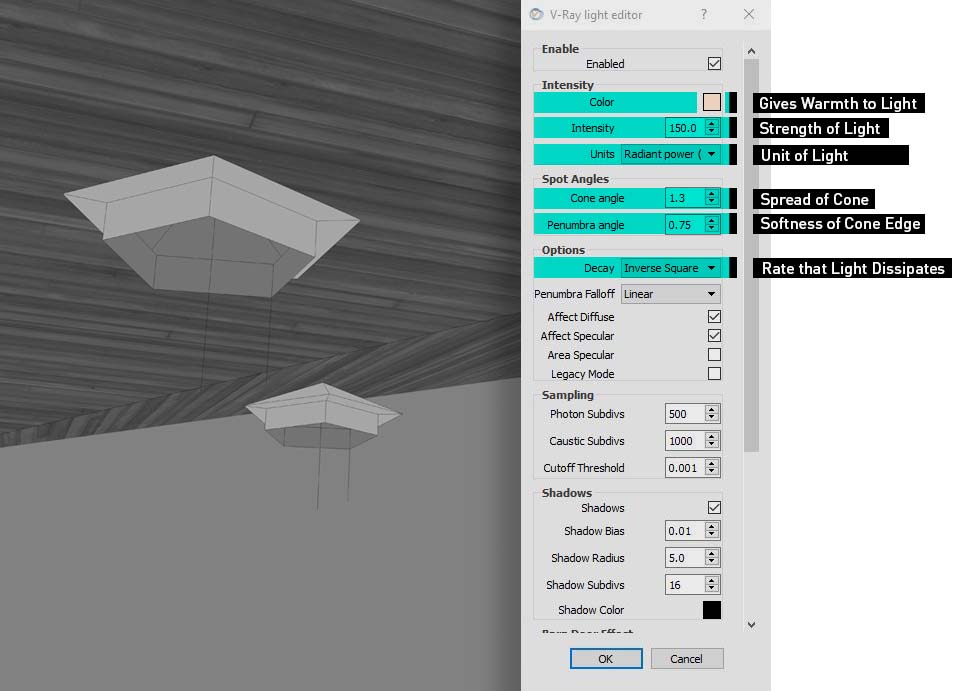
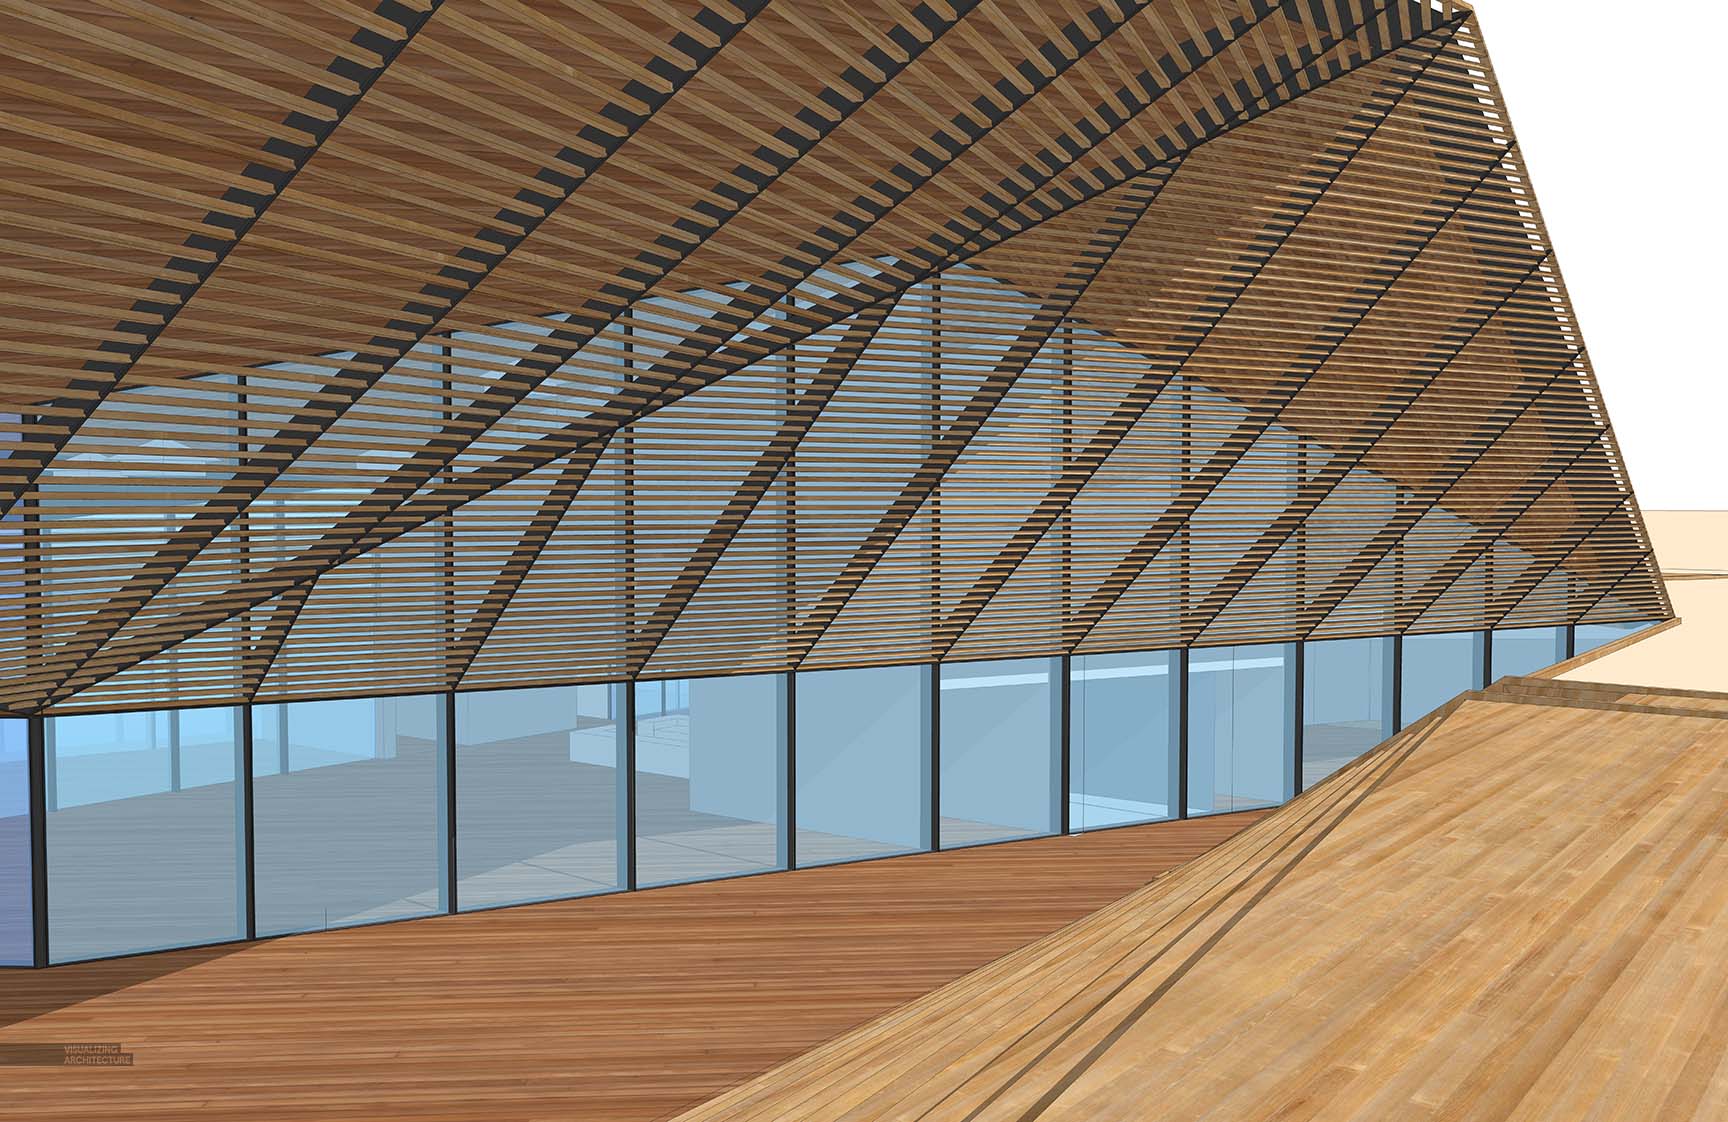
The wood louvers on the exterior facade are an important part of the design concept. I wanted a lot of light inside bouncing around to play up the screen effect, therefore, I dropped in a bunch of V-Ray spot lights. Since the view is far away from the building, the lights were dropped in a little more casually and were placed based on the view angle.
When you drop in a spotlight, you can then right click on it and choose “V-Ray for Sketchup>Edit Light”. This brings up the V-Ray Light Editor where you can adjust some of the settings. I usually set the color to something warm such as light orange. The intensity number is really based on the camera exposure settings as well as the environmental lighting. However, in this case, I set the Intensity to “150” and set the Units to “Radiant Power (W)”. For the Cone Angle, I set it to “1.3” which will widen it slightly and then set the Penumbra Angle to “0.75” which will soften the edge a bit. Finally, I set the Decay to “Inverse Square” which will cause the light to fade much quicker as it moves further from the light source.
5. Other Option Editor Settings
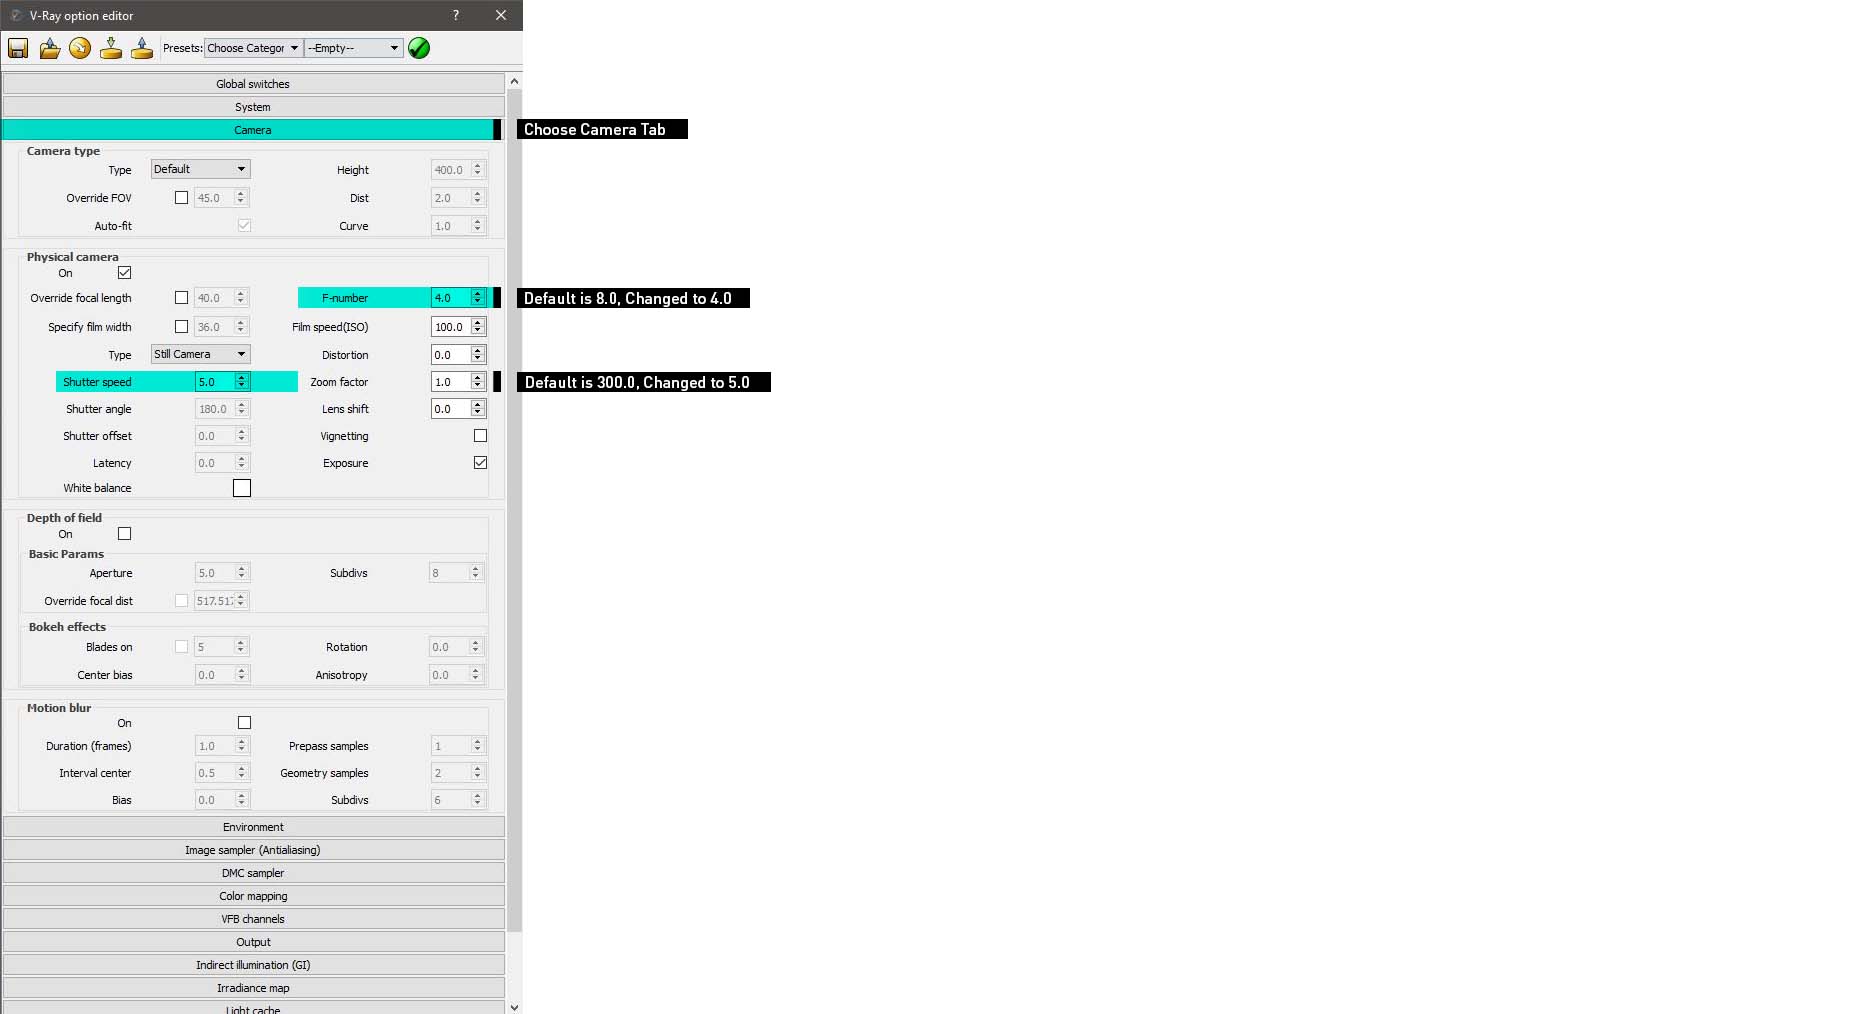
Under the “Camera” tab of the V-Ray option editor, two settings were adjusted. For daytime shots, I don’t adjust much with the camera and leave most of the defaults. However, for night shots, it’s good to lower the shutter speed and f-number. This is helpful so that when you are dropping in V-Ray lights, you don’t have to substantially increase their strength.
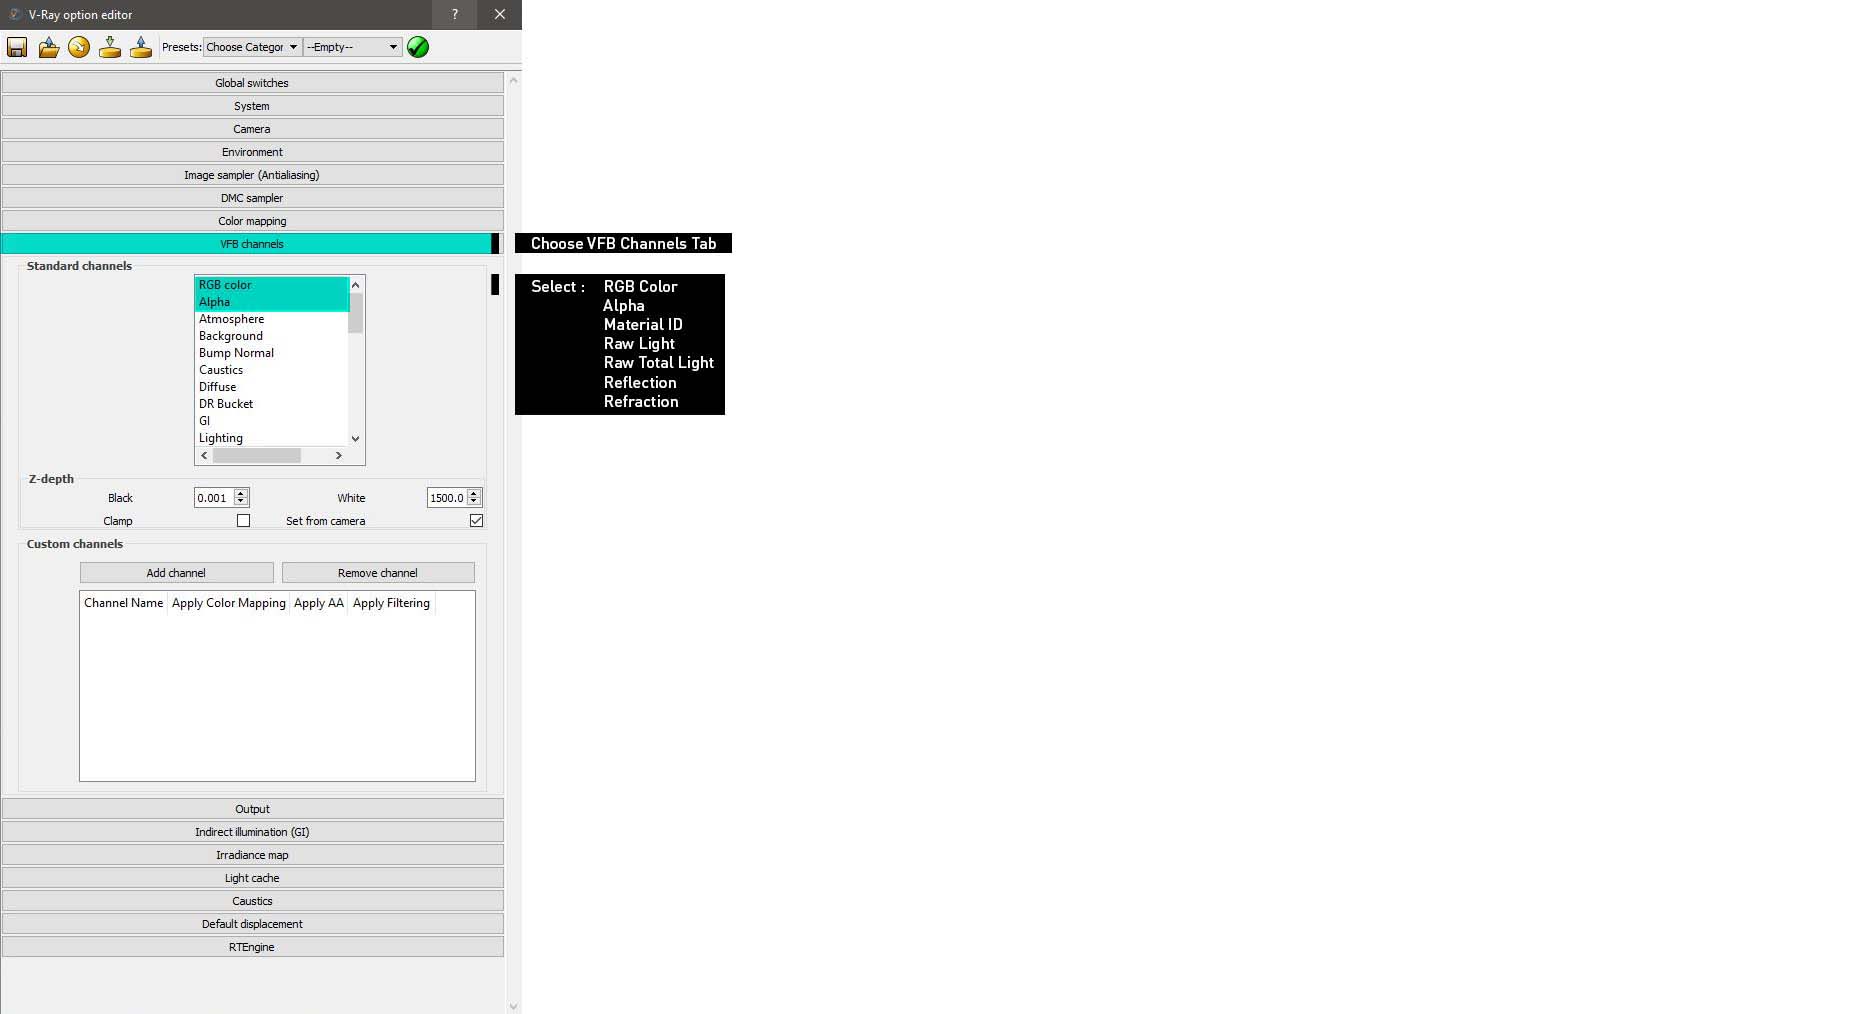

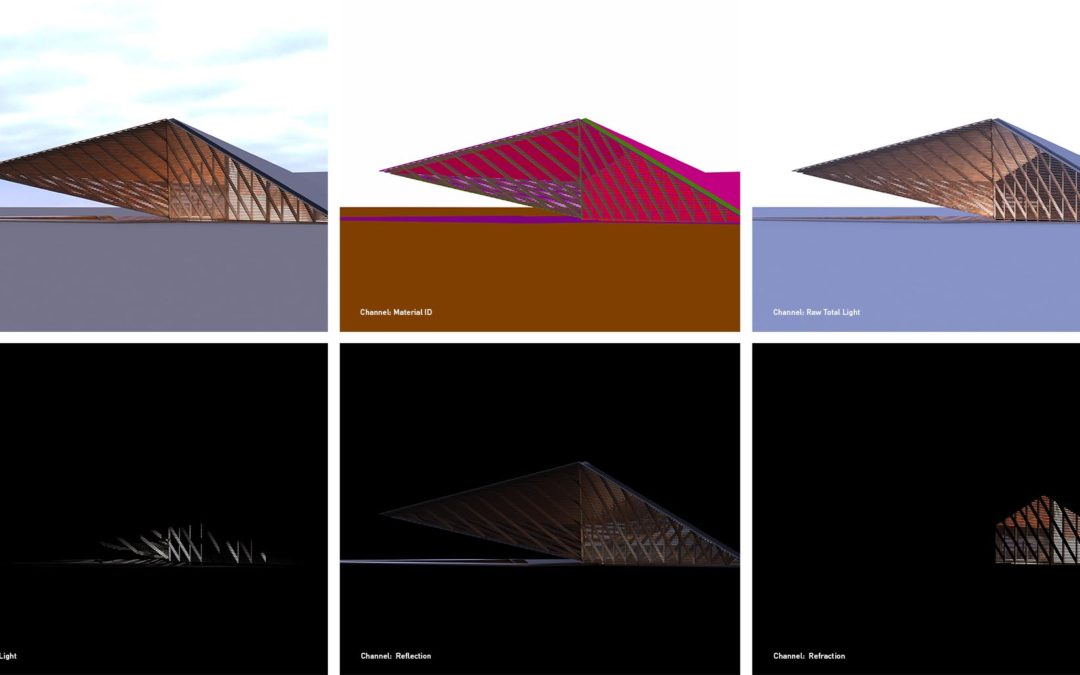
Under the “VFB Channels” tab in the “V-Ray Options Editor” I turned on a few more channels. For this illustration, I highlighted RGB Color, Alpha, Material ID, Raw Light, Raw Total Light, Reflection, and Refraction.
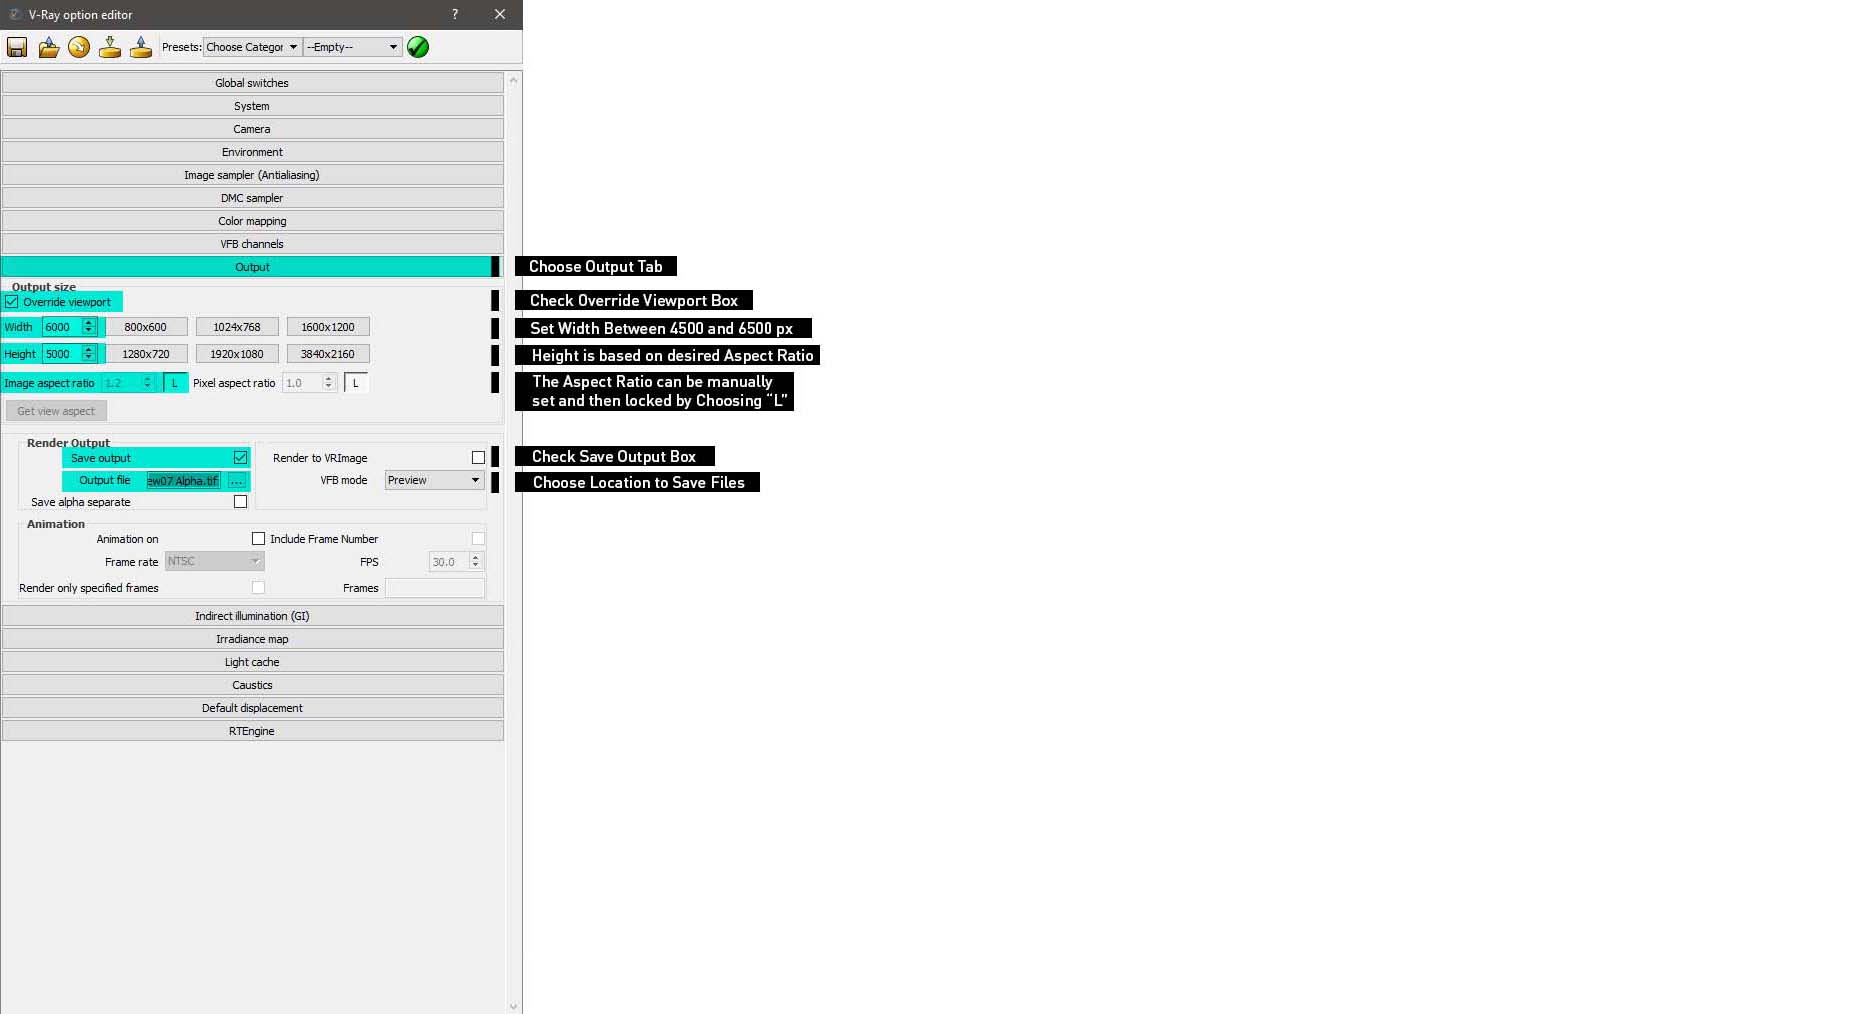
Finally, under the “Output” tab, I setup the resolution and ratio of the image. I checked the “Override Viewport” box, then set the Width to “6000” px and set the Height to “5000” px. This gave a ratio of 1.2 which is the ratio that I wanted, so I chose the “L” button to lock it. I am going with a 1.2 ratio because it matches the ratio of my next portfolio I am producing. Otherwise, I typically use 1.77 which is the more common 16:9 aspect ratio.
Under Render Output, I checked the “Save Output” box and browsed to a location to save the files when they are finished rendering. This is also where I setup the file type to be saved which I set to .tif.
6. Setting Up the View in Sketchup

Finally, there are a few things that need to happen in Sketchup before hitting render. I need to setup the camera at eye height which I use the “Position Camera”. When selected, I can click anywhere on the ground in the model and Sketchup will place the camera at that point at eye height. This ensures that I am not accidentally setting the camera at an awkward height of 3ft or 10ft.
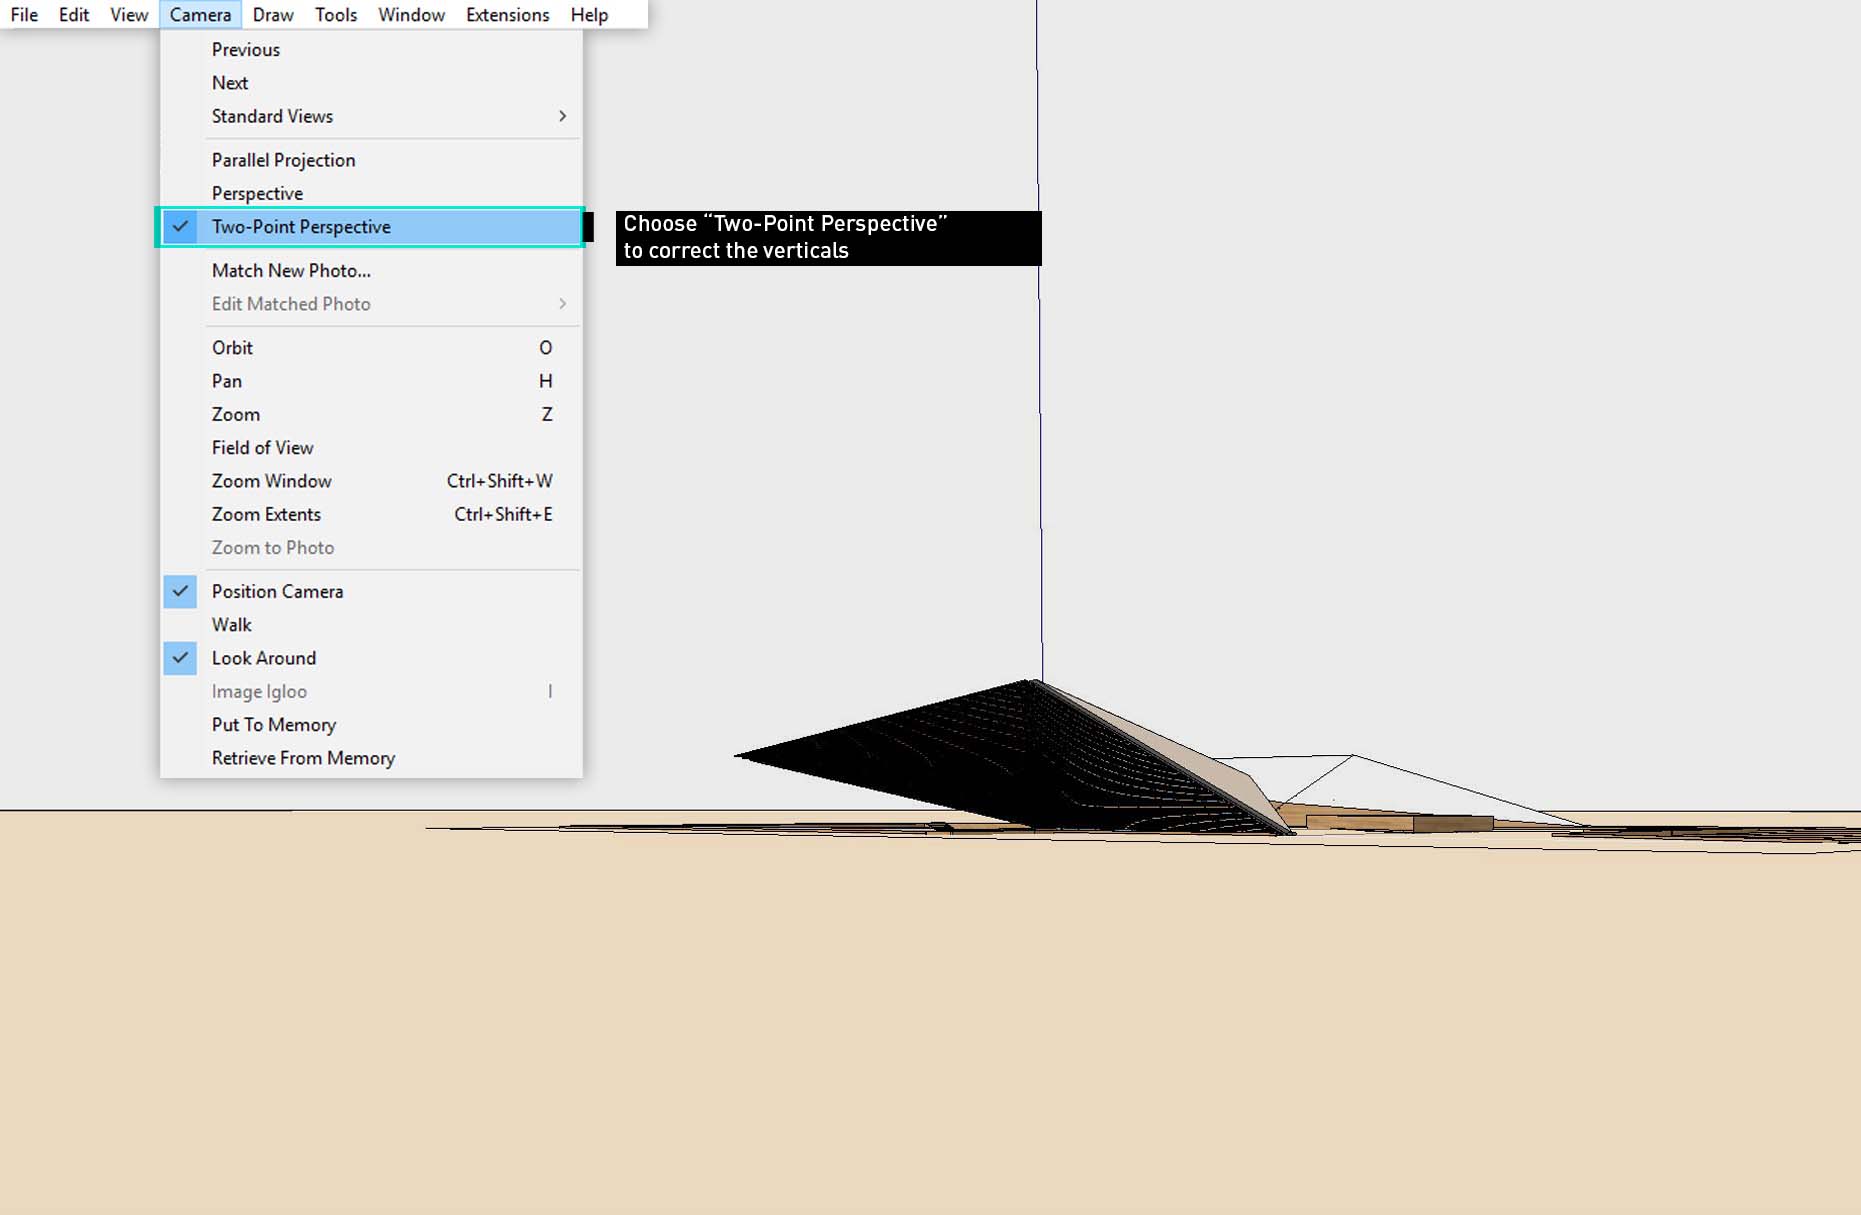
Next, I set the view to Two-Point Perspective by going to “Camera>Two-Point Perspective”. This ensures that all of my verticals are corrected.
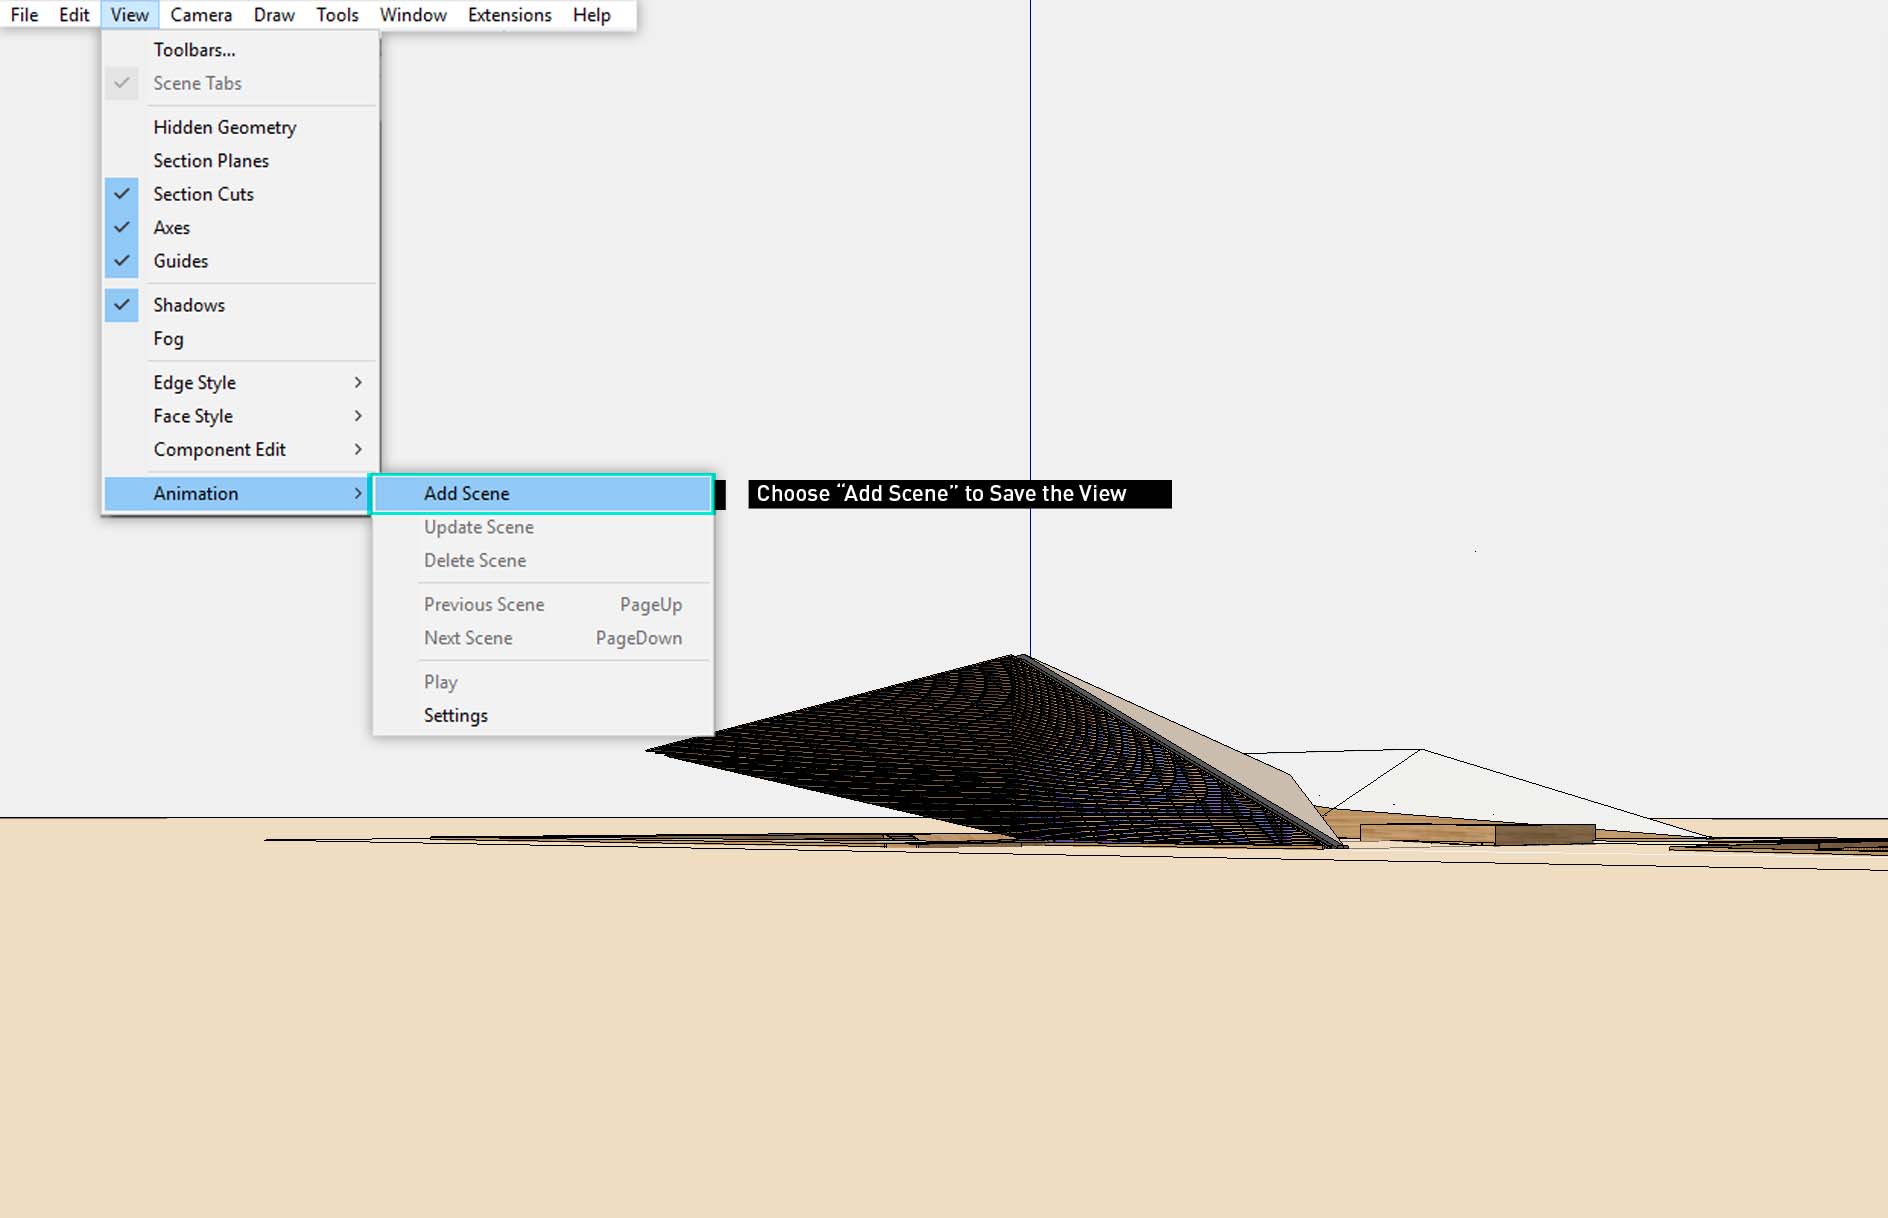
Finally, I chose “View>Animation>Add Scene” to save the view in Sketchup.
7. Render

Finally, I can hit “Render” and let V-Ray generate the high-res image along with the extra channels. It took V-Ray less than an hour to complete the job on my desktop. The final output gives me a solid base to work from in Photoshop and gives me everything I need to make proper selections, add textures, and tone the image.
I will spend part 2 of this tutorial in Photoshop bringing the rendering to life by breaking down each step and describing how I added the sky, ground textures, color, atmosphere, and entourage. Stay tuned.


where can i download this model?
wow! Thank this meaningful and helpful post
I really like that, would love to do something like that!
Very nicely explained. Thank you for the great article
Great read. Thank you for sharing your experience. When will you release the part 2? Can’t wait.
I enjoyed over read your blog post. This was actually what i was looking for and i am glad to came here!